
Mobile apps are making our world increasingly connected. Think about how many times in a day you use an app to communicate with family and friends. A handful of times? A dozen times? Do you ever really close those apps out? Facebook, Instagram, Snapchat, TikTok, and countless other apps forge invisible bonds across the globe, so it’s no wonder that many developers are constantly at work trying to build a better chat app.
With 5G networks coming closer and closer to daily usage for the general public, more people are increasingly willing to communicate with their friends through social media applications. Even the smallest app platforms often have basic chat functions attached to them, letting users communicate directly with one another.
Have you ever considered creating a real-time communications application similar to WhatsApp?
There’s usually a steep learning curve in implementing real-time video communication, which can discourage many developers. Thankfully, the Agora SDK is a great and easy solution for this!
In this guide, we’ll walk through all the steps you need to build a social media application on Android that supports video and messaging communication from scratch.
Prerequisites
- A basic understanding of Java and android SDK
- Agora Developer Account
- Android Studio and 2 android devices
Please Note: While no Android knowledge is needed to follow along, certain basic concepts won’t be explained along the way.
*You can find my demo app as a reference for this article. Also, you can find Agora Video SDK API documents here and Agora Message SDK API here.
Overview
- Set Up New Project
- Set Up Google Sign-in
- Implement Chatting Functionality
- Implement Video Call Functionality
Set Up New Project
To start, let’s open Android studio and create a new blank new project.
- Open Android Studio and click Start a new Android Studio project.
- On the Choose your project panel, choose Phone and Tablet > Empty Activity, and click Next.
- Click Finish. Follow the on-screen instructions, if any, to install the plug-ins.
Integrate the SDK
Add the following line in the /app/build.gradle file of your project.
...
dependencies {
    ...
    // 2.9.2 is the latest version of the Agora SDK. You can set it to other versions.
implementation 'io.agora.rtc:full-sdk:2.9.2'
implementation 'io.agora.rtm:rtm-sdk:1.1.0'
implementation 'com.google.firebase:firebase-analytics:17.2.0'
implementation 'com.google.firebase:firebase-auth:19.1.0'
implementation 'com.google.android.gms:play-services-auth:17.0.0'
...
}
apply plugin: 'com.google.gms.google-services'
Add project permissions in the /app/src/main/AndroidManifest.xml file for device access according to your needs:
<manifest xmlns:android="http://schemas.android.com/apk/res/android"
    package="com.example.whatsappagora">    <uses-permission android:name="android.permission.READ_PHONE_STATE" />
    <uses-permission android:name="android.permission.INTERNET" />
    <uses-permission android:name="android.permission.RECORD_AUDIO" />
    <uses-permission android:name="android.permission.CAMERA" />
    <uses-permission android:name="android.permission.MODIFY_AUDIO_SETTINGS" />
    <uses-permission android:name="android.permission.ACCESS_NETWORK_STATE" />
    <uses-permission android:name="android.permission.BLUETOOTH" />
    <uses-permission android:name="android.permission.ACCESS_WIFI_STATE" />
    <uses-permission android:name="android.permission.WRITE_EXTERNAL_STORAGE" />
...
</manifest>
Prevent code obfuscation
Add the following line in the app/proguard-rules.pro file to prevent code obfuscation:
-keep class io.agora.**{*;}Set Up Google Sign-in
Similar to most social media applications, we also want to allow user to log in into our app using their Google account. Follow this video to implement Google authentication. We can call
Intent sianInIntent = Auth.GoogleSignInApi.getSignInIntent(mGoogleApiClient);
startActivityForResult(sianInIntent, RC_SIGN_IN);
to start Google authentication process.
Please Note: There are many other ways to authenticate a user. You can follow this for more options.
Implement Chatting Functionality
Start RtmClient
In order to enable the chatting function in our application, we need to create RtmClient in Agora Rtm SDK.
Rtmclient = RtmClient.createInstance(mContext, appID, new RtmClientListener() {
        @Override
        public void onConnectionStateChanged(int state, int reason){
for (RtmClientListener listener : mListenerList) {
                listener.onConnectionStateChanged(state, reason);
            }
        }@Override
        public void onMessageReceived(RtmMessage rtmMessage, String peerId) { ... }
});
In order to get the App ID in the parameter, follow these steps:
- Create an Agora project in Console.
- Go to Console and click the Project Management on the left navigation panel.
- Click Create and follow the on-screen instructions to set the project name, choose an authentication mechanism, and Click Submit.
- On the Project Management page, find the App ID of your project.
Here, onConnectionStateChanged() callback, we are calling RtmClientListener. We will implement this later in the Message activity.
When successfully signed in through Google, store the Google display names for future connection with Agora userID. Then login RtmClient using Google display name.
GoogleSignInApi.getSignInResultFromIntent(data);
if (result.isSuccess()) {
    final User user = new User(result.getSignInAccount().getId());
    user.setFireDisplayName(result.getSignInAccount()
.getDisplayName());
    mRtmClient.login(null, user.getFireDisplayName(), new io.agora.rtm.ResultCallback() {
        @Override
        public void onSuccess(Void aVoid) { ... }        @Override
        public void onFailure(final ErrorInfo errorInfo) { ... }
    });
}else {
    ...
}
In the onSuccess() callback, we can pass the user information and jump to the Channel Selection activity.
Channel Selection
Create a UI for Channel Selection with a radio group for users to choose chat in peer-to-peer mode or group mode, a chat button and an EditText view in order for users to input the channel name. Also, create a button to start a video call here. We will cover the video call button onClick logic later.
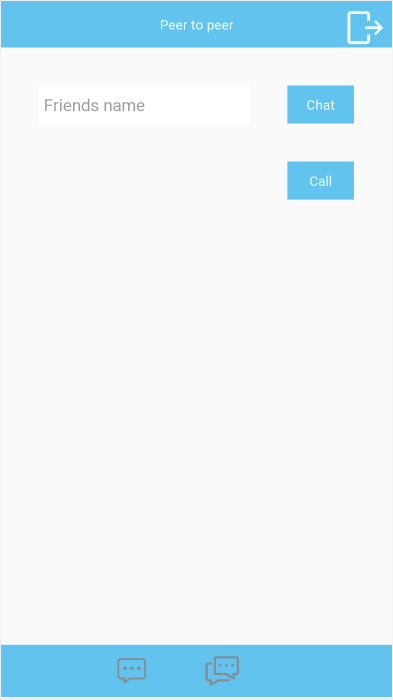
Please Note: You can find the .xml file here.
When the chat button is clicked, we need to pass on the channel name that the user entered, the user’s selected chat mode, and the user information, all to the Message activity.
Message Activity
In the Message Activity, let’s create a RecyclerView to show the chat history list, an EditText for user input chat message, a send message button, and a TextView to show the name of the chat room.
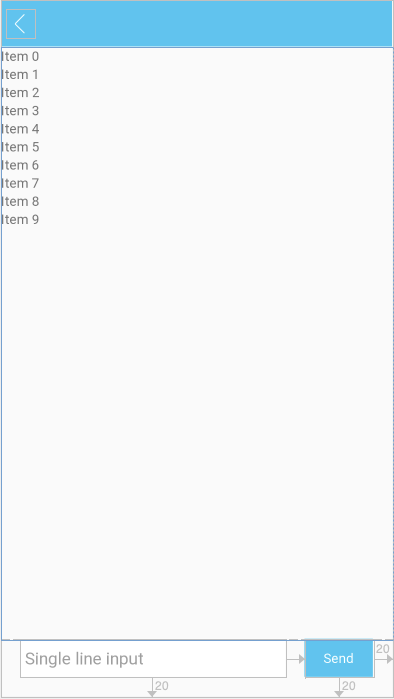
Please Note: You can find this .xml file here.
In the onCreate() method, we are going to set the adapter and layout manager for the RecyclerView. We also need to check if the chat mode we passed from the previous activity is group chat mode. If so, we need to manually join the chat channel.
Please Note: Only group chat needs to join a channel, peer-to-peer mode can directly send messages to peer.
Receive Group Chat Message
For group chat mode, in the activity onCreate() method, we are going to call createChannel() on the RtmClient we initialized earlier to create a RtmChannel instance.
mRtmChannel = mRtmClient.createChannel(mChannelName, new MyChannelListener());We need to define the MyChannelListener which implements RtmChannelListener with callback onMessageReceived() to handle the logic when we receive messages sent from any member in the chat room.
class MyChannelListener implements RtmChannelListener {
    @Override
    public void onMessageReceived(final RtmMessage message, final RtmChannelMember fromMember) {
        runOnUiThread(new Runnable() {
            @Override
            public void run() {
                String account = fromMember.getUserId();
                String msg = message.getText();
                MessageBean messageBean = new MessageBean(account, msg, false);
                messageBean.setBackground(getMessageColor(account));
                mMessageBeanList.add(messageBean);
                mMessageAdapter.notifyItemRangeChanged(mMessageBeanList.size(), 1);
                mRecyclerView.scrollToPosition(mMessageBeanList.size() - 1);
            }
        });
    }
    ...
}
Then join the channel by calling join() on the RtmChannel instance.
mRtmChannel.join(new ResultCallback() {
    @Override
    public void onSuccess(Void responseInfo) { ... }    @Override
    public void onFailure(ErrorInfo errorInfo) { ... }
});
In the onSuccess() callback, we can call getMembers() on the RtmChannel instance to get the number of members in the chat room.
Receive Private Chat Message
To receive private chat messages, on the other hand, we need to register RtmClientListener. Remember that when we created the RtmClient instance, we were calling RtmClientListener in the callbacks. Now, let’s implement this. In the callback onMessageReceived(), we put the logic to show the message on the RecyclerView.
class MyRtmClientListener implements RtmClientListener {@Override
    public void onConnectionStateChanged(final int state, int reason) { ... }@Override
    public void onMessageReceived(final RtmMessage message, final String peerId) {
        runOnUiThread(new Runnable() {
            @Override
            public void run() {
                String content = message.getText();
                if (peerId.equals(mPeerId)) {
                    MessageBean messageBean = new MessageBean(peerId, content,false);
                    messageBean.setBackground(getMessageColor(peerId));
                    mMessageBeanList.add(messageBean);
                    mMessageAdapter.notifyItemRangeChanged(mMessageBeanList.size(), 1);
                    mRecyclerView.scrollToPosition(mMessageBeanList.size() - 1);
                } else {
                    MessageUtil.addMessageBean(peerId, content);
                }
            }
        });
    }
}
Send Messages
So far, we are able to receive messages from a group chat or a private chat, but we also want to send messages to others. To do that, we first need to create a message instance by calling createMessage().setText() on the RtmClient instance in the send message button onClickListener() method.
RtmMessage message = mRtmClient.createMessage().setText(userInputText);Then we want to send this message out to the SDK. If we are in the group chat mode, we need to call sendMessage() on the RtmChannel instance.
mRtmChannel.sendMessage(message, new ResultCallback() {
    @Override
    public void onSuccess(Void aVoid) { ... }    @Override
    public void onFailure(ErrorInfo errorInfo) { ... }
});
If we are in peer-to-peer mode, we need to call sendMessageToPeer() instead.
mRtmClient.sendMessageToPeer(mPeerId, message, mChatManager.getSendMessageOptions(), new ResultCallback() {
    @Override
    public void onSuccess(Void aVoid) { ... }    @Override
    public void onFailure(ErrorInfo errorInfo) { ... }
});
Handle onDestroy()
It is always good practice to unregister unused listeners and leave the channel in onDestroy() method.
@Override
protected void onDestroy() {
    super.onDestroy();
    if (mIsPeerToPeerMode) { ... }
    else {
        leaveChannel();
    }
    mChatManager.unregisterListener(mClientListener);
}/**
 * API CALL: leave and release channel
 */
private void leaveChannel() {
    if (mRtmChannel != null) {
        mRtmChannel.leave(new ResultCallback() {
            @Override
            public void onSuccess(Void aVoid) { ... }            @Override
            public void onFailure(ErrorInfo errorInfo) { ... }
        });
        mRtmChannel = null;
    }
}
Now we are able to either chat with a friend by entering their Google display name or chat with friends in a chat room using a channel name.
Implement Video Call Functionality
In a social media application, we also want to let users make face-to-face video calls to each other. Agora Video SDK makes this step very simple. Let’s add video call logic in our application.
Channel Selection
Don’t forget that we have a call button in the Channel Selection activity that we haven’t used yet. Let’s implement its onClickListener. When the user clicks that button, we first want to see if the user is in peer-to-peer mode or group chat mode. If they’re in the group chat mode, the channel name we are going to use is the one user inputed in the EditText. If in peer-to-peer mode, however, the channel name is a sorted combination of user Google display name and user input channel name. This way, both caller and callee can join in the same channel.
After that, we pass user information, channel name, and call mode to Video Call activity.
public void onClickCall(View view) {
    String myName = user.getFireDisplayName();
    mTargetName = mNameEditText.getText().toString();
    ...
    String channelName = "";
    if (mIsPeerToPeerMode) {
        channelName = myName.compareTo(mTargetName) < 0 ? myName + mTargetName : mTargetName + myName;
    }else {
        channelName = mTargetName;
    }
    Intent intent = new Intent(this, VideoActivity.class);
    ...
    startActivity(intent);
    }
}
Video Call Activity
First, we need to create the UI components in this activity: a start_call/end_call button, a switch_camera button and an audio_mute/audio_unmute button.

Then, in the onCreate() method in the Video Call activity, let’s do following several things:
- Initialize Agora Rtc Engine
- Setup local video Canvas
- Join channel
1. Initialize Agora Rtc Engine
In order to initialize the agora video engine, just simply call RtcEngine.create(context, appid, RtcEventHandler) to create a RtcEngine instance. Here, we pass the same appID we used for creating RtmClient instance.
mRtcEngine = RtcEngine.create(getBaseContext(), appID, mRtcEventHandler);You might notice that we have an RtcEventHandler as a parameter. That’s the handler to manage different events on the RtcEngine. Let’s implement it with some basic event handlers needed for this application.
private final IRtcEngineEventHandler mRtcEventHandler = new IRtcEngineEventHandler() {
    @Override
    // Listen for the onJoinChannelSuccess callback.
    // This callback occurs when the local user successfully joins the channel.
    public void onJoinChannelSuccess(String channel, final int uid, int elapsed) {
        runOnUiThread(new Runnable() {
            @Override
            public void run() {
                user.setAgoraUid(uid);
                ...
            }
        });
    }    @Override
    // Listen for the onFirstRemoteVideoDecoded callback.
    // This callback occurs when the first video frame of a remote user is received and decoded after the remote user successfully joins the channel.
    // You can call the setupRemoteVideo method in this callback to set up the remote video view.
    public void onFirstRemoteVideoDecoded(final int uid, int width, int height, int elapsed) {
        runOnUiThread(new Runnable() {
            @Override
            public void run() {
                SurfaceView mRemoteView = RtcEngine.CreateRendererView(getApplicationContext());
                ...
                mRtcEngine.setupRemoteVideo(new VideoCanvas(mRemoteView, VideoCanvas.RENDER_MODE_HIDDEN, uid));
                ...
            }
        });
    }    @Override
    // Listen for the onUserOffline callback.
    // This callback occurs when the remote user leaves the channel or drops offline.
    public void onUserOffline(final int uid, int reason) { ... }
};
Check the comments on the top of each event handler methods to have a better understanding of them. For more RtcEngine event handlers that you can use, check the Agora Rtc API document.
Please Note: Some of the logic to show video views on the screen is hidden. You can check the github demo app for a better understanding of how to display and remove video views on the screen dynamically.
2. Setup Local Video Canvas
To start a local video (see yourself on the screen), you need to call two functions: enableVideo() and setupLocalVideo() on a RtcEngine instance. In function setupLocalVideo(), a surfaceView created by calling RtcEngine.CreateRenderView(context) is passed as a parameter.
mRtcEngine.enableVideo();
SurfaceView surfaceView = RtcEngine.CreateRendererView(getBaseContext());
mRtcEngine.setupLocalVideo(new VideoCanvas(surfaceView, VideoCanvas.RENDER_MODE_HIDDEN, 0));
3. Join channel
Now we are ready to join the channel by calling joinChannel() on the RtcEngine instance and pass the channelName we passed from the previous activity.
mRtcEngine.joinChannel(token, channelName, "Extra Optional Data", 0);Please Note: The token in the parameter can be set to null.
By calling this function and successfully joining the channel, the RtcEngineEventHandler will trigger the onJoinChannelSuccess() method that we implemented in the previous step. It will return a unique Agora video id, which we need to store in the user information so that we can connect it with the user Google display name we stored earlier.
Implement Buttons onClick
Now we are going to implement the logic for the three buttons we have in this activity.
1. Start/end a call
When the start/end call button is clicked, if we are in a call, we should finish the video call by calling leaveChannel() on the RtcEngine instance. Otherwise, we will start a call by setting up the local video and join the channel again, similar to what we did in the previous steps to start a call.
2. Switch camera
This button is to switch from using your mobile’s front camera to rear camera or vise versa. To do that, simply call switchCamera() on the RtcEngine instance.
mRtcEngine.switchCamera();3. Audio mute/unmute
Sometimes, users want to mute their input voice during a video call. That’s also easy to implement by just calling muteLocalAudioStream() on the RtcEngine instance and passing whether the user is already muted in the parameter.
mRtcEngine.muteLocalAudioStream(isMuted);Build and Test on Device
Now, Let’s run our application!
Go to Android Studio, make sure your android device is plugged in and click Run.
Done!
All Done!
Congratulation! You just built yourself a social media application that can make video calls and chat with friends.
Thank you for following along!


