
In this chat SDK Android tutorial, we’ll build a basic 1-to-1 video chat app for a virtual meet-up in 10 easy steps, using the Agora Video SDK for Android.
Updated: May 24, 2020
This 1-on-1 video chat app tutorial and project have been updated to use v3.4.1 of the Agora Video for Android SDK.
Chat App Tutorial – Android Prerequisites
- Android Studio
(https://developer.android.com/studio) - Basic knowledge of Java and the Android SDK
(https://developer.android.com/training/basics/firstapp) - Agora Developer Account
(see: How to Get Started with Agora)
Step 1: Getting Your App ID
Once you finish the sign-up process, you are redirected to the Agora Console. Open the Projects tab on the left-hand nav to see your default project’s App ID.d
JCenter Integration
Add the following line in your project level /app/build.gradle:
allprojects {
    repositories {    ...// Jit pack
        maven { url ‘https://www.jitpack.io' }
    }
}
Add the following line in the /app/build.gradle file of your project:
dependencies {
    ...//Agora RTC SDK for video call
    implementation 'com.github.agorabuilder:native-full-sdk:3.4.1'
}
Manual Integration
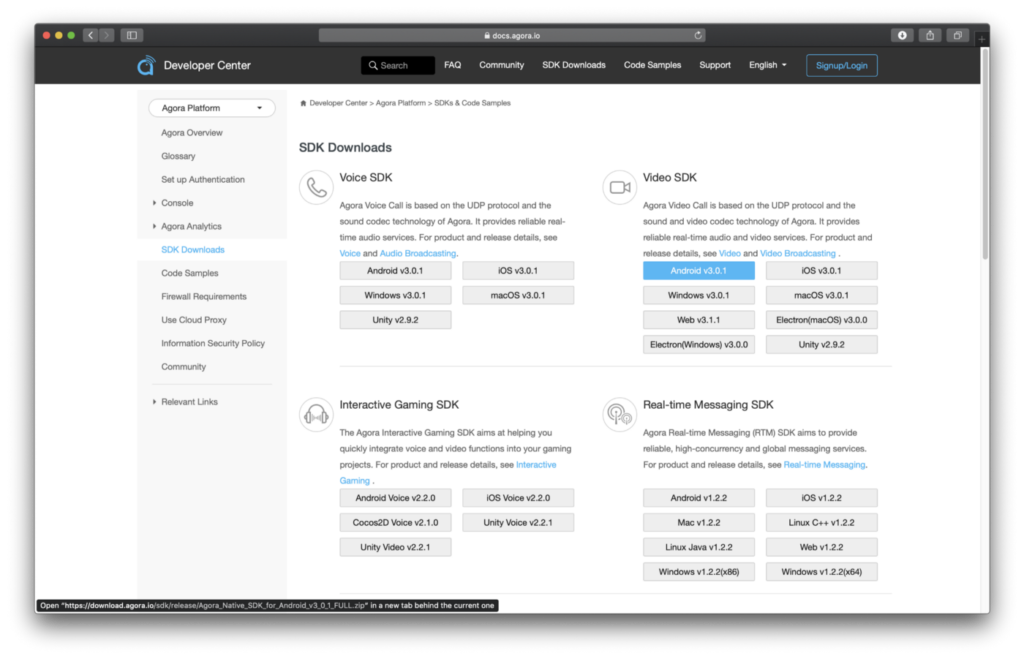
In the final project I use JCenter to make updating easier, but it’s always nice to demonstrate how to add the SDK manually. First, download the Agora Video SDK for Android from the online Agora Developer Center.
In your empty Android project, add the SDK libs folder into your Android project’s libs folder (from your file explorer):
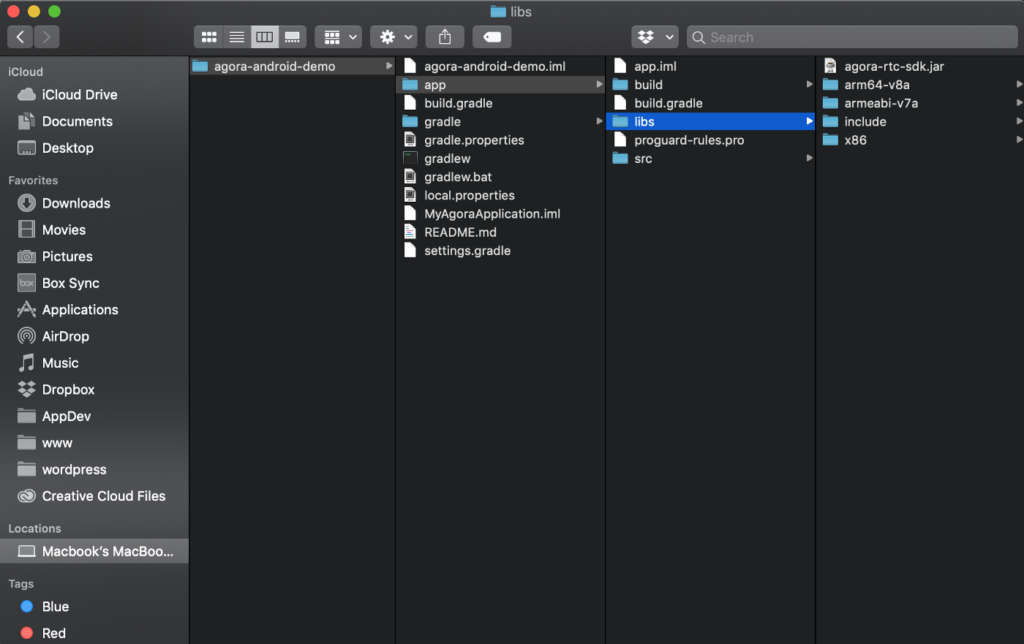
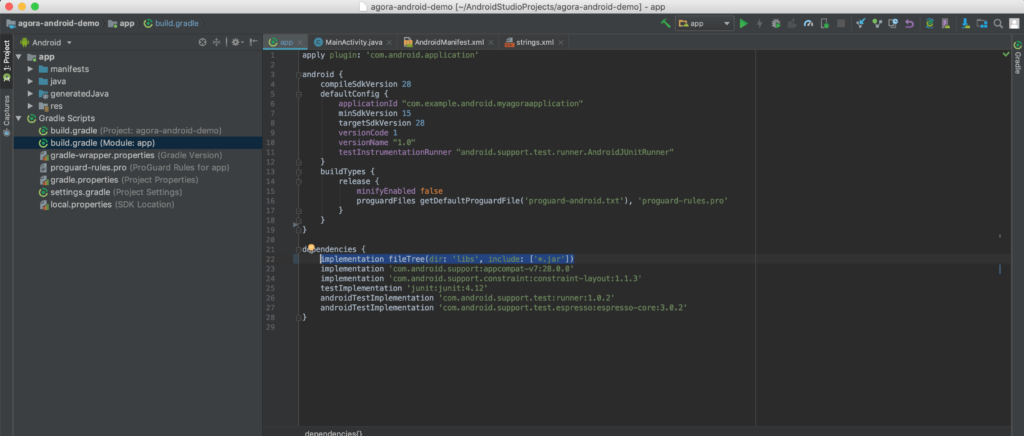
Make sure to note the location of the libs folder in relation to the build.gradle. Next, it’s time to set the storage directory of the libs folder in the app/src/main/build.gradle dependencies list. Since Gradle reads paths relative to the build.gradle file we can add this fileTree declaration to let Gradle know to include the libs folder.
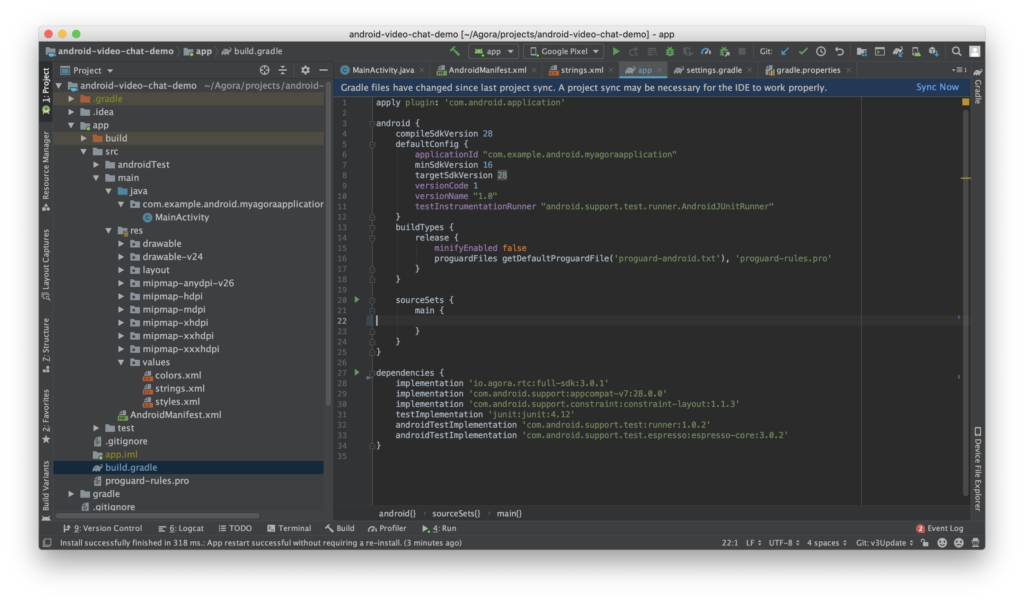
Next, make sure to add the sourceSets within the build.gradle. Again make sure the PATH to the libs folder is relative to the build.gradle file.

Setting Up the Agora App ID
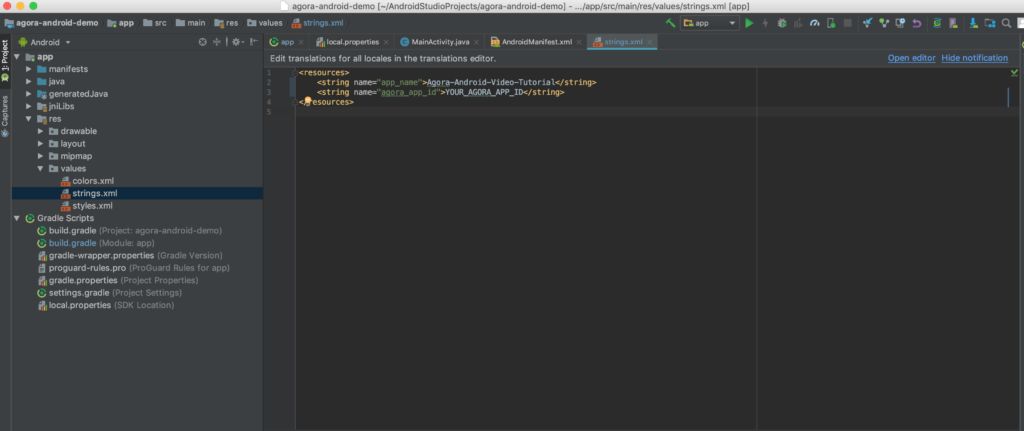
Next, it’s time to add your Agora App ID (see Step-1) to the Android project’s Strings.xml (app/src/main/res/values/Strings.xml).
<resources>
    <string name="app_name">Agora-Android-Video-Tutorial</string>
    <string name="agora_app_id"><#YOUR APP ID#></string>
</resources>
Note: This guide does not implement token authentication, which is recommended for all RTE apps running in the production environments.
For more information about token-based authentication within the Agora platform, please refer to this guide: https://bit.ly/3sNiFRs
The next step is to add the appropriate permissions within Manifest.xml.

The final step is to prevent obfuscation of the Agora classes. This might sound complex, but it’s really very simple. In the proguard-rules.pro file, add a-keep class configuration for the Agora SDK.
-keep class io.agora.**{*;}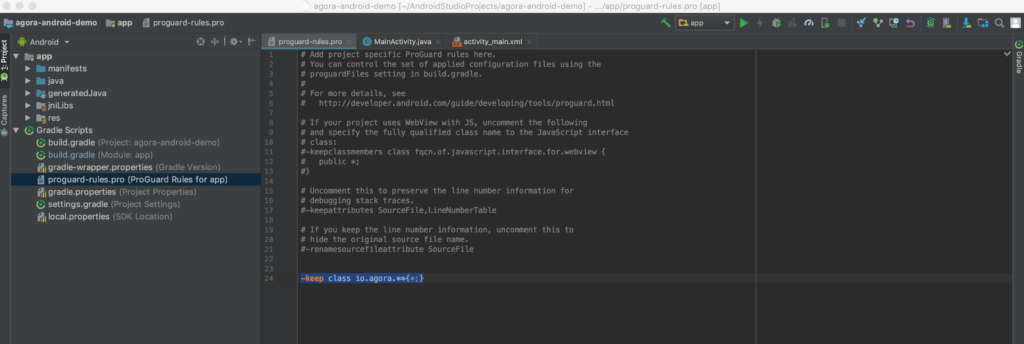
Note: Ensure that the Android NDK plugin is installed and set up for this project.
Step 4: Setting Up Views
Now that we have the Agora Video SDK integrated, let’s set up our UI for our Android one on one video chat app. I will breeze through this portion since we are using standard UI elements.
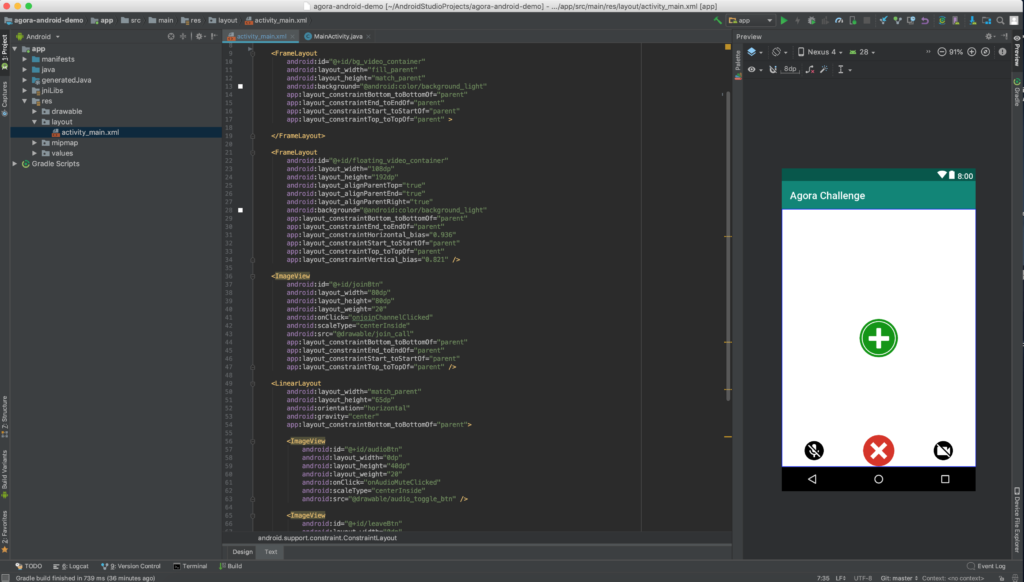
In the example, I chose to use ImageView instead of Button for the various UI elements. Either works. The important part is to note that there are functions that we link to using the onClick property.
Step 5: Checking Permissions
I know what you must be thinking: “Didn’t we already set up the permissions?” Earlier, we let the application’s Manifest know which permissions our Android live video chat app plans to use, but we still have to explicitly request the user to grant these permissions during live video calls. Don’t worry—this is the final step in getting the boilerplate project running, and it’s painless.
First, let’s declare which permissions we want to request:
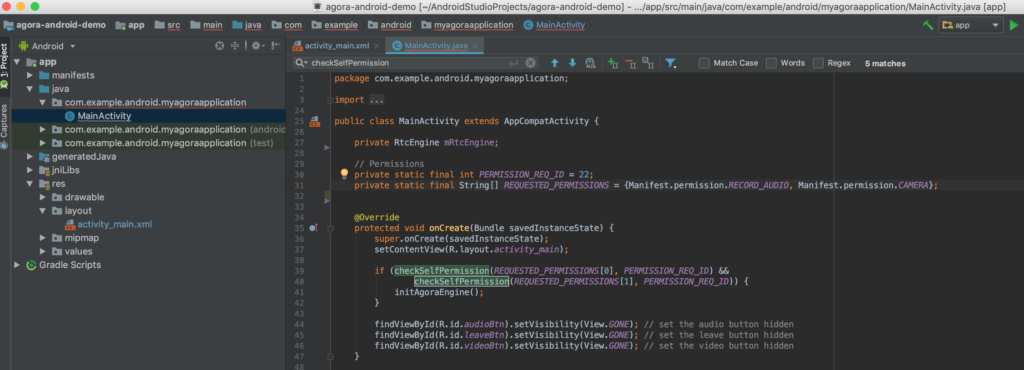
// Permissions
private static final int PERMISSION_REQ_ID = 22;
private static final String[] REQUESTED_PERMISSIONS = {Manifest.permission.RECORD_AUDIO, Manifest.permission.CAMERA};
Next, we set up a couple of functions to help us.
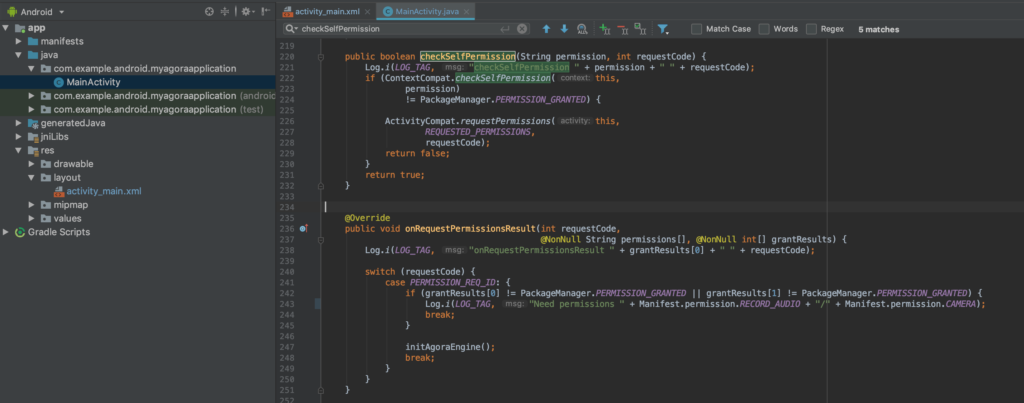
First, we have a method that requests permissions for a given permission string and code.
Next, we have a callback method that gets called after the user has responded to the permissions request prompt.
Last, in our class’s onCreate we check if our permissions were granted. If they were not, the above methods handle the requests.
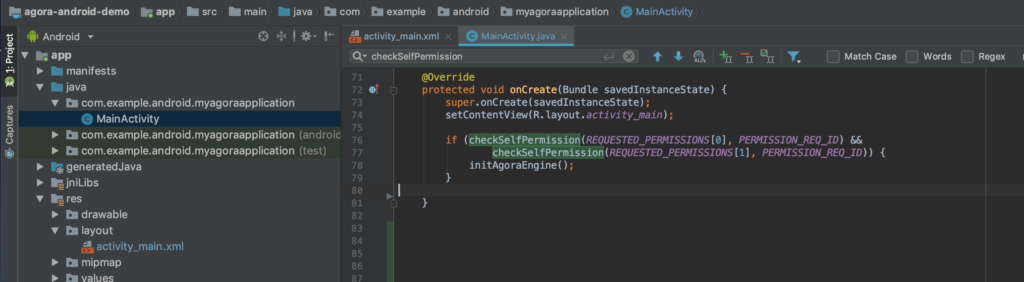
Step 6: Initializing the Agora SDK
Now that we have our view, we are ready to use the Agora video call API to initialize the Agora Video SDK, set up the profile and set the video quality settings.
In the previous step, you may have noticed a couple places that I call initAgoraEngine(). Before we can dive into the initialization, we need to make sure that our activity has access to an instance of the Agora RtcEngine.
In our MainActivity class, we need to declare a class property to store our instance of RtcEngine.
private RtcEngine mRtcEngine;Now it’s time to initialize. After all the boilerplate setup, we are finally at the step where we can start playing with the Agora engine in our 1-to-1 video chat app!
Go ahead and declare your initAgoraEngine() method in your class. In this function, we will create a new instance of the RtcEngine using the baseContext, the Agora App ID (declared above), and an instance of the RtcEngineEventHandler (we’ll get into this a little later).
Once we have our new instance, it’s time to set up our user’s session. Here we can set the Channel Profile to Communication, since this is a live video call and not a broadcast . This is also where we configure our video encoder settings.

Note: At this phase of the build, we can use the emulator to test our work, but I am choosing to use a mobile device.
Step 7: Connecting the Video Streams
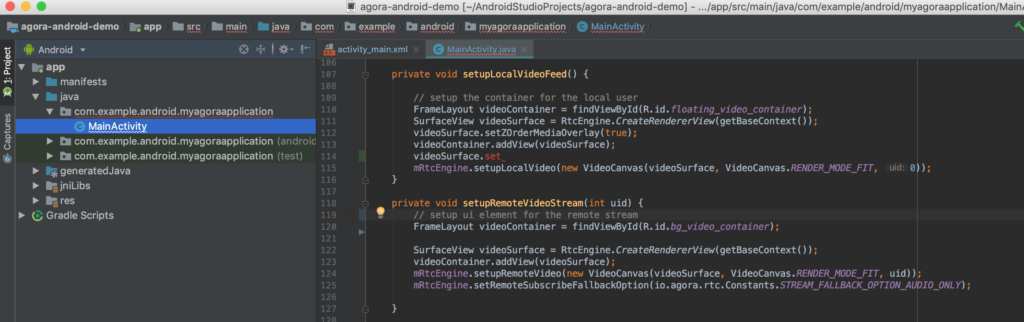
Before we can join a live video call we need to be able to present the local video stream to the user via the UI elements we set up earlier (step 4). For reference, below is the UI element’s id that our local video will render into:
android:id="@+id/floating_video_container"In the first line, we get a reference for the UI element that will act as our parent view for our video stream. The second step is to use the RtcEngine to create a SurfaceView that renders the stream from the front camera. We also set the new videoSurface to render on top of its parent view. The next step is to add the videoSurface as a subview of the UI element. Last, we pass the videoSurface to the engine as part of a VideoCanvas object. We leave the uid parameter blank so that the SDK can handle creating a dynamic ID for each user.
Now, that we have our local video feed set up, we need to use a similar function to get our remote video stream connected.
The main difference between the remote video and the local video is the user ID parameter that gets passed to the engine as part of the VideoCanvas object. The last line sets the fallback option: If the video degrades, the engine reverts to audio only:
Step 8: Setting Up the SDK Event Handler
Earlier, I made a reference to the RtcEngineEventHandler, and now it’s time to declare it as a property of our MainActivity class. The engine will call these methods from the RtcEngineEventHandler.
Each event triggers some fairly straightforward functions, including one we wrote in the previous step. In the interest of brevity, I provide the code below, but I don’t give an in-depth breakdown.
feel free to leave a comment if anything is unclear
Step 9: Joining and Leaving Channels
I know what you’re thinking, step 9 ?! Don’t sweat it — the next two steps are very simple. Let’s start by joining a call.
Note: If you do not specify the uid when joining the channel, the engine will assign one.
As you can see from the first line, the Agora video call API makes it simple: The engine calls joinChannel, passing in the channel name followed by the call to set up our local video stream (Step 7).
Note: The remove video method is the same used in step 8.
Leaving the channel is even simpler: The engine calls leaveChannel. Above, you’ll notice there are a few lines to remove the video stream subviews from each UI element.
Step 10: Adding Other Functionality
The last remaining parts are related to connecting the UI elements for toggling the microphone and video streams on local devices. Let’s start with the audio toggle feature.
First, we get the reference to our button and then check if it has been toggled on or off using isSelected(). Once we have updated the UI element state, we pass the button’s updated state to the RtcEngine.
Moving on to the video toggle:
As with the audio toggle, we check or update the button’s state using isSelected() and then pass that to the RtcEngine. To give a better visual representation of the video being muted, we hide or show the videoSurface.

I hope you enjoyed reading along and working together on creating a 1-to-1 video chat app for Android using the Agora SDK.
Full source code:

If you have any questions or comments, I invite you to join the Agora Developer Slack community.


