
This blog was written by Akarsh Ashok, an Agora Student Ambassador. The Agora Student Ambassador program empowers student leaders around the world to share their passion and technical expertise in the local communities.
According to a research by Grand View Research, the global video streaming market size was valued over $40 billion in 2019. More than half of the value was from live video streaming. The blooming live-streaming market not only creates influencers worth over millions of dollars, but also encourages large companies to launch their own web and mobile live-streaming features, such as YouTube Live and Instagram Live.
Many of you may have wondered how to add live-streaming features in your apps. With an easy-to-embed platform like Agora SDK, adding live-streaming features is now easier than ever. In this simple tutorial, I will walk you through building a working Flutter video streaming sample mobile app that looks like Instagram Live.
Prerequisites
- A basic understanding of Flutter
- An Agora developer account
- Install Android Studio
Overview
We’ll be using Agora Video SDK and Real-Time Messaging SDK tools for our Flutter video app. The first step is to create a new Flutter Project. You can do this by one of two methods: Command Line or Android Studio. I used Android Studio to create the project in this tutorial (you can find the tutorial to learn how to create a new Flutter project here. After you give your project a name, you can clean the main.dart file and add a splash screen. I’m going to name it Agoragram since we are using Agora SDK and it’s similar to Instagram.
Creating the Splash Screen, Login and Signup Interfaces
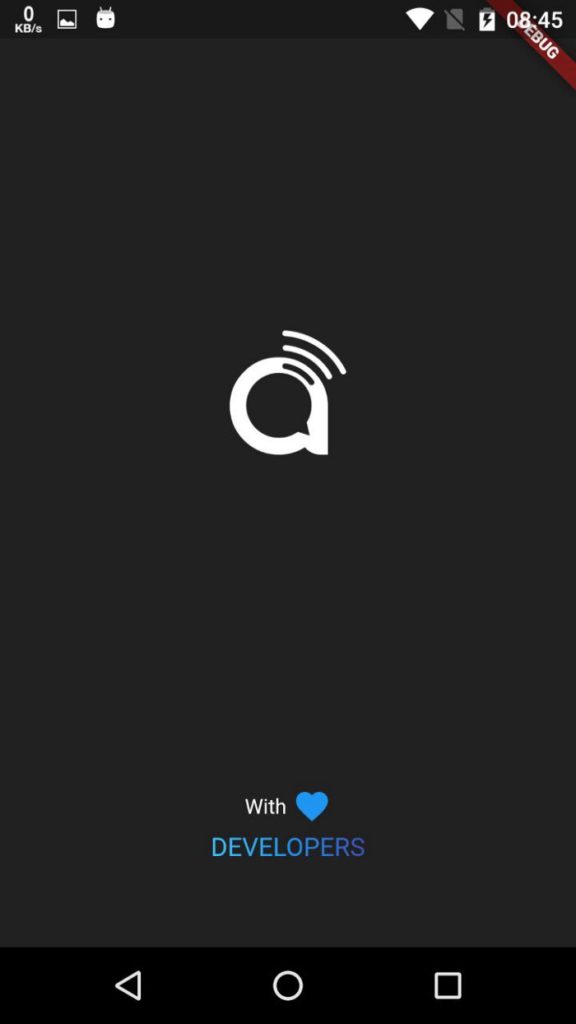
Let’s start with the Splash screen for your Flutter video streaming player. You can get the code from here.
The design is shown below:
Here I’m changing the route at the end of the timer to HomeScreen. Later on I’ll be using HomeScreen as the base route.
After SplashScreen we need to build a login page. Here I have used Firebase Authentication for the back-end of the login and registering page. From here, we need to create a Firebase project and link it with your Flutter video streaming project. The reference guide for the signup/login feature can be found here.
After you have integrated Firebase to your Flutter project, we can build the login.dart file. The widgets design for login is mentioned below:
- A call to action button
- Two Text Fields for entering email and password
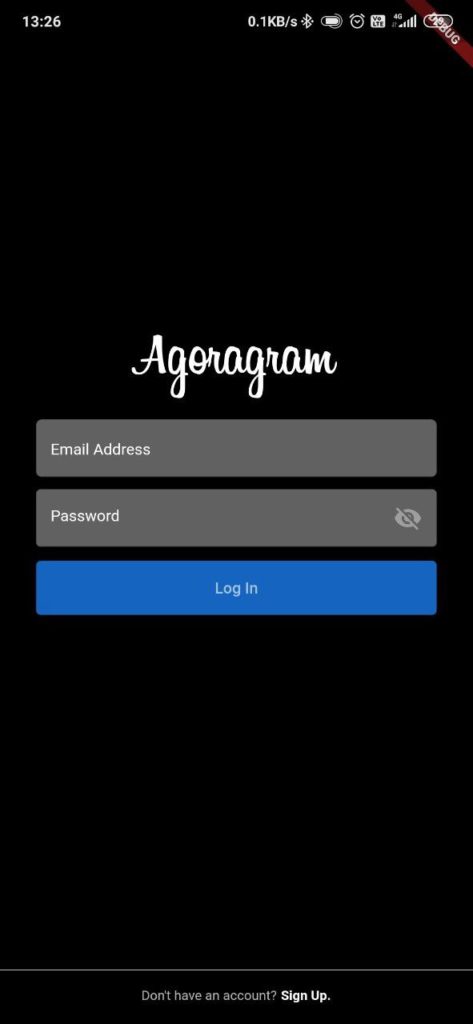
It is important to know that I used some functions which are not defined in this dart file. It is because I have made all the Firebase requests in another file. I will share the details towards the end of the blog.
After you finish the login interface, let’s build a signup interface. On this interface, we will need an option to upload an image and the text fields for email address, password, full name, and user name.
For the best user experience, we also need to prompt if the entered values are not valid. Here is the code for building this feature:
I have added a footer that, when clicked, will redirect back to the Login Page. We need to add an image that will show the user’s picture. After the login or sign up, save the data (including name, email, image) in the Firebase server and in shared Preference too.
Setting up Home Screen
Now, let’s work on the main home screen of the app. To make it look like an image social media app, similar to Instagram, I am adding 2 sample posts with images, comments, and the user interactions (heart, comment, share, and save).
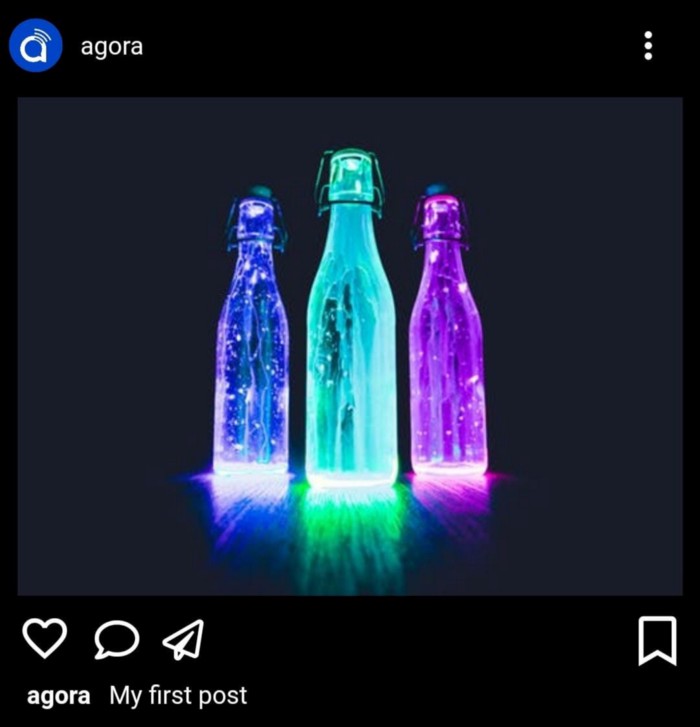
After you finish the basic home page design for your Flutter video streaming application, this is what it will look like. In my project I have used a class for the posts so that I can easily manage the UI.
Before we start building the live-streaming feature, we need to create a UI block that can show the users who are currently streaming. The detailed design will look like the following:
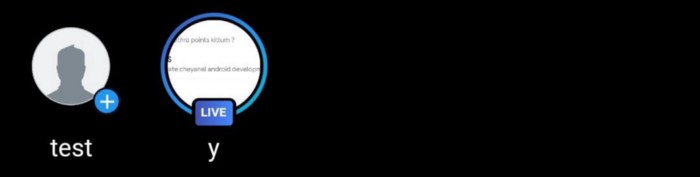
Here, the ‘test’ is the user’s username and ‘y’ is another user’s username. Now it looks more like a live-streaming notification block. After you finish the UI design, we can work on the logistics of this feature. We want the icon to show up whenever someone is streaming on the platform. To achieve that, whenever a user streams a live session, a document will be created and stored in the Firebase. We then set up the app to subscribe and listen to the changes on Firebase. As soon as the Firebase is updated with live-streaming information, the live-streaming notification block will be updated with the graphic as the above.
We then need a scrollview to manage the live users horizontally. I’m using class for the live users too, so that we can easily manage data. The code for the home screen can be found here. Now the final build of the home page will be like this:

Adding Live-Streaming and Live-Commenting Features
You should have created the homepage UI and a live-streaming notification feature. Next, we will go through the process of adding the live-streaming feature into the app using Agora Flutter SDK.
Before we dive into the technical side, we need to understand the logic: the user (host) starts a streaming session sharing video and audio stream using his/her camera and microphone; the user (audience) subscribes and views the video and audio stream but the user will not pass the video and audio.
For the Flutter video streaming app platform, I used Agora Flutter SDK. They have a lot of resources and documentation that you can check out for the implementation. I built this app by referring to this Agora Flutter SDK quickstart GitHub repo. Here are the steps you need to take.
Step 1: Create an Account
- Create a developer account.
- Click on the sign-up button in the top-right corner.
- Fill in the sign-up fields to create your account.
- Once you’ve created an account, sign in.
Step 2: Developer Dashboard
- After signing in, you’ll land in the developer dashboard — this is where you’ll access all the developer resources.
- Navigate to the “Projects” tab in the top-left, a default project has been created.
- You will see the App ID — which serves as your API key to use Agora’s services.
We need that App ID for running the SDK in our project. So let's add the dependencies and open the pubspec.yaml and enter these:
agora_rtc_engine: 1.0.5   # for video
agora_rtm: 0.9.11         # for chatting
Now you can find the setting.dart file in my project which stores the App ID. You can paste the App ID here.
const APP_ID = ""; // Enter the App ID in between the double quotesNow let's get all dependencies in our project.
flutter pub getThe intended UI for the live-streaming feature is shown below:
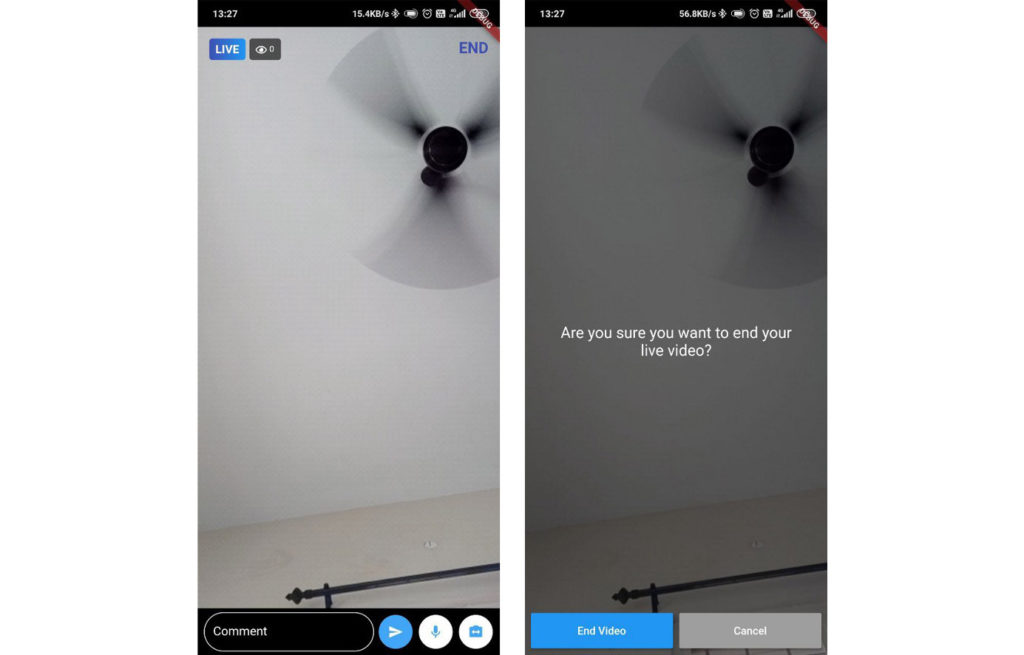
Now we just need to add a few more features to make our streaming app look more like a functional social media app. Having a live-commenting feature is useful for a live-streaming social media app. Users can write public messages through this Flutter live streaming feature to show their support for the host. We also need to have an admin management feature, which allows the hosts to mute, switch camera, and end streaming.
Let’s start with the live-commenting feature. We will use Agora RTM SDK for this feature. You can refer to this file for the complete dart file. I’ll explain why we use it later.
Future<void> initialize() async {
await _initAgoraRtcEngine();
_addAgoraEventHandlers();
await AgoraRtcEngine.<em>enableWebSdkInteroperability</em>(true);
await AgoraRtcEngine.<em>setParameters</em>(
'''{"che.video.lowBitRateStreamParameter":{"width":320,"height":180,"frameRate":15,"bitRate":140}}''');
await AgoraRtcEngine.<em>joinChannel</em>(null, widget.channelName, null, 0);
}
<em>/// Create agora sdk instance and initialize
</em>Future<void> _initAgoraRtcEngine() async {
await AgoraRtcEngine.<em>create</em>(APP_ID);
await AgoraRtcEngine.<em>enableVideo</em>();
}
<em>/// Add agora event handlers
</em>void _addAgoraEventHandlers() {
AgoraRtcEngine.<em>onJoinChannelSuccess </em>= (
String channel,
int uid,
int elapsed,
) async{
final documentId = widget.channelName;
channelName= documentId;
FireStoreClass.<em>createLiveUser</em>(name: documentId,id: uid,time: widget.time,image:widget.image);
// The above line create a document in the firestore with username as documentID
await Wakelock.<em>enable</em>();
// This is used for Keeping the device awake. Its now enabled
};
AgoraRtcEngine.<em>onLeaveChannel </em>= () {
setState(() {
<em>_users</em>.clear();
});
};
AgoraRtcEngine.<em>onUserJoined </em>= (int uid, int elapsed) {
setState(() {
<em>_users</em>.add(uid);
});
};
AgoraRtcEngine.<em>onUserOffline </em>= (int uid, int reason) {
setState(() {
<em>_users</em>.remove(uid);
});
};
}We need to initialize the Agora Engine by calling the initialize function inside initState(). I also use the Wakelock package to keep the device on, otherwise, it will be locked after a particular amount of time. Don't forget to disable the Wakelock while ending the live.
@override
void initState() {
  super.initState();
  // initialize agora sdk
  initialize(); // Initialise agora engine
  _createClient(); // initialise agora RTM
}
To create a client for Agora RTM, we need to add that function in the initState() too. We also need to get the Rendered Widget to show the screen so we need to use this command.
AgoraRenderWidget(0, local: true, preview: true),Let’s go back to the live-streaming feature. Now that the layout is all in our hands, we’ll need a screen of the host user. To start a streaming channel, we need a channelName. The channelName should be unique because the audience and host need to join and connect with the channelName. To make our lives easier in the development phase, we will use the username as channel name for creating the channel.
Alongside the live-steaming feature, I have called a function in the initState() of the host file, createClient(). This function defined an RTM Channel for the user to send messages.
void _createClient() async {
  _client =
  await AgoraRtmClient.<em>createInstance</em>('');
  _client.onMessageReceived = (AgoraRtmMessage message, String peerId) {
    _log(user: peerId,  info: message.text, type: 'message');
  };
  _client.onConnectionStateChanged = (int state, int reason) {
    if (state == 5) {
      _client.logout();
     setState(() {
        _isLogin = false;
      });
    }
  };
  await _client.login(null, widget.channelName );
  _channel = await _createChannel(widget.channelName);
  await _channel.join();
}
Next, we need to add the App ID in the AgoraRtmClient.createInstance(). It is a required step to connect your stream into Agora Engine.
In a streaming channel, it is always good to know the number of audiences in the same channel as the host. To achieve that, we use the RTM’s feature on channel.getMembers().length. This function returns the number of users joined in the channel.
Future _createChannel(String name) async {
AgoraRtmChannel channel = await _client.createChannel(name);
channel.onMemberJoined = (AgoraRtmMember member) async {
var img = await FireStoreClass.<em>getImage</em>(username: member.userId);
userMap.putIfAbsent(member.userId, () => img);
var len;
_channel.getMembers().then((value) {
len = value.length;
setState(() {
userNo= len-1 ;
});
});
_log(info: 'Member joined: ', user: member.userId,type: 'join');
};
channel.onMemberLeft = (AgoraRtmMember member) {
var len;
_channel.getMembers().then((value) {
len = value.length;
setState(() {
userNo= len-1 ;
});
});
};
channel.onMessageReceived =
(AgoraRtmMessage message, AgoraRtmMember member) {
_log(user: member.userId, info: message.text,type: 'message');
};
return channel;
}
void _log({String info,String type,String user}) {
var image = userMap[user];
Message m = new Message(
message: info, type: type, user: user, image: image);
setState(() {
_infoStrings.insert(0, m);
});
}The codes above allow you to get the user’s image when he/she has joined the channel. I added them to a map so that we do not need to call the image function repeatedly. This way, the image will only be fetched once from the server. In addition, when a new user joins the channel, we need to have the app send an automatic message showing the new user has joined the channel.
The completed version of the host’s streaming screen is here. The streaming screen should look like this:
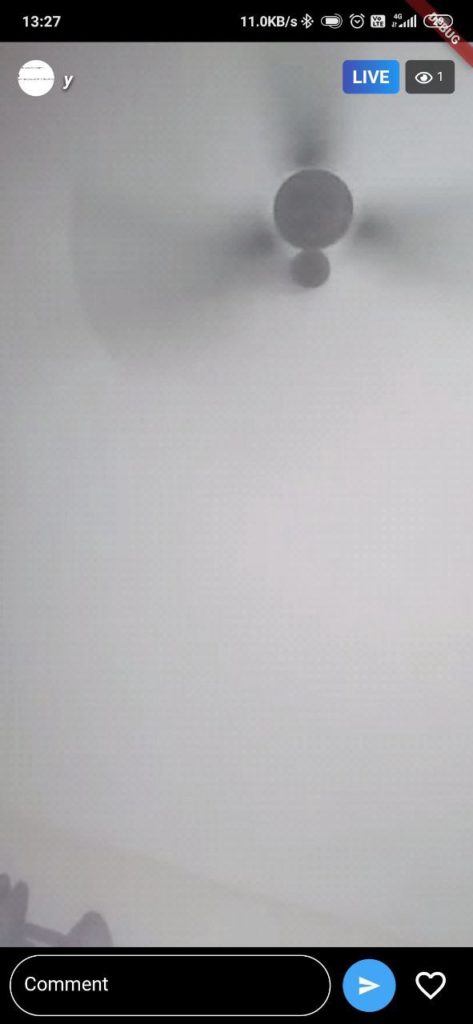
Next, let’s work on creating the join screen for the audience. There are a few differences between the host screen and the audience screen when streaming in Flutter. For example, the audience screen layout does not have mute and switch camera features.
First, we need to add the host user’s image on the top left, and the number of users viewing on the top right. Below, we have the comment option and heart option. In order to complete these features, here is what we need to do in the code logic: in the _initAgoraRtcEngine(), we need to mute the user’s audio and disable local video by default.
Future _initAgoraRtcEngine() async {
  await AgoraRtcEngine.<em>create</em>(APP_ID);
  await AgoraRtcEngine.<em>enableVideo</em>();
  await AgoraRtcEngine.<em>muteLocalAudioStream</em>(muted);  // Changes
  await AgoraRtcEngine.<em>enableLocalVideo</em>(!muted);     // Changes
}
For the heart animation, I’m using a custom dart file with some maths, you can find the custom dart file here.
In the join.dart, to call the HeartAnim, I’m using the following code:
Widget heartPop(){
final size = MediaQuery.<em>of</em>(context).size;
final confetti = <Widget>[];
for (var i = 0; i < _numConfetti; i++) {
final height = _random.nextInt(size.height.floor());
final width = 20;
confetti.add(HeartAnim(height % 200.0,
width.toDouble(),1));
}
return Container(
child: Padding(
padding: const EdgeInsets.only(bottom:20),
child: Align(
alignment: Alignment.<em>bottomRight</em>,
child: Container(
height: 400,
width: 200,
child: Stack(
children: confetti,
),
),
),
),
);
}This part of code will just make 10 heart shaped icons with different sizes and images once, but to show it in an animation. We need to loop it for 4 seconds:
void popUp() async{
  setState(() {
    heart=true;
  });
  Timer(Duration(seconds: 4), () =>
  {
    _timer.cancel(),
    setState(() {
      heart=false;
    })
  });
  _timer = Timer.periodic(Duration(milliseconds: 125), (Timer t) {
    setState(() {
      _height += _random.nextInt(20);
    });
  });
}
The above code will call the heartPop for the remaining 4 secs.
I think the changes are all set for the join page. You can find the code here.
Conclusion
Hoo-ray!
That’s it! You just created your own social media app with a live-streaming feature similar to Instagram Live! In this tutorial, I only explained the key parts of the codes. For the entire project, you can check out the GitHub repo here.


