
Try Agora for Free
Sign up and start building! You don’t pay until you scale.

Hi everyone. I hope you had an amazing learning experience during the #30DaysOfFlutter. They say that knowledge without action is insanity and that action without knowledge is vanity. So to put your knowledge into action, let’s build a project to provide real-time engagement (RTE) in a Flutter application.
Building your own RTE software can be a little troublesome: maintaining a server, load balancing, and at the same time providing low-latency can make even the best go nuts.
So how can you add RTE to your Flutter application without losing your mind and saving time as well? Luckily, we have the Agora RTE SDK to provide support across all the platforms. In this tutorial, I will walk you through the process of subscribing to multiple channels using the Agora Flutter SDK.
Before we jump in to the development process, let’s look into why someone would need to subscribe to multiple channels.
https://giphy.com/gifs/heyarnold-hey-arnold-nick-splat-3o6nV72xXHzIBAOWiI
The main reason for joining multiple channels is that you can track the activities of multiple groups simultaneously or interact with various groups simultaneously. So the various use cases include breakout rooms, multiple sessions, waiting rooms, and active sessions.
flutter create agora_multi_channel_demo2. Navigate to your pubspec.yamlfile and in that file, add the following dependencies:
Take care of the indentation over here while adding the packages as you might get an error if there is a problem with the same.
3. In your project folder, run the following command to install all the dependencies:
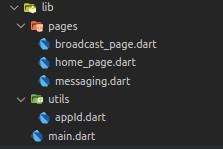
flutter pub get4. Once we have all the dependencies, we can create the file structure. Navigate to the lib folder and create a file structure like this:
The login page simply reads two channels that the user wants to join. In this tutorial, we are keeping it to two channels, but you can join more channels if you want to:
On successful submission of channel names, we trigger PermissionHandler(), a class from an external package (permission_handler) that we will be using in order to get users’ permission for their camera and microphone during the call.
Now, before we start building our lobby where we connect multiple channels, let’s keep our App ID separate in utils.dart under the utils folder:
const appID = '<---Enter your App ID here--->';If you have seen my Group Video Calling or Interactive Streaming guide, then you’ll recognize that most of the code that we will be writing here is similar to the code we wrote then. The main difference in both cases is that earlier we were relying on a single channel to connect a group. But now a single person can join multiple channels simultaneously.
In a single-channel video call, we saw how to create an instance of RtcEngine class and further join a channel. Even here we begin with the same process, such that it goes something like:
Note: This project is meant for reference purposes and development environments, it is not intended for production environments. Token authentication is recommended for all RTE apps running in production environments. For more information about token based authentication within the Agora platform please refer to this guide: https://bit.ly/3sNiFRs
We see that after creating an instance of RtcEngine, we set the Channel Profile as Live Streaming and join the required channel according to the users’ input.
Our _addAgoraEventHandlers() function takes care of all the major callbacks that we need for this project. In this case, I simply want to create a list of users in the RTE Channel with their uid.
The list of uid is dynamically maintained as it is updated every time a user joins or leaves the channel.
This sets up our primary channel or the lobby where a broadcast stream can be displayed now subscribing to other channels need an instance of RtcChannel and only then you can join the second channel.
The RtcChannel is initialized with a channel name, so we use the other input given by the user to take care of this. Once it’s initialized, we call the join channel function with the ChannelMediaOptions() class. This class looks for two parameters: autoSubscribeAudio and autoSubscribeVideo. Since it expects a Boolean value, you can pass true or false depending on your requirements.
For RtcChannel, we see similar event handlers, though we will be creating another users list that will be specific to the users present in that particular channel.
The _users2 list contains the uid of all the people in the channel, created using the RtcChannel class.
With this, you will be able to add multiple channels to your application. But let’s take a quick look at how we can create widgets so that these videos can be displayed on our screens.
We begin by adding the views from our RtcEngine. In this example, I am going for a grid view that takes up the maximum space available on the screen.
For the RtcChannel, I will be going with a scrollable ListView that is positioned at the bottom of the screen. This way, a user can scroll through the list to view all the users present in the channel.
The way you style your app or align users’ videos in a call is totally up to you. The key elements or widgets to look for are _getRenderViews() and _getRenderRtcChannelViews(), which return a list of user videos. Using this list, you can position your users and their videos as you choose, similar to the _viewRows() and _viewRtcRows() widgets.
Using these widgets, we can add them to our scaffold. Here, I will be using a stack to place _viewRtcRows() on top of _viewRows().
I have added another widget called _panel to our stack. We use this widget to display all the events that occur on our channel.
This way, a user can add two channels and view them simultaneously. But let’s consider an example where you need to join more than two channels. In that case, you can simply create more instances of the RtcChannel class, with a unique channel name. Using the same instance, you can then join multiple channels.
Finally, you need to create a dispose() method. This will be responsible for clearing the users list for both channels and calling the leaveChannel() method for all the channels we were subscribed to.
When you are done building the application through which you can join multiple channels using the Agora SDK, you can run the application and test it on your device. Navigate to the project directory in your terminal, and run this command:
flutter runCongratulations! You have implemented your own streaming application built using the Agora Flutter SDK with the ability to join multiple channels simultaneously.
You can get the complete code for this application here.
To learn more about the Agora Flutter SDK and other use cases, you can refer to the developer guide here.
You can also have a look at the complete documentation for the functions discussed above and many more here.
I also invite you to join the Agora Developer Slack community.


