
Introduction
We’re going to put together a basic audio call application with Agora and SwiftUI. Upon completion, you’ll be able to join & chat in an audio channel.
This tutorial largely follows the same format as the UIKit tutorial provided by Agora. The main difference is that we need to work with UIViewControllerRepresentable in order to interface the UIKit-based UIViewController with SwiftUI.
Prerequisites
- An iOS device running iOS 13 or greater
- A macOS device running Catalina or greater
- Xcode 12.0 or greater
- CocoaPods
- An Agora developer account & App ID (See: How to Get Started with Agora)
- An Agora project (note your temporary token)
Step 1: Project Setup
Xcode Setup
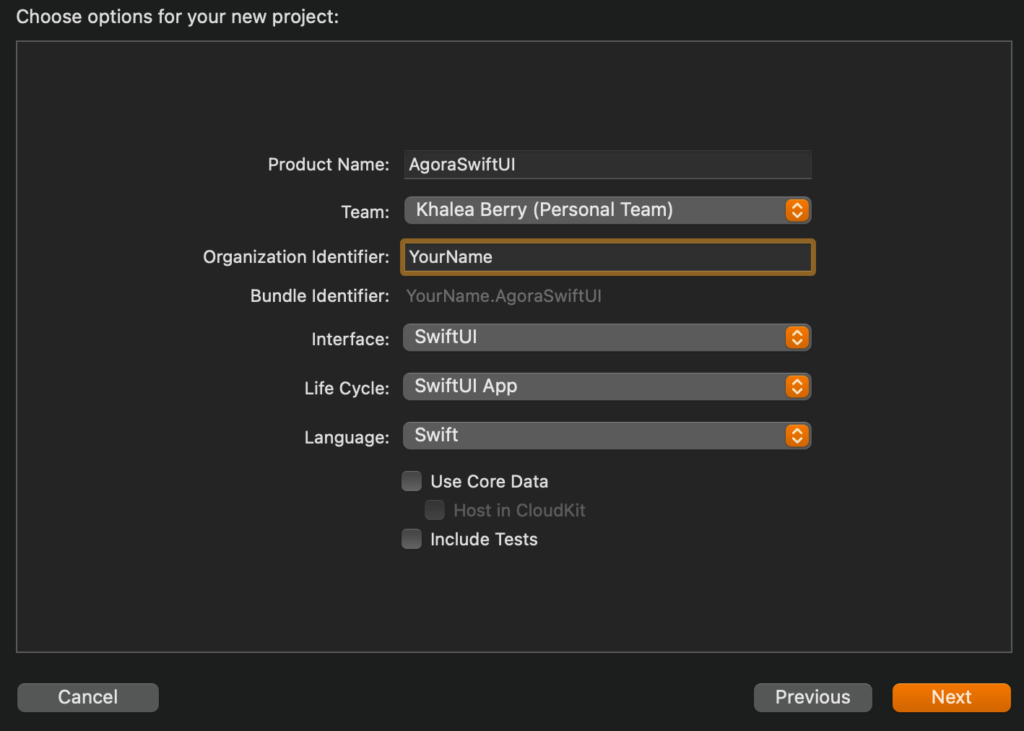
Create a new project by selecting iOS > App in the Xcode template menu. Set the project options to the following:
Add Mic Permissions
In Xcode, open the Project Settings and go to the Info tab.
On the Custom iOS Target Properties submenu, hover over one of the keys and click the plus sign (+) to add a new property. Enter Privacy — Microphone Usage Description as the key. For the value, provide a reason for requesting mic access, such as “For calls or interactive live streaming.”

Install Agora Voice SDK
There are two ways to do this : You can either use CocoaPods or download the Agora SDK and add it to your project manually. For the sake of brevity, I will link directly to those instructions:
Initialize Agora
First, we’re going to lay the groundwork for calls by implementing the AgoraRtcKit library. This will provide us with the functions necessary for connecting to and disconnecting from an Agora audio channel.
Step 2: AgoraViewController
Start by creating a new Swift file called AgoraViewController. In this file, you’ll import the AgoraRtcKit class, and define a variable called agoraKit of optional type AgoraRtcEngineKit.
Next, we’ll want to initialize AgoraRtcEngineKit. To properly do so, we’ll add two methods: viewDidLoad() & initializeAgoraEngine(withAppId, delegate).
viewDidLoad()is a UIKit view lifecycle method that will execute included code after the related view is loaded. In this case, we’ll be initializing the Agora engine and joining a channel (we‘ll add this function later) after the view is loaded.initializeAgoraEngine(withAppId, delegate): here, we simply create an instance ofAgoraRtcEngineKitwith your App ID and anAgoraRtcEngineDelegateto handle event callbacks to the application (in this case, the View Controller itself as it is a subclass ofAgoraRtcEngineDelegate). The delegate will know when errors occur, when someone joins a channel, and so on.
Step 3: Joining & Leaving A Channel
Channels are Agora RTC sessions that allow users to communicate with each other. Channels have UIDs (unique identifiers), names, and tokens that are requirements to join the channel. We can use the following function to join a test channel (make sure you replace “Token” with your own).
Note: For production apps, you should generate tokens on your own server, instead of using temporary tokens from the Agora Console. Learn more here.
In order to leave a channel, we’ll want to call an even simpler function with our agoraKit object:
Note: Don’t worry about the leaveChannelBlock parameter. It’s an optional callback that would provide us with call stats after leaving.
After leaving the channel we want to free up memory being used by destroying the AgoraRtcEngineKit instance as follows:
and
SwiftUI
We’ll keep it simple here with just 2 views: a home view that has a button allowing you to enter a call and a fullscreen sheet for the call itself, which will have Mute & End Call buttons.
Step 4: Homepage
Navigate to ContentView.swift, and add a button called Join Call:
Now, in order to have the sheet pop over the home view, we’ll have to add a binding Boolean state variable that acts as the source of truth for whether or not we should be presenting the call sheet. Just under the struct declaration, add the following:
Now, before we add the call sheet into our main view, you’ll want to create a new SwiftUI view file called CallView.swift. At first, it will only have “Hello, World” text in it.
Afterward, we can get the Join Call button from the ContentView to present the CallView like so:
If you go to Live Preview mode in your SwiftUI preview panel, you should be able to click the button and see the new CallView pop-up!
Step 5: Call View
Next, we’ll want to add our Mute and End Call buttons. We’ll be using SF Symbols for the icons. We’ll nest all the elements under a VStack, and the call buttons will be nested within an HStack.
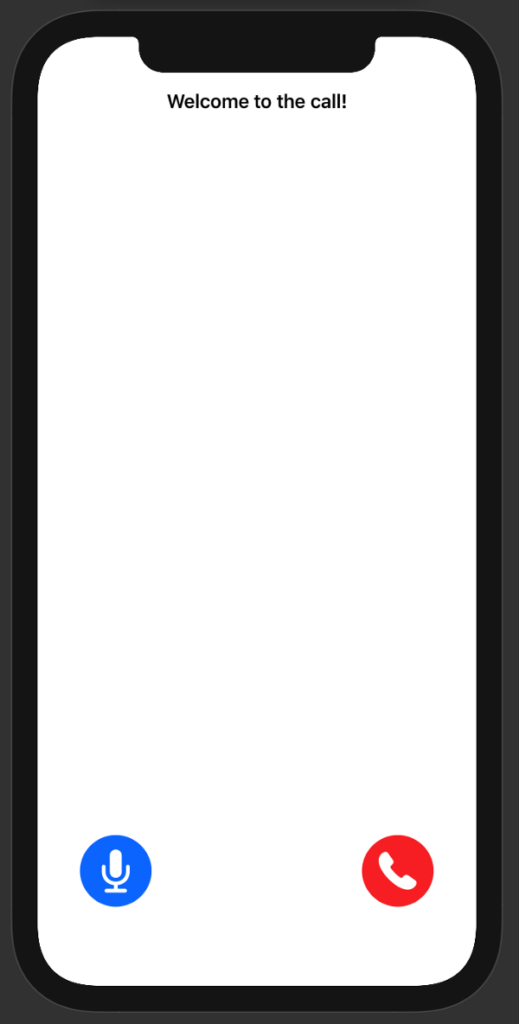
At this point, we have all of the basic UI elements that we need for calls. Now we just need to implement functionality for those new buttons.
Let’s start with ending calls. When we end a call, we want the CallView to disappear. In order for this to happen, we’ll add an @Environment state variable to the CallView that keeps track of whether or not the sheet is presented.
To dismiss the sheet, we will add an onTapGesture action to the phone button:
While this will dismiss the sheet, it does not terminate the call. That’s because we haven’t yet mapped our SwiftUI code to our AgoraViewController functions.
Connecting SwiftUI & UIKit
We need to wrap our UIViewController in a SwiftUI View. This is where UIViewControllerRepresentable comes in!
Step 6: UIViewControllerRepresentable
Create a new Swift file called AgoraRep.swift. Import SwiftUI at the top, and create a struct named AgoraRep that inherits from UIViewControllerRepresentable.
We’ll see some errors since we haven’t implemented the requisite makeUIViewController and updateViewController methods. Add them now:
updateViewController(context): This updates the view controller with new information received from SwiftUI. We can use this to check for certain changes in the UI, and perform functions accordingly.makeUIViewController(uiViewController, context): This creates a view controller of the desired type and configures its initial state. Code within this block is executed when the view controller is made.
We will return an instance of AgoraViewController that will be used in the SwiftUI:
Step 7: Coordinator
There will be an error for now because we do not yet have a coordinator. The coordinator is essentially what allows the UIKit-based (Agora) view controller to communicate events with SwiftUI.
Underneath the updateUIViewController function, create a class called Coordinator, that inherits from NSObject and conforms to the AgoraRtcEngineDelegate protocol. You’ll have to import AgoraRtcKit at the top of the file as well.
Add a class variable parent of type AgoraRep. This will be used in the init function to give the coordinator a reference to the AgoraRep so it can interact with AgoraRep directly.
Now we need to add the mandatory makeCoordinator function. It just returns an instance of the Coordinator class and passes the AgoraRep in with it:
At this point, we should be able to make calls! All we need to do is add an instance of AgoraRep to CallView somewhere into the VStack. Its width & height will be set to 0 because we don’t need to present anything:
Mute Input Audio
In order to mute the input audio, we want to track the status or state of the mic button, with the default state being set to unmuted. Fortunately, SwiftUI provides declarative state & data flow solutions that make this simple.
Step 8: Mute Button State
Before we do anything in the UI, we need to add a new mute function called didClickMuteButton to the AgoraViewController. We can use muteLocalAudioStream(Bool) to tell Agora whether to stop publishing the audio input on the device:
The next step is to monitor the state of the Mute button, and trigger didClickMuteButton in the view controller via AgoraRep.
At the top of the body element in CallView, add a state variable of type Bool called isMuted just under the struct definition, and set it to false:
Add an onTapGesture modifier to the Image element with the mic icon that will toggle the value of isMuted and the fill color of the mic. To let the user know that they are muted, we’ll also toggle the foregroundColor from blue to yellow when the state changes:
Now we have to relay the state of the mute button to the AgoraRep controller. First, add a private binding variable isMuted of type Bool just under the struct declaration. In the updateUIViewController function, add an if-else statement that updates uiViewController.didClickMuteButton dynamically:
Then in the CallView you’ll want to add an argument isMuted to the AgoraRep instance and pass in the binding variable $isMuted as its value:
Testing Calls
There are a number of ways to test calls, but here we’ll use an iOS device and the Agora WebDemo tool.
First, open the WebDemo and enter your App ID, channel name (“TestChannel”), and Temporary Token. Mute the mic on your computer if possible and click Join. Then you’ll want to run the application on your iOS device and join the call from there.
Note: You may need to go to your iOS device’s Settings > General > Device Management menu and grant permissions to run apps from your development account after installation.
You can follow these steps to test the functionality:
- Audio transmission from the iOS device: While the computer mic is muted, speak into the iOS device’s microphone. Audio should come from the computer.
- Audio transmission to the iOS device: Mute the mic on the iOS device and unmute the computer’s mic. When you speak into the computer’s mic, audio should come from the iOS device.
Note: Make sure you leave the call on the WebDemo site and on iOS, or else you will continue to use up free Agora credits!
Conclusion
Congrats, you’ve successfully learned to interface UIKit components with SwiftUI Views as well as the essentials of using Agora’s iOS Voice SDK. The code used in this tutorial is available on Github.
Other Resources
You can find me on Medium and Twitter for more tutorials and random thoughts. I also invite you to join the Agora Developer Slack community!


