
When setting up your own streaming application with Agora, a few technical steps might slow you down. Now with Agora UIKit, you can easily create a masOS or iOS streaming application by placing a UIView, NSView or SwiftUI View.
Prerequisites
- An Agora developer account (see How To Get Started with Agora)
- Xcode 11.0 or later
- iOS device running on iOS 13.0, or macOS minimum 10.14
- A basic understanding of iOS development
- CocoaPods (if not using Swift Package Manager)
Setup
Start by creating an iOS or macOS project in Xcode.
Swift Package Manager (Recommended, iOS Only)
Add the URL of this repository to your Xcode 11+ Project.
Go to File > Swift Packages > Add Package Dependency, and paste in this link: https://github.com/AgoraIO-Community/iOS-UIKit
Xcode sometimes has issues downloading large libraries such as the Agora SDK. If any errors are thrown, in Xcode select File > Swift Packages > Reset Package Caches.
CocoaPods
To install the CocoaPod AgoraUIKit_iOS or AgoraUIKit_macOS, your Podfile should look like this:
target 'Agora-UIKit-Project' do
  # Uncomment the next line if you want to install for iOS
  # pod 'AgoraUIKit_iOS', '~> 1.3'
  # Uncomment the next line if you want to install for macOS
  # pod 'AgoraUIKit_macOS', '~> 1.3'
end
The latest AgoraUIKit release at the time of writing this post is v1.3.
Run pod init, and open the .xcworkspace file to get started.
Add authorisation for the app to use the camera and microphone. To do this, open up the Info.plist file at the root of your Xcode project and add NSCameraUsageDescription along with NSMicrophoneUsageDescription.
For more information on requesting authorization for media capture, check out this article from Apple.
Adding Video Streaming
iOS UIKit
Adding an AgoraVideoViewer to your ViewController should look like this:
import UIKit
import AgoraUIKit_iOS

class ViewController: UIViewController {

  var agoraView: AgoraVideoViewer!
  override func viewDidLoad() {
    super.viewDidLoad()

    self.agoraView = AgoraVideoViewer(
      connectionData: AgoraConnectionData(
        appId: <#Agora App ID#>,
        appToken: <#Agora Token or nil#>
      )
    )

    // frame the view
    self.view.addSubview(agoraView)
    agoraView.frame = self.view.bounds
    agoraView.autoresizingMask = [.flexibleWidth, .flexibleHeight]

    // Set the layout style (default .grid)
    agoraView.style = .grid // or .floating

    // join the channel "test"
    agoraView.join(channel: "test", as: .broadcaster)
  }
}
Note: This project is meant for reference purposes and development environments, it is not intended for production environments. Token authentication is recommended for all RTE apps running in production environments. For more information about token based authentication within the Agora platform please refer to this guide: https://bit.ly/3sNiFRs
iOS SwiftUI
If you opt to make a SwiftUI app, adding an AgoraViewer to your view looks like this:
import SwiftUI
import AgoraUIKit_iOS

struct ContentView: View {
  @State private var connectedToChannel = false

  var agview: AgoraViewer {
    let agoraView = AgoraViewer(
      connectionData: AgoraConnectionData(
        appId: <#Agora App ID#>,
        appToken: <#Agora Token or nil#>
      ),
      style: .floating
    )
    agoraView.join(channel: "test", with: nil, as: .broadcaster)
    return agoraView
  }

  var body: some View {
    agview
  }
}
For the SwiftUI app, you may need to handle microphone and camera permission pop-ups manually. See the SwiftUI example project included with the Agora UIKit repository for an example.
The SwiftUI app makes a very similar view to that found in the previous example.
macOS AppKit
The macOS app setup is very similar to the first example found above. A minimal example app looks like this:
import Cocoa
import AgoraUIKit_macOS
class ViewController: NSViewController {
var agoraView: AgoraVideoViewer!
override func viewDidLoad() {
super.viewDidLoad()
self.agoraView = AgoraVideoViewer(
connectionData: AgoraConnectionData(
appId: "my-app-id",
appToken: nil
),
style: .floating,
)
// Method provided with the library to fill
// a UIView or NSView with the AgoraVideoViewer
agoraView.fills(view: self.view)
// join the channel "test"
agoraView.join(channel: "test", as: .broadcaster)
// Optionally the application window to a specific size
self.view.setFrameSize(NSSize(width: 1440, height: 790))
}
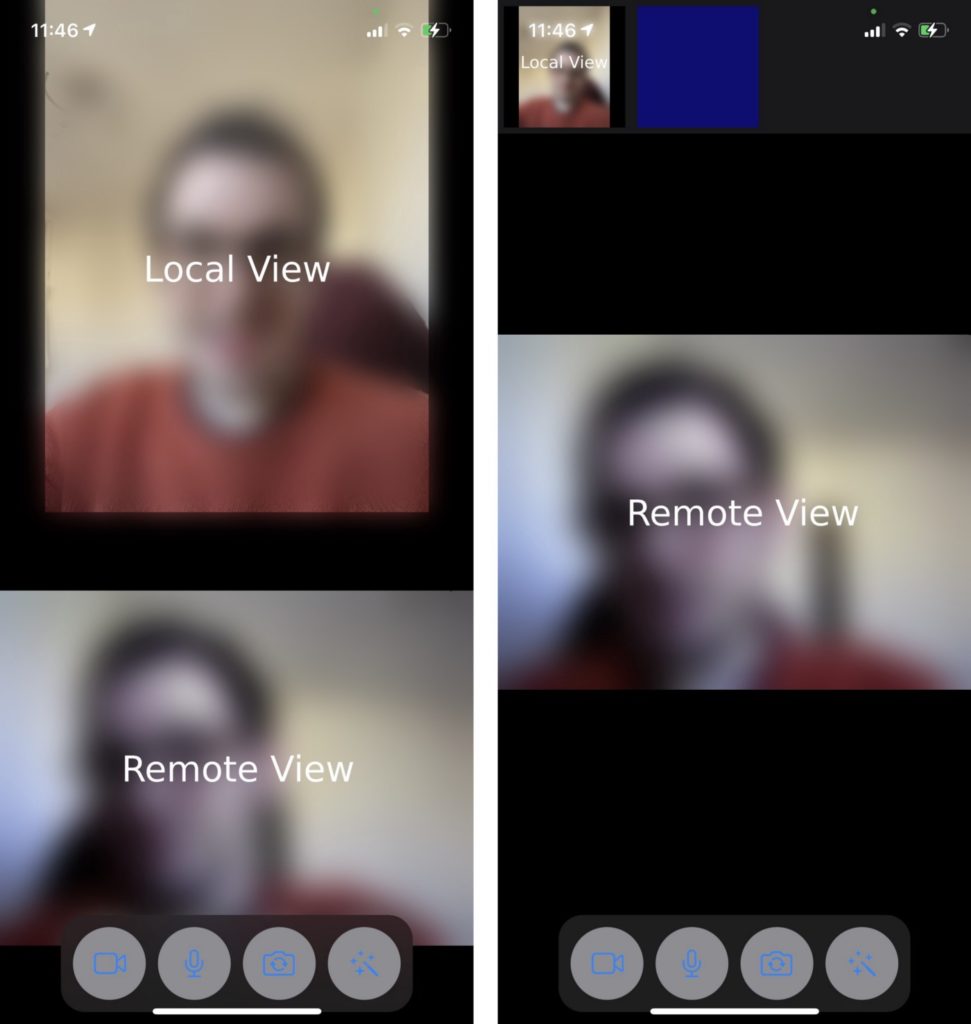
}The layouts are also the same, with a choice of grid or floating:
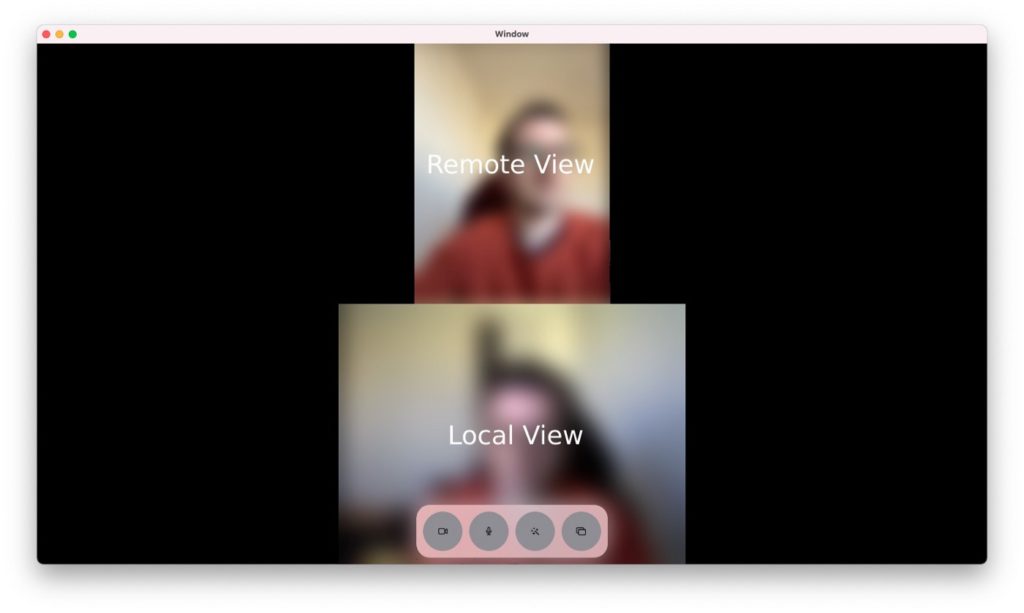
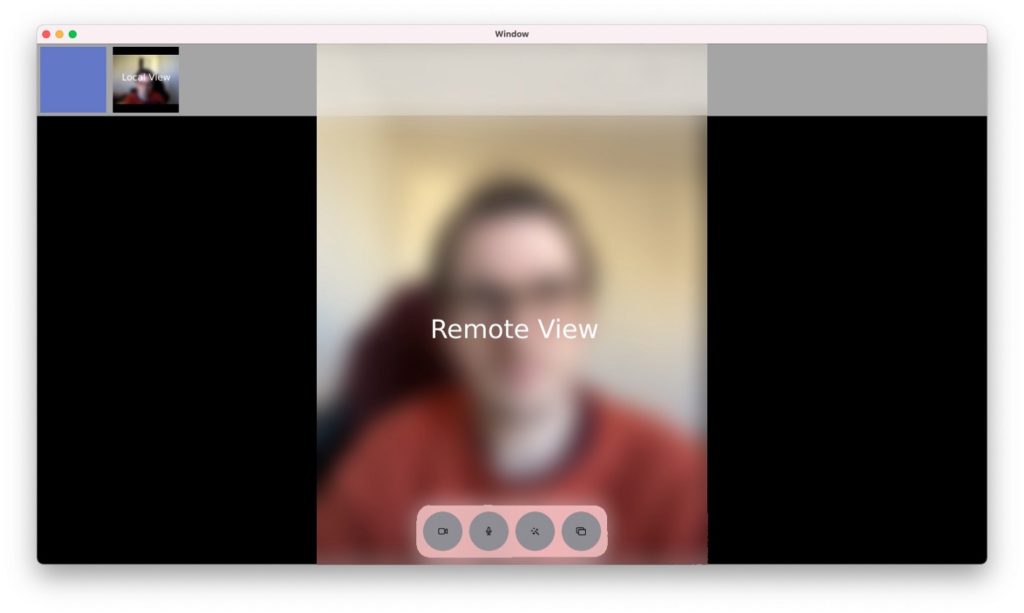
Default Functionality
By default, Agora UIKit includes the following functionality before any customising:
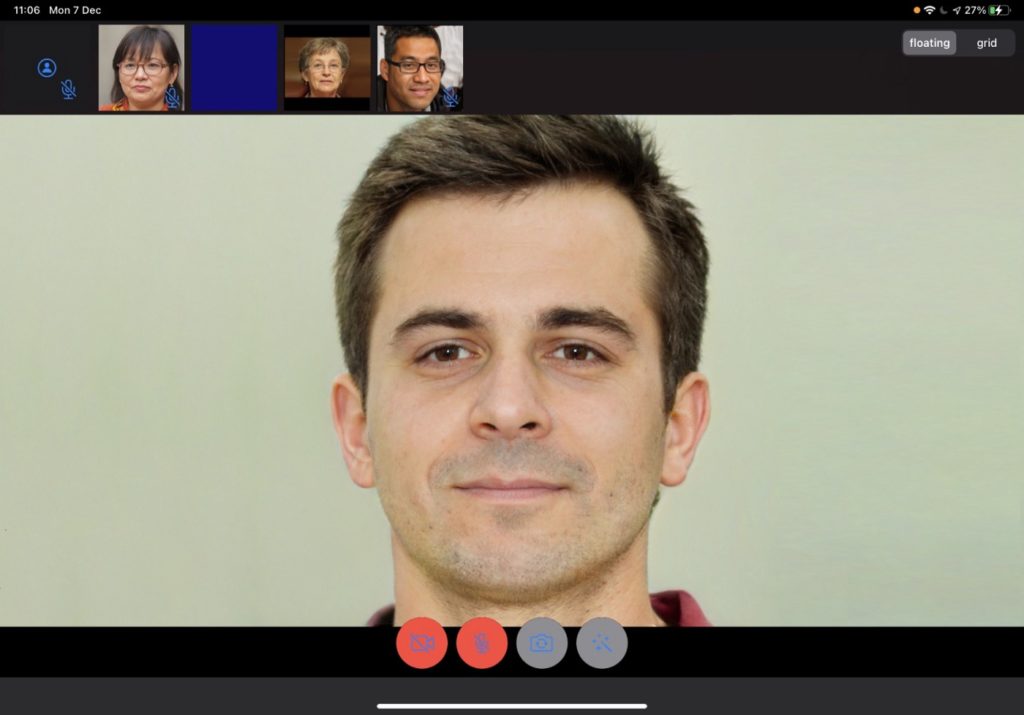
- Automatically layout all video streams
- Displaying the active speaker in the larger display in the floating layout
- Allowing you to pin any stream to the larger display in the floating layout
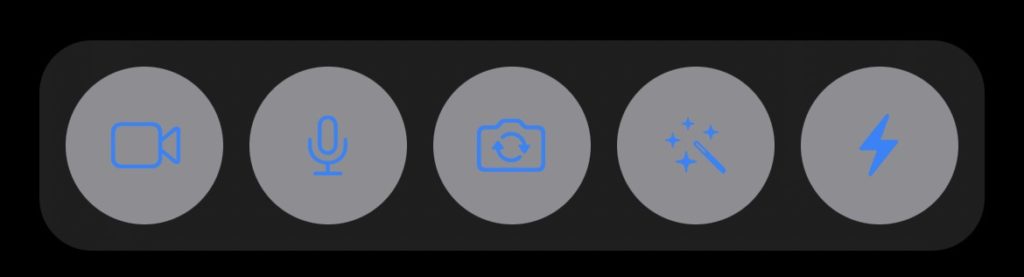
- Buttons for disabling camera or microphone, beautify filter, share screen (macOS only) and switch cameras (iOS only)
- Icon for signalling the local or remote streamer’s microphone is disabled
- Automatically subscribing to high- or low-quality video streams, depending on the size of views
- Multiple layouts, including floating, grid, collection (which displays only the scrolling collection of streams), and custom (example of custom below)
Basic Customising with AgoraSettings
A few basic and more advanced features in this library make it customisable for your needs. And there’s a growing list of things to customise using AgoraSettings. The entire class definition can be found here.
Positioning Elements
The position of the collection view of all the streamers when using floating layout and the collection of buttons (such as mute microphone and beautify) can be moved around with floatPosition and buttonPosition, respectively. You have the choice of top, right, bottom and left for this enumeration. floatPosition defaults to the top, and buttonPosition defaults to the bottom.
Colors
There aren’t many elements where you can choose the color in this library yet — only the mute icon flag, which defaults to blue. It can be changed like this
var agSettings = AgoraSettings()
agSettings.colors.micFlag = .red
Choosing the Button Set
By default, all the buttons are added (with the flip camera button available only on iOS and share screen available only on macOS). The set of buttons is created using the parameter enabledButtons. enabledButtons is an OptionSet, a type that is explained by NSHipster here.
If you want to show only the button to enable and disable the camera, you could set enabledButtons like this:
var agSettings = AgoraSettings()
agSettings.enabledButtons = .cameraButton
Or if you want to show the camera button, microphone, and share screen (macOS only):
var agSettings = AgoraSettings()
agSettings.enabledButtons = [
  .cameraButton, .micButton, .screenShareButton
]
Then apply these settings using the AgoraVideoViewer initialiser:
let agoraView = AgoraVideoViewer(
  connectionData: AgoraConnectionData(
    appId: "my-app-id",
    appToken: nil
  ),
  agoraSettings: agSettings
)
In the Advanced Customisation section below you see how to add your own custom button.
Video Settings
You can find a few parameters in AgoraSettings to change the way the video stream looks.
AgoraSettings.videoRenderMode lets you choose the AgoraVideoRenderMode for all the videos rendered on your local device, with a choice between fill, fit, and hidden. See Agora’s full documentation on AgoraVideoRenderMode here.
AgoraSettings.videoConfiguration lets you add your own AgoraVideoEncoderConfiguration, with options of size, frame rate, bitrate, orientation and more. See Agora’s full documentation for AgoraVideoEncoderConfiguration here.
You can also customise settings for dual-stream mode in several ways. By default, a session created with AgoraVideoViewer enables dual-stream mode and adopts a default low-bitrate parameter identical to the one shown in the below example. This can be customised by setting AgoraSettings.lowBitRateStream, like this:
var agSettings = AgoraSettings()
agSettings.lowBitrateParam = """
  { "che.video.lowBitRateStreamParameter": {
    "width":160,"height":120,"frameRate":5,"bitRate":45
  }}
"""
To better understand this setting, the following post talks in depth about dual-stream mode and the low-bitrate stream parameter:
With AgoraVideoViewers, all videos in the floating view collection are subscribed to the low-bitrate stream until they move to the main view or the layout changes to grid mode. The grid mode may also subscribe to the low-bitrate stream if the number of videos in the grid passes the threshold value, found in AgoraSettings.gridThresholdHighBitrate.
This value can be set to any integer. The default value is 4. This means that if 5 videos are shown in the grid view, then they are all subscribed to the low-bitrate feed.
Subscribing to the low-bitrate mode is important for a couple of reasons: It reduces the bandwidth used by all users subscribed to the feed, and it can help avoid using more minutes on your Agora account by reaching a higher streaming band.
Token Fetching
The final parameter currently in this library is AgoraSettings.tokenURL. This property is an optional string that can be used to automatically fetch a new access token for the channel if the provided token has expired or is due to expire soon.
The functionality for requesting a new token expects the token to follow the URL scheme in the Golang token server found on GitHub: AgoraIO-Community/agora-token-service.
To set up this property, you can add the following code, replacing the localhost address with the URL path to your own token server:
var agSettings = AgoraSettings()
agSettings.tokenURL = "http://localhost:8080"
This feature can be triggered when calling the join method on your AgoraVideoViewer like so:
agoraView.join(
  channel: "test", as: .broadcaster, fetchToken: true
)
Any attempt to fetch a new token only will only be triggered if a tokenURL is provided in the AgoraSettings for this AgoraVideoViewer object.
Advanced Customisation of AgoraVideoViewer
Adding More Buttons with AgoraVideoViewerDelegate
You may want to add your own buttons to the enabledButtons. You can use the delegate method extraButtons for that. To use extraButtons, you must set a delegate to the AgoraVideoViewer. There is a parameter for this in the AgoraVideoViewer initialiser.
An example implementation of extraButtons might look like this:
func extraButtons() -> [UIButton] {
  let button = UIButton()
  button.setImage(UIImage(
    systemName: "bolt.fill",
    withConfiguration: UIImage.SymbolConfiguration(scale: .large)
  ), for: .normal)
  return [button]
}
This code adds a button with the SF Symbol bolt.fill. It is added to the end of the button collection, adopting the same style as the other buttons in the collection.
You can add a bit of functionality to the button in the exact same way you would any other UIButton, by using addTarget:
extension ViewController: AgoraVideoViewerDelegate {
  func extraButtons() -> [UIButton] {
    let button = UIButton()

    button.setImage(UIImage(
      systemName: "bolt.fill",
      withConfiguration: UIImage.SymbolConfiguration(scale: .large)
    ), for: .normal)

    button.addTarget(
      self,
      action: #selector(self.clickedBolt),
      for: .touchUpInside
    )
    return [button]
  }

  @objc func clickedBolt(sender: UIButton) {
    print("zap!")
    sender.isSelected.toggle()
    sender.backgroundColor = sender.isSelected ?
      .systemYellow : .systemGray
  }
}
Since the buttons are being added to a set of existing buttons, I advise not to try to customise these buttons too much, to avoid the risk of the design falling apart. If you wish to add completely custom buttons, the best way is to add them on top of the AgoraVideoViewer object and set the enabledButtons setting to an empty set.
Custom Stream Layouts
A choice between just two options may not satisfy all use cases, so you may want to create your own layout using the custom style option:
agoraView.style = .custom(
  customFunction: myLayout(viewer:videoViews:count:)
)

func myLayout(
  viewer: AgoraVideoViewer,
  videoViews: EnumeratedSequence<[UInt: AgoraSingleVideoView]>,
  count: Int
) {
  // custom layout
}
The layout method can do anything you like, including adding all the AgoraSingleVideoView objects into a separate list, to be shown in your own CollectionView. Here is an example of how the body of myLayout can be used to create something like the grid style:
AgoraSingleVideoView
As well as displaying all the video views together, you may want to place and organise them independently, this is possible with AgoraSingleVideoView.
This is the same way that AgoraVideoViewer displays the boxes, but if you were to create the views yourself for a remote user, you can do so like this:
func rtcEngine(
_ engine: AgoraRtcEngineKit,
didJoinChannel channel: String,
withUid uid: UInt, elapsed: Int
) {
let remoteVideoView = AgoraSingleVideoView(
uid: uid, micColor: .systemBlue
)
engine.setupRemoteVideo(remoteVideoView.canvas)
// position the remoteVideoView in your scene...
}I recommend keeping a way to reference each AgoraSingleVideoView by userID, in form of a dictionary for example: [UInt: AgoraSingleVideoView]. That way you can utilise all the features of the view, such as a signal that the user microphone has been muted, or camera turned off.
Here’s an example of those features, where userVideoLookup acts as a dictionary of userID to AgoraSingleVideoView:
extension ViewController: {
    func rtcEngine(
        _ engine: AgoraRtcEngineKit,
        remoteVideoStateChangedOfUid uid: UInt,
        state: AgoraVideoRemoteState,
        reason: AgoraVideoRemoteStateReason,
        elapsed: Int
    ) {
        // Hide/Show the video feed
        switch state {
        case .decoding:
            self.userVideoLookup[uid]?.videoMuted = false
        case .stopped:
            self.userVideoLookup[uid]?.videoMuted = true
        default: break
        }
    }

    func rtcEngine(
        _ engine: AgoraRtcEngineKit,
        remoteAudioStateChangedOfUid uid: UInt,
        state: AgoraAudioRemoteState,
        reason: AgoraAudioRemoteStateReason,
        elapsed: Int
    ) {
        // Hide/Show the muted microphone flag
        if state == .stopped || state == .starting {
            self.userVideoLookup[uid]?.audioMuted = (
                state == .stopped
            )
        }
    }
}
The documentation for AgoraSingleVideoView can be found here.
Summary
If there are features you think would be good to add to Agora UIKit for iOS or macOS that many users would benefit from, feel free to fork the repository and add a pull request. Or open an issue on the repository with the feature request.
The plan is to grow this library and have similar offerings across all supported platforms. There are already similar libraries for ReactNative and Android, so be sure to check those out.
Other Resources
For more information about building applications using Agora SDKs, take a look at the Agora Video Call Quickstart Guide and Agora API Reference.
I also invite you to join the Agora Developer Slack community.
Build an iOS video call app with only 3 lines of code


