
If you have ever wondered how to include video calling features in your web applications, you’ve found a well-structured and well-written article.
In this article, we will build an application that has video calling capabilities similar to those in WhatsApp Web, using the Agora Web SDK.
Features to Expect in the Article
- Inviting a user to a video call with an incoming call notification
- Returning the appropriate feedback if the user is offline
- Terminating calls before they’re answered
- Declining/rejecting calls
- Accepting/receiving calls
Prerequisites
- An Agora developer account (see How to Get Started with Agora).
- A Python 3.8 Flask application with authentication. Download the following starter project to get started: Flask Auth Starter Project We are going to build on top of this starter project.
Project Setup
- Create and activate a Python 3 virtual environment for this project.
- Open your terminal or command prompt and navigate to the starter project that you downloaded as part of the prerequisites. The folder is named agora-flask-starter.
- Follow the instructions in the README.md file in the agora-flask starter to set up the application.
- Install the agora_token_builder package:
pip install agora-token-builder - Download the latest version of the Agora RTM SDK. Agora RTM SDK
Configuring the Back End
We will create a new app named agora_rtm, register its blueprint, and create the needed static templates and views
1. Create the folders needed for the app:
mkdir app/agora_rtmmkdir app/static/agora_rtmmkdir app/templates/agora_rtm2. Create the Agora view:
- Create views.py and __init__.py in the app/agora_rtm directory from your terminal:
touch app/agora_rtm/views.pytouch app/agora_rtm/__init__.py- Add the following to __init__.py:
3. Register the agora_rtm blueprint.
Import the agora_rtm app and register it as a blueprint in app/__init__.py:
from .agora_rtm import agora_rtm as agora_rtm_blueprint
app.register_blueprint(agora_rtm_blueprint)
Place the above code before the return app statement.
Breakdown of Methods in agora_rtm/views.py
index: To view the video call page. Only authenticated users can view the page. Non-authenticated users are redirected to the login page. We return a list of all the registered users.
fetch_users: Returns all the registered users as a JSON response.
generate_agora_token: Returns the token used for the RTM and RTC connections.
* token: The RTC token
* rtm_token: The RTM token
Note that we have set the token’s expiration time to 3600s (1 hr). You can modify the endpoint to use the expiration time that you want.
Configuring the Front End
We will create the user interface for making and receiving the video call with the ability to toggle the on and off states of the camera and the microphone.
We show incoming call notifications where the recipient can accept or reject the call.
1. Add the Downloaded RTM SDK to the project.
- Unzip the file we downloaded in step 5 in “Project Setup”.
- Navigate to the libs folder and copy the agora-rtm-sdk-1.4.4.js file into static/agora_rtm.
- Rename the copied file to agora-rtm.js
2. Add the HTML file for the index view.
The HTML file will contain the links to the CDN for the Agora RTC SDK, Agora RTM SDK, Vue.js, Axios, Bootstrap for styling, and our custom CSS and JavaScript.
The index.html file will also inherit a base template, which is used to render the view:
- Create an index.html file in templates/agora_rtm:
touch app/templates/agora_rtm/index.html - Add the following code to the index.html file:
We use Flask’s templating language to reuse some code. As indicated earlier, we inherit a base template named base.html. It has the following blocks:
- head_scripts: This is the block where we place the link to the Agora RTC and RTM SDKs and our index.css for styling the video call page.
- content: The content block contains the user interface for rendering the video stream with its control buttons.
- bottom_scripts: This block contains the CDN links to Axios for sending AJAX requests and Vue.js for writing the client-side logic for our video chat application. We also have index.js for our custom JavaScript code.
3. Create the static files
We have index.css for custom styling and index.js, which is our script for handling the call logic.
Run the following command to create the files from your terminal or command prompt:
touch app/static/agora_rtm/index.js
touch app/static/agora_rtm/index.css
Add the following to index.js:
Add the following to index.css:
Breakdown of the Agora Call Page
On the video call page (app/templates/agora_rtm/index.html), we display buttons that bear the name of each registered user and whether they are online or offline at the moment.
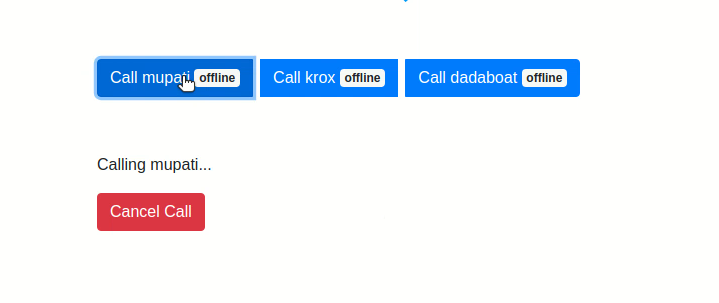
Placing a Call
Click the button of the user that you want to call. You see an outgoing call interface with the ability to cancel the call:
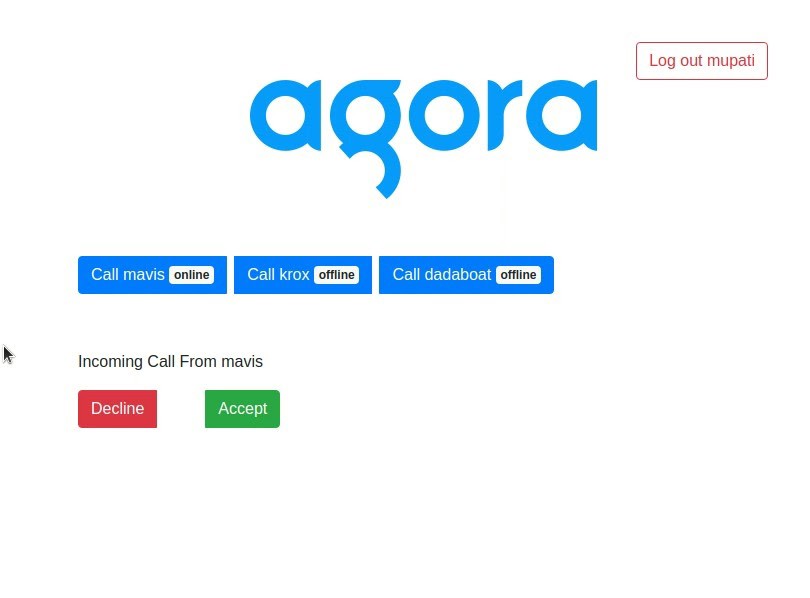
The callee/recipient gets an incoming call notification where they can either decline or accept the call:
Technical Explanation Video
The following video explains the logic for the video call:
4. Set the environment variables in .flaskenv:
FLASK_APP=app.py
FLASK_ENV=development
SECRET_KEY=
SQLALCHEMY_DATABASE_URI=sqlite:///db.sqlite
SQLALCHEMY_TRACK_MODIFICATIONS=False
TEMPLATES_AUTO_RELOAD=True
SEND_FILE_MAX_AGE_DEFAULT=0
ENABLE_DEBUG=True
AGORA_APP_ID=
AGORA_APP_CERTIFICATE=
Testing
1. Start the Flask development server from your terminal:
flask run2. Open two different browsers or two instances of the same browser, with one instance in incognito mode, and navigate to the registration page: http://127.0.0.1:5000/register
3. In one of the browsers, create four users by registering four times.
4. Login with the account details that you just created on each of the browsers from the login page: http://127.0.0.1:5000/login
5. Navigate to http://127.0.0.1:5000/agora_rtm.
6. In each of the browsers you opened, the other users registered on the application are displayed.
7. In one browser, you can call an online user by clicking the button that bears their name.
8. The other user is prompted to click the Accept button to fully establish the call.
Video Demonstration of the Video Call
To confirm that your demo is functioning properly, see my demo video as an example of how the finished project should look and function:
Conclusion
The Agora RTM and RTC SDKs give you the ability to build a fully-featured video call application. You can even use the RTM SDK to implement an in-app messaging feature.
While testing, one thing that stood out for me was the reconnection of the call when the internet connectivity on either side of the call failed for a short while.
Online demo link: https://watermark-remover.herokuapp.com/auth/login?next=%2Fagora_rtm
Completed project repository:
https://github.com/Mupati/agora-call-invitation
Note: Make sure the demo link or production version is served over HTTPS and the route is /agora_rtm.
Test accounts:
foo@example.com: DY6m7feJtbnx3ud
bar@example.com: Me3tm5reQpWcn3Q
Other Resources
- Available events on the Agora RTC Client.
- Agora RTM Web API Reference.
- For more information about Agora applications, take a look at the Agora Quickstart Guides.
- Take a look at the complete documentation for the functions discussed above and many more: Agora Web SDK API
And I invite you to join the Agora Developer Slack Community


