
In a previous blog post, we looked at how to add Agora cloud recording to a video chat application for storing the recordings in an Amazon S3 bucket. Here, we’ll go over how to fetch and playback the recorded videos in a React Native application.
We’ve updated the app and the back end from the last blog post to bring everything together. If you just want the demo, you can deploy the back end and build the app from the links provided.
Prerequisites
- An Agora developer account (see How to Get Started)
- An Amazon AWS account
- A Heroku account or another service to deploy the back end
- Understanding of React Native
Agora Setup
- Create a project: Once you have an Agora account, click the Project Management tab in the console. Click the Create button. Enter a name for your project. Select Secured Mode while creating the project.
- Enable cloud recording: Click the View usage button and select the option to enable cloud recording.
- Get app credentials: Copy the App ID and the App Certificate from the same page to a text file. We’ll use these later.
- Get customer credentials: Visit the RESTful API page and click the Add Secret button. Copy the Customer ID and the Customer Secret to a text file.
AWS Setup
Once you’ve created an AWS account, we need to create an Amazon S3 bucket to store our video recordings and an IAM user to access our bucket. If you have already completed this setup, you can skip this section.
- Go to your AWS IAM Console and create a user. Add the AmazonS3FullAccess policy with Programmatic Access. Copy your AWS Access Key and Secret Key to the text file.
- Create an Amazon S3 bucket:
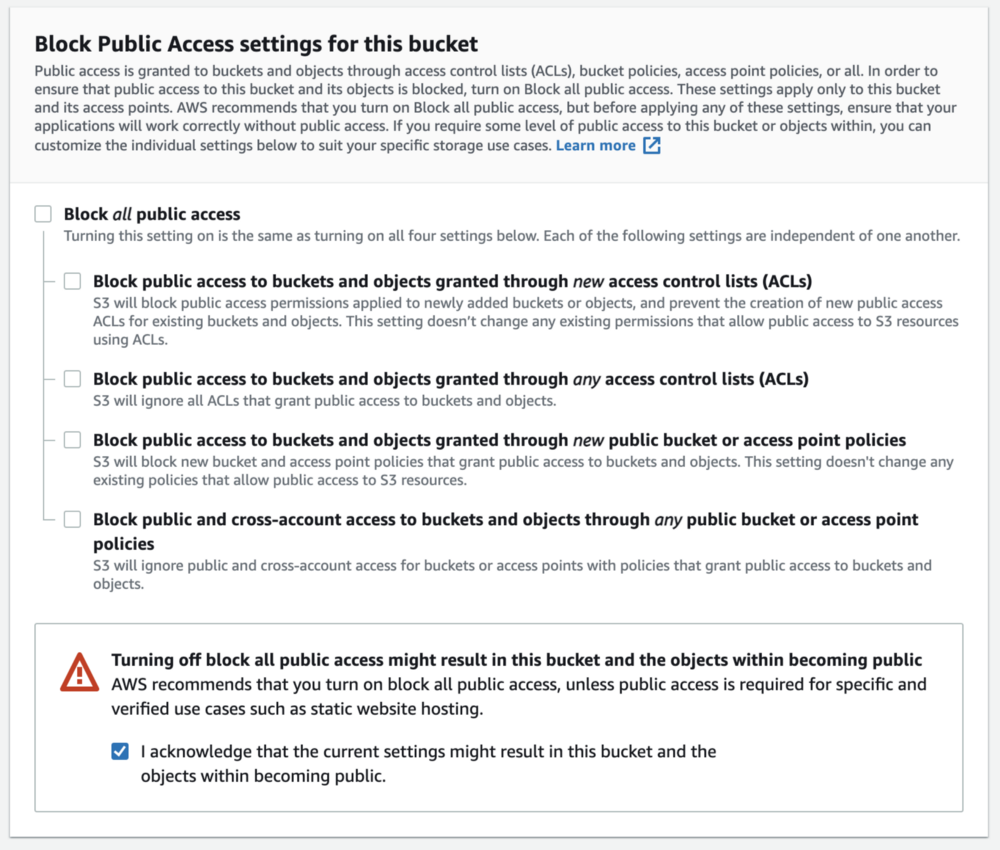
Choose a name for your bucket and copy it to a text file. We’ll use this text file later. Allow public access to stream media from your bucket by deselecting the block all public access check box. Click the Create Bucket button.
Note: With the URL for your recording, anyone on the internet can view it. We’ll discuss how to make the recording secure at the end of the post.
We’ll also need the region number for the selected AWS region. Go to this table, click the Amazon S3 tab, and note your region number. For example, if you’re using the US_EAST_1 region, your bucket number is 0.
3. Add the bucket policy.
To make files accessible by all users, we’ll add a bucket policy. Go to the Permissions tab in your newly created bucket and add this policy:
{
    "Version": "2012-10-17",
    "Id": "Policy1620917655085",
    "Statement": [
        {
            "Sid": "Stmt1620917653925",
            "Effect": "Allow",
            "Principal": "*",
            "Action": "s3:GetObject",
            "Resource": "arn:aws:s3:::agora-rec123/*"
        }
    ]
}
Deploying Our Back End
Before deploying our back end, we need the following variables. (It’s time to use our text file.) We’ll be using the Heroku one-click deploy to make it super simple to get our back end up and running. You can use any other service as well.
Note: We’ve updated the back end, so if you’re using the back end from the previous post, you should update it now.
APP_ID=
APP_CERTIFICATE=
RECORDING_VENDOR=
RECORDING_REGION=
BUCKET_NAME=
BUCKET_ACCESS_KEY=
BUCKET_ACCESS_SECRET=
CUSTOMER_ID=
CUSTOMER_CERTIFICATE=
Note: RECORDING_VENDOR=1 for AWS. Click this link for more information.
Building Our App
We’ll start from the app we developed in the last post, which lets you take part in group video calls and record them. I’ve refactored the app to move all the video call and recording components to ./components/Call.tsx. We’ll start with a new file: ./components/PlayRecording.tsx
We’ll use the Video component from react-native-video for HLS playback. We take in the back-end URL, App ID, and channel name as props to our PlayRecording component. We define an interface for our state. tracks will contain an array of URLs for each m3u8 file. currentTrack is the index of the URL we’re playing. statusMsg holds a string to display the current status of the video player.
We define our component and our initial state. In the componentDidMount we perform a GET request to the /api/get/recordingUrls/<ChannelName> route of our back-end server. We get the response JSON and update the tracks state array.
In our render method, we’re returning a list of tracks wrapped in TouchableOpacity using a ScrollView. When a track is selected, we update the currentTrack state with the track index.
We use the Video component with the source set as the URL we want to play (currentTrack index of our tracks array). We have event handlers to update our statusMsg. We also display the statusMsg in a Text component.
Putting it back together
We use the PlayRecording component in our App.tsx ;along with the Call component to put everything back together.
Security Consideration: As we discussed, with our current configuration all the recordings stored on the S3 bucket are public so that the React Native client can access them. Before we use the app in production, it’s important to set access control for our videos. Once we get our users authenticated, we can issue them access to the files, while keeping the files private for everyone else. You can find more information here and here.
Conclusion
You can find more information about cloud recording here. If you’re starting out with the Agora SDKs, take a look at the Agora Video Call Quickstart Guide and this blog post.
And I invite you to join the Agora Developer Slack community. Feel free to ask any React Native questions in the #react-native-help-me channel and cloud recording questions in the #cloud-recording-help-me channel.


