
In a previous post we built a group video chat app similar to a Google Hangouts/Meet. Now we want to build something more akin to Instagram Live. When building a live broadcasting web-app, the architecture is similar to that of a communication web-app, except with a slight twist.
For the sake of simplicity, this tutorial will walk through the process of creating a “one-to-many” live broadcasting web-app similar to Facebook and Youtube Live. The web-app will allow a single broadcaster to stream their video feed to a multi-person audience. This project can be extended to support “many-to-many” broadcasting, where multiple broadcasters are streaming to the same audience.
This tutorial will be a followup to “Building a Group Video Chat Web-App” and will assume a familiarity of some parts of the code.
For the TLDR crowd: there’s a CodeSandbox demo at the bottom of the post.
Prerequisites
- A simple web server (I use XAMPP)
- A way to support a secure (https) connection (I use ngrok)
- A developer account with Agora
- An understanding of HTML/CSS/JS
- An understanding of how Bootstrap and JQuery function
(minimal knowledge needed) - Read: Building a group video chat web-app
Architecture and Structure Design
In “Building a Group Video Chat Web-App,” the build conformed to the communication scenario, where every user in the channel has the ability to broadcast their audio and video streams.
In this project we will be implementing a broadcasting scenario, where there is a mix of users. Some users in the channel are broadcasting (broadcasters) their camera streams and other users that will be watching the content streamed by the “broadcasters” (audience).
In this case we need to limit the broadcasting capability to specific users while allowing all other users are in the audience they will only consume the broadcaster stream(s).
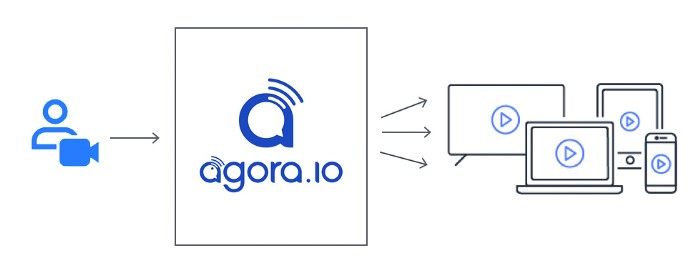
The graphic above helps us to visualize the flow of our broadcaster web-app. We can see we have to implement two different clients, one for broadcasters and one for the audience. Each client will have a unique interface for each of the user roles (broadcaster/audience) and both will connect to the Agora Software Defined Real-Time Network (SD-RTN).
Core Structure (HTML)
In our live broadcast web-app we will have two clients (broadcaster/audience), each with their own UI.
The broadcaster client is almost identical to the client we build for our communication web-app. The main difference being we won’t need to account for other broadcasters, since we’re building this as a one-to-many broadcast.
The above code should look very familiar with a few minor differences — we’ve added some comments to add drop down selectors for the camera and microphone buttons. Along with the button comments there are also two rows of comments for some modal windows that we need to add in.
<!-- insert RTMP Config Modal -->

<!-- insert External Injest Url Modal -->
Let’s start with the camera/mic buttons. We can use button groups to create simple containers for each and we’ll use Agora’s SDK to get the input devices and populate these containers. This will give the broadcaster the ability to switch their camera and microphone to any media device connected to their computer/tablet/phone.
We’ll use Javascript to populate these containers
Now we are ready to add in our models for configuring the settings for pushing our broadcast stream to RTMP servers. I’ll dive into pushing the stream to external servers a little later in the article, for now lets add the modals and input elements.
Make sure to take note of the input fields
Now that we have our broadcaster client we need our Audience client. The audience client is very straight-forward. We have some wrapper div along with the fullscreen div that we can set to 100% of the browser window height and width to play the broadcast video stream.
Giving it some style with CSS
As with our last project, we’ll use a mix of Bootstrap and some custom CSS. For both clients, we’ll use the same CSS file. The broadcaster client we can re-use most of the CSS from our communications web-app, with some adjustments/updates. For the audience, we can keep the CSS very simple.
Building the Javascript Clients
Let’s start with our broadcaster. I chose to use Agora’s WebSDK to simplify the heavy lifting generally associated with writing a WebRTC interface. I wrote a short post on how to get setup with Agora for anyone new to the Agora platform.
In our JS code for both clients we start by declaring and initializing the Client object. Once we create the Client object we can join or leave the channel.
var client = AgoraRTC.createClient({mode: 'live', codec: 'vp8'});Prior to joining the channel, we need to set our client’s role. Within Agora’s SDK, any user publishing a stream is by default a broadcaster, but I’d recommend being explicit about the client’s role within the stream to avoid any unwanted streams.
It shouldn’t be assumed that a broadcaster will always have a published stream. In that same breath, it can’t be assumed that an audience member will never try to publish a stream (consider someone trying to hack and inject their stream into the broadcast).
We’ll also need to add event listeners for the various engine events that Agora’s SDK provides. Most of the events should look familiar, as the broadcaster has all of the same controls as a video chat web-app, plus a few extras. We have liveStreamingStarted, liveStreamingFailed, liveStreamingStopped, liveTranscodingUpdated, and streamInjectedStatusas the new events. These events are related to the Agora’s ability to push out to external RTMP server or to pull in an external RTMP stream.
The RTMP Push/Pull features will allow us to push the video broadcast out to third party RTMP servers such as Facebook, YouTube, Vimeo, or any other service that accepts an RTMP stream and similarly pull streams from these same sources into our live stream.
Since RTMP Push/Pull is one of the more important additions to our broadcaster UI, let’s first take a closer look at the methods needed to push our stream out to an external service and then we’ll dive into how to pull an external stream into our broadcast.
The two main methods that enable us to push out are setLiveTranscodingand startLiveStreaming. Before we can push our stream to an RTMP server, we first need to set the transcoding configuration using client.setLiveTranscoding(config) passing an object with the various settings. Then, once we have our configuration set, we can call client.startLiveStreaming(url) passing the url we wish to push out to.
We are using a form to allow a user to configure the settings for their broadcast
We are using the form elements to allow the broadcaster to control their settings, but since we are building an object for the configuration we need to ensure that we are pulling the values with the correct types.
One area to take note, is the userCount and transcodingUser. In our example, the user count is hardcoded in because we are only broadcasting with a single user, but if you intend to have more than a single broadcaster in each channel you need to make this number dynamic to the number of streams you want to push to the external server. Along with userCount, the transcodingUser array in our example is a single element array, but you can make that dynamic if you wish to have more broadcasters in the external stream.
Another point worth mentioning: if you are broadcasting more than one stream to a 3rd party service using RTMP, the streams will be merged into a single stream. To allow developers to control the layout when the videos are merged into a single video stream. The configuration object allows us to set the overall width and height of the stream and then within the transcodingUser array we can also specify the scale and position of the individual streams within the merged video stream.
Earlier we added some dropdown UI elements to our microphone and camera buttons. Let’s now take the time to add in the Agora method to load the list of our devices.
Its best to wait until the user has granted permission to use the devices before we ask for the list of permissions because each browser has varying support as to how much information they return. For example, in Safari the browser will return an empty array but in Chrome the browser returns an array of devices but without any identifiable information. On the other hand, every browser gives consistent access once the user has granted permission.
In the snippet above we store the devices in arrays to quickly switch whenever the user selects a different device. The stream.switchDevice()method allows us to pass in the deviceId and quickly switch the input device on our broadcast stream.
When we are done, our agora-broadcast-client.js should look like the code below.
The audience client is much simpler. We have most of the same event listeners but in our use-case we will only need a handful of them. We’ll include the extra ones in the even that we want to extend the demo at a later date. Below is the full implementation of our agora-audience-client.js.
Testing Setup (webserver/https)
There are a few different ways to test and deploy our broadcast web-app. We can use localhost but if we want to share with our friends we must spin up a simple web server with a https connection. This is due to browser restricts when accessing userMedia resources like the camera and microphone.
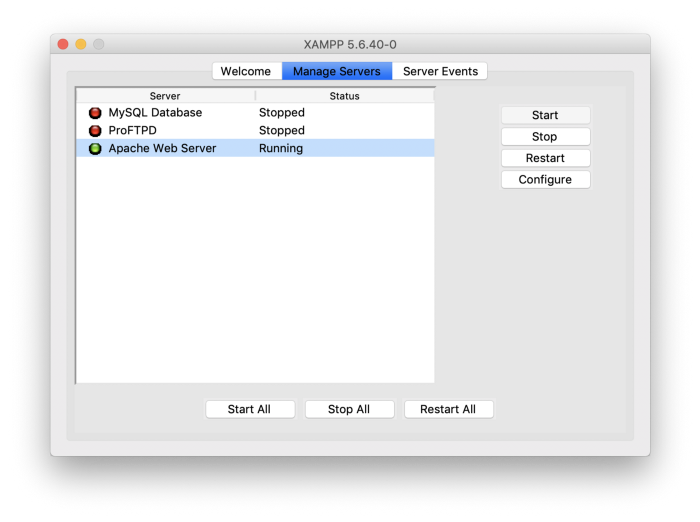
To keep things simple, I like to use XAMPP to enable an APACHE webserver locally in conjunction with ngrok, a service that creates a tunnel out from your local machine and provides an https url for use. In my experience, this is one of the simplest ways to run an https secured web server on your local machine.
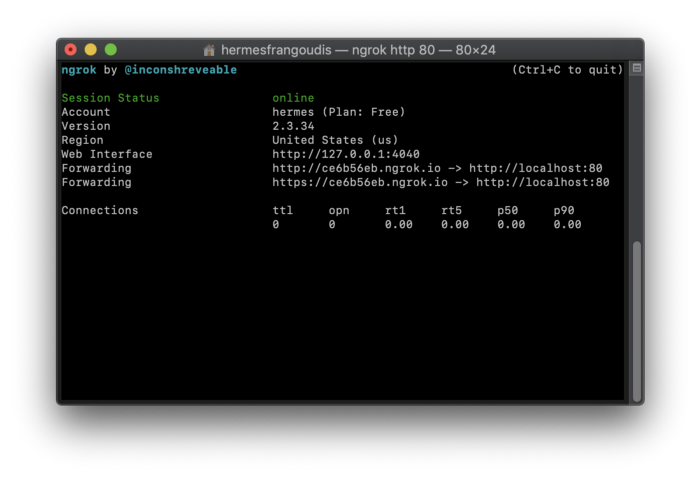
Once the server is ready we can share our ngrok link with a friend or two and run our test broadcast.
NOTE: For testing I am using an iPad and iPhone as the audience, and my laptop is the broadcaster.
That’s a wrap
Thanks for following along. Now it’s your turn to go and build something amazing!
Thanks for taking the time to read my tutorial and if you have any questions please let me know with a comment. If you see any room for improvement feel free to fork the repo and make a pull request!
Please note: Due to high demand, I have updated the Code Sandbox example code to not include an AppId.
You will need to register for a free Agora account to get AppId to test the demo. If you need help, I have a quick 3 step guide.
Once you have your AppId, open js/agora-audience-client.js and js/agora-broadcast-client.js and add your AppId


