
The Agora Video for WordPress plugin lets you easily add live broadcast or video conferencing functionality to your WordPress posts and pages. Create and configure “broadcast” or “communication” channels through the WordPress Admin dashboard. Each channel has its own settings page, where you can customize the call/interactive-broadcast settings.
Installation
There are a few different ways to install the WP Agora plugin; you can use the WordPress Admin dashboard or FTP.
Plugins Directory
- Go to the Add New section of the Plugins section of your WordPress Admin Dashboard.
- Search for
Agor. - Click the Install Now button.
- Once the plugin status changes to “Installed,” the Active button will appear. Click the Activate button.
Plugins Upload
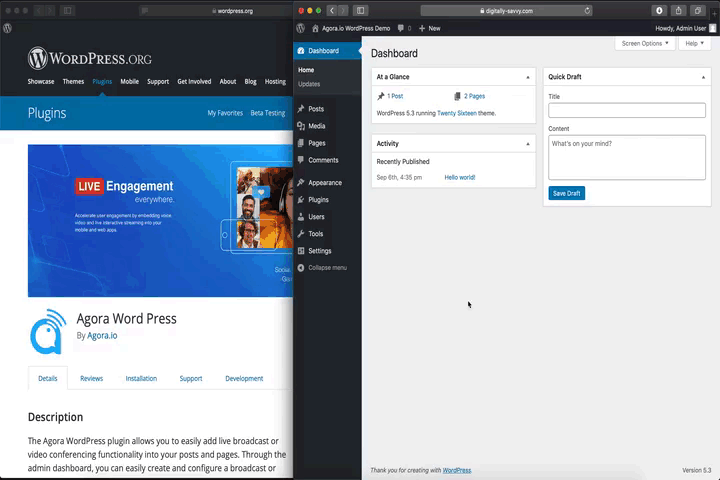
- Visit the Agora Video for WordPress plugin page (https://wordpress.org/plugins/wp-agora-io/) and download the plugin zip.
- Go to the Plugins section of your WordPress Admin Dashboard.
- Click the “Upload” button and then upload the
wp-agora-io.zipthrough the WordPress Admin Dashboard. - The plugin upload screen will load. Once “Plugin installed successfully…” click the Activate button.
FTP

- Visit the Agora Video for WordPress plugin page (https://wordpress.org/plugins/wp-agora-io/) and download the plugin zip.
- Unzip and upload the wp-agora-io folder to the
/wp-content/plugins/directory. - Activate the plugin through the Plugins section in WordPress Admin Dashboard.
Setup
Just as with installation, there are a few different ways to setup the WP Agora WordPress plugin. The Basic setup will get you up and running with the basic live broadcasting and video communication channels. The Advanced setup will allow you to enable features such as pushing streams to third-party CDN servers or ingesting streams from CDN servers into channels. Advanced setup also enables Cloud Recording to allow your broadcasters to easily record their live streams to the Cloud Storage provider of your choosing.
Basic Setup
- Create or Login to an Agora developer account (https://console.agora.io).
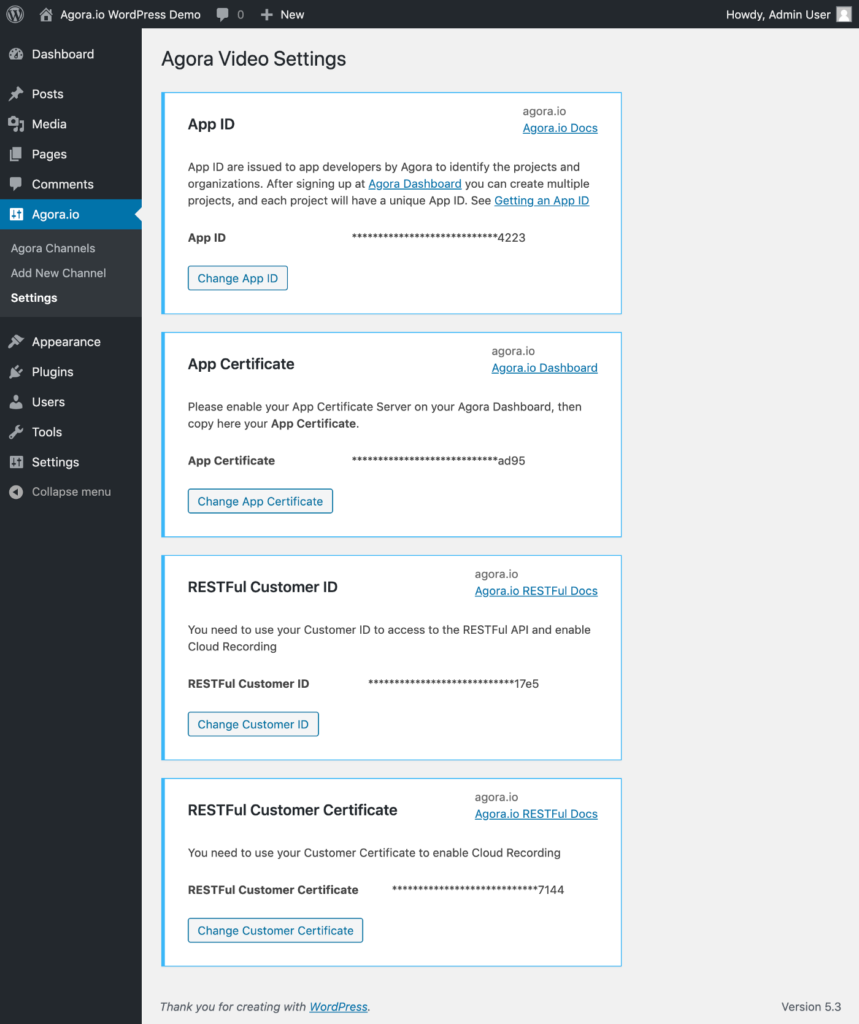
- Create a project and take note of the
App IDandApp Certificatekeys. - Navigate to the Agora WordPress Settings page and input
App IDandApp Certificatekeys.
Advanced Setup
- Create or Login to an Agora developer account (https://console.agora.io).
- Create a project and take note of the
App IDandApp Certificatekeys. - Navigate to “Products and Usage” page. Enable
RTMPandCloud Recording. - Navigate to the Dashboard API section of your Agora Console (https://console.agora.io/restfulApi) and take note of your
Customer IDandCustomer Certificatekeys. - Navigate to the plugin’s Settings section and input
App ID,App Certificate,Customer ID, andCustomer Certificatekeys.
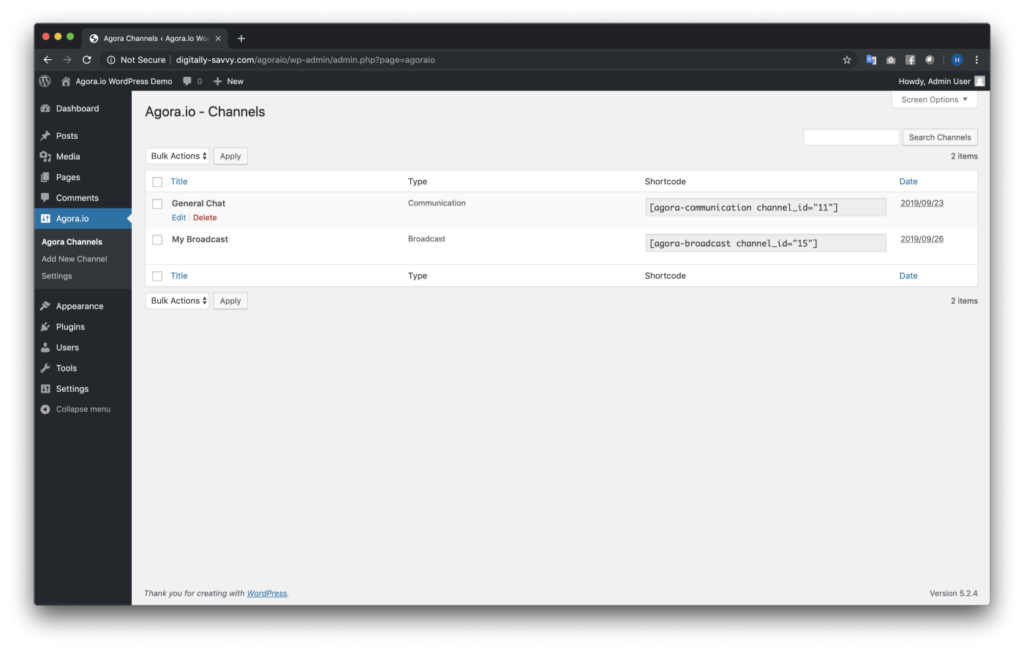
View All Channels
Click the Agora section within the WordPress Admin Dashboard. This will display a list of channels that have been created. You can click to edit or delete the existing channels.
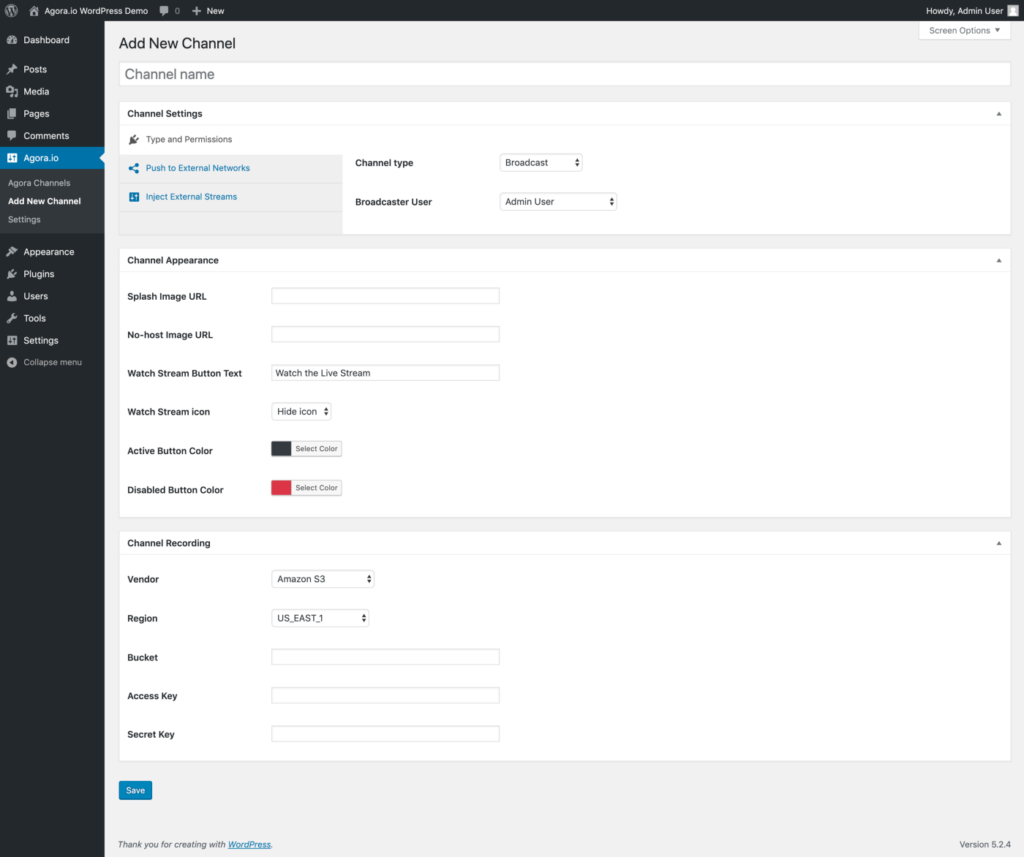
Create a Channel
Click the Add New Channel section within the Agora plugin section of the WordPress Admin Dashboard. Here you will be presented with many options. The first option is to select the type of channel that you want to set up. Each channel type has its own set of options/settings and the UI will update and adjust once you have made your channel type selection.
Agora Shortcode
Once you have created your channel, a shortcode is created for you. Wp Agora has two shortcodes, depending on which channel type you are using.
For communication use:
[agora-communication channel_id=""]For broadcasting use:
[agora-broadcast channel_id=""]Make sure to fill in the Channel ID value with the ID from when you created the channel.
The Agora Video for WordPress plugin also exposes the video_profile setting as part of the shortcode. If the setting is omitted, then the plugin will not set a profile and the Agora SDK will use its default profile.
For communication use:
[agora-communication channel_id="" videoProfile="720p_3"]For broadcasting use:
[agora-broadcast channel_id="" videoProfile="720p_3"]Full list of available video profiles: https://docs.agora.io/en/Video/video_profile_web?platform=Web#recommended-video-profiles
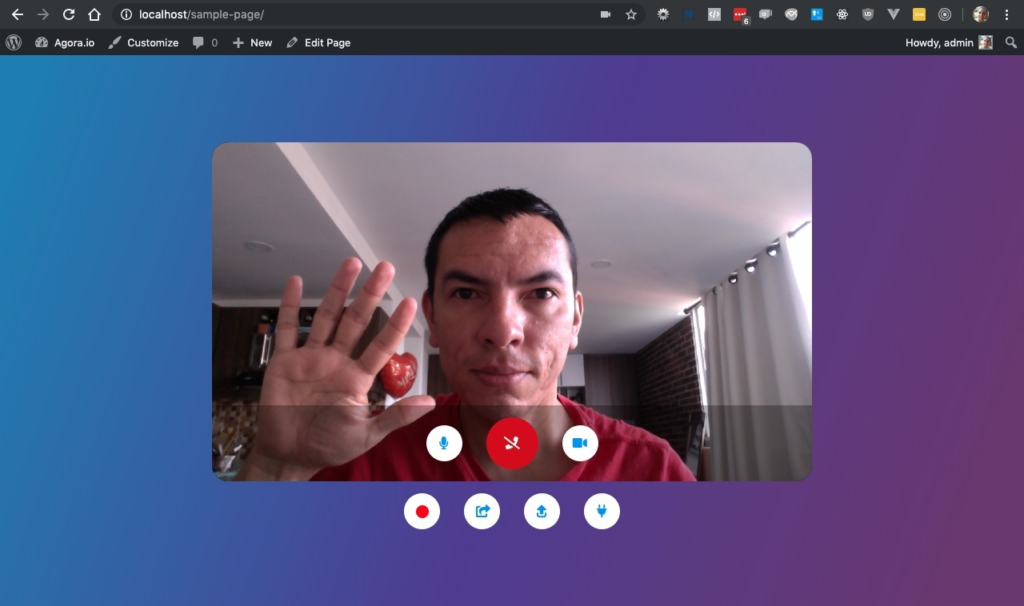
Embed Channel in Post or Page
WP Agora makes it very simple to quickly add a live broadcast or communication channel to your Post or Page using the Agora shortcode.

Live Broadcast
In live broadcast mode, only the designated user will be able to broadcast their video stream. All other users who have access to the page will be audience members.
Group Chat
In group communication mode, any user that has access to the post or page will be able to join and publish their video feed within the channel.

Thanks for taking the time to read my tutorial and if you have any questions please let me know with a comment. If you see any room for improvement, please file a feature request or feel free to fork the repo, make your update and submit a pull request!
Other Resources
- The Agora Video for WordPress plugin is based on the Agora WebSDK. Complete API is available in the Agora Documentation Center
- For technical support, submit a ticket using the Agora Console


