
One thing that makes any game more fun is having the ability to chat with other players in the game. Games have been including voice chat services for years but when it comes to Unity, there are a limited options. The best option I’ve found is the Agora Voice SDK for Unity available through the Unity Asset Store. Getting a sample app up and running is simple and took less than 10 minutes. Let’s run thought the steps together.
Prerequisites
- Unity Editor
- A developer account with Agora
Getting Started
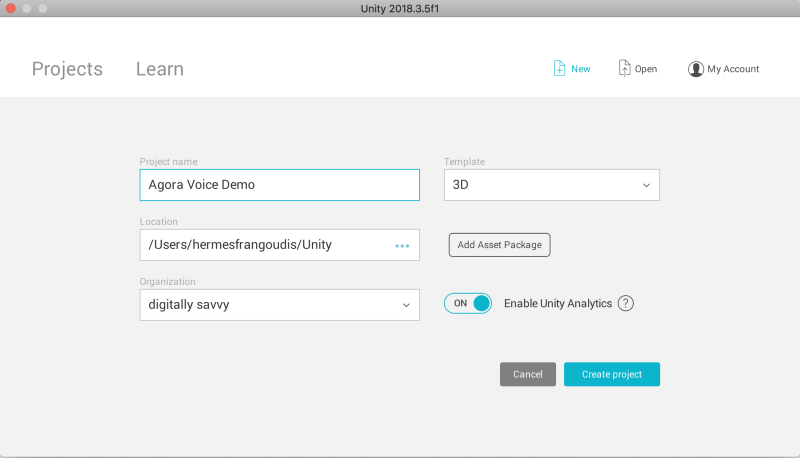
To start, let’s open Unity and create a blank new project, I chose to name my project Agora Voice Demo.
The next step is to navigate to the Unity Store (if you are in the scene view, click the Unity Store tab) and search for “Agora voice SDK”.
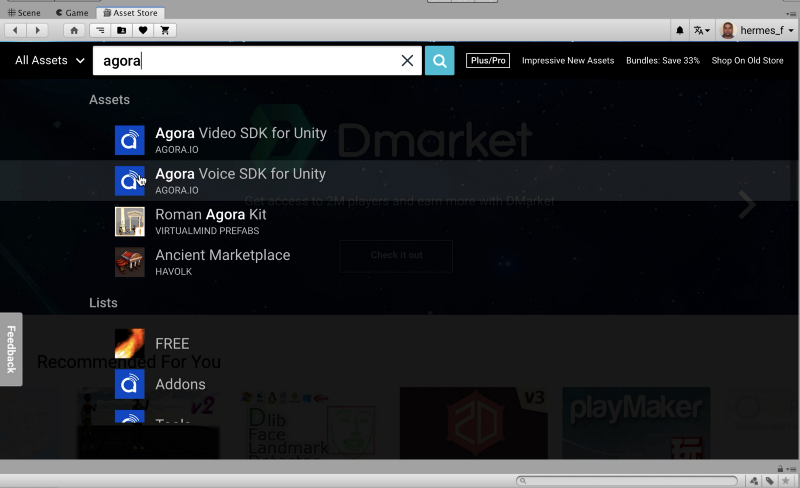
Once the plugin page has loaded, go ahead and click Download. Once the download is complete, click and Import the assets into your project.

Update code
Great! Now that we have the plugin downloaded and imported to our project we need to make 1 quick update before we can build and run our app. Double click the TestSceneScript.cs file within the assets panel to edit it.

The file will open in Visual Studio (Unity’s default code editor). Let’s scroll down to line 19.
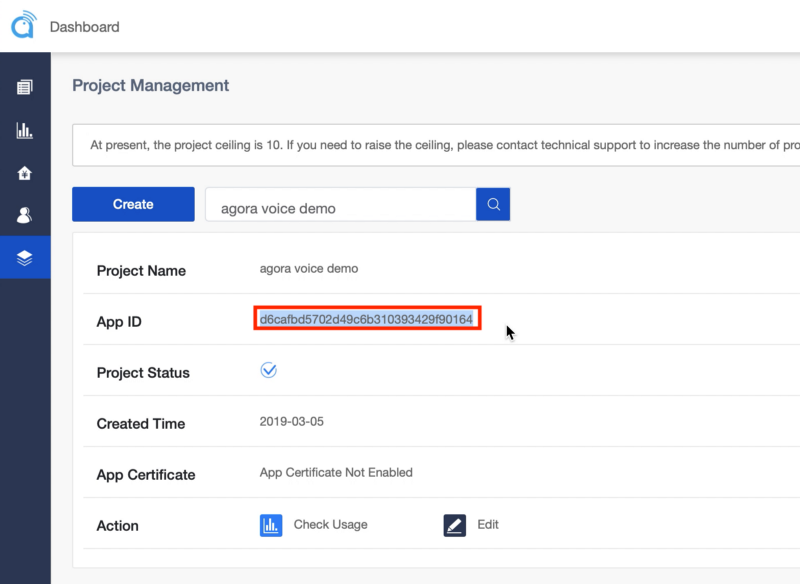
private string appId = "YOUR APP ID";At this point we need to log into our Agora developer account and create a new AppID or select an existing one. I had previously created one so I’ll copy paste this appid into the “ ” on line 19. Make sure to save your changes.
We can scroll through the TestSceneScript.cs file to see all the various event callbacks the Agora Voice SDK for Unity offers.
Building For iOS
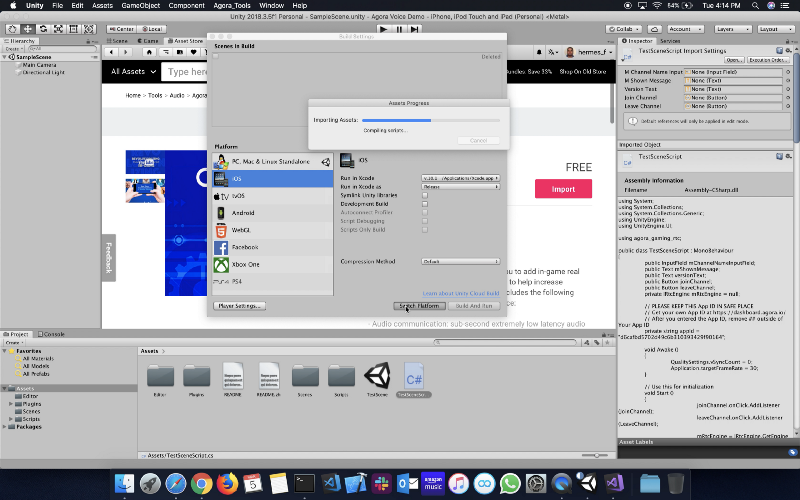
Now we are ready to build the project, so click back into Unity and open the Build Settings (File > Build Settings). When the Build Settings dialog box appears, make sure to drag the TestScene from the assets list into the “Scenes in Build” list.

Next select iOS from the Platform list and click Switch Platform.
Once Unity finishes its setup process, open the Player Settings. We need to make sure we give our app a unique bundle id, I chose com.agora.voicedemo. The last step is to add a short sentence within the “Mic Usage Description”section. This will add the proper permissions to the info.plist and will allow use the mic.

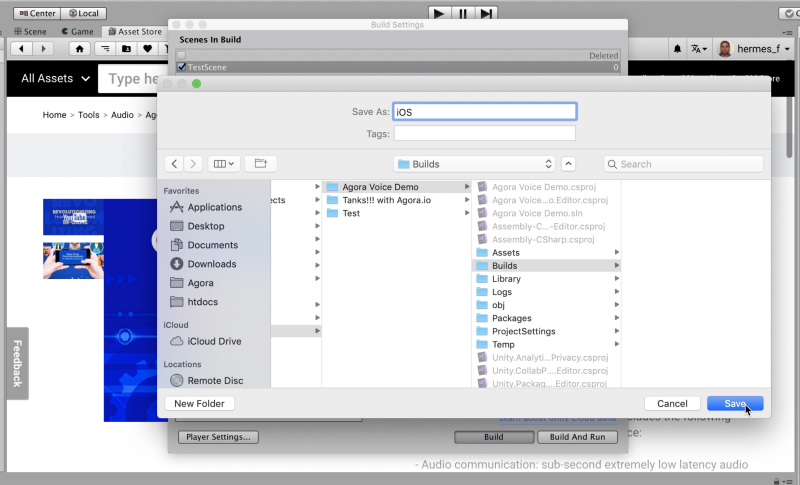
We are now ready to build our app! Within the Build Settings dialog click the Build button, and Unity will prompt you for a location to save the build. I like to create a Builds folder to keep things organized. Save your build within the newly create Builds folder, I chose the name iOS.
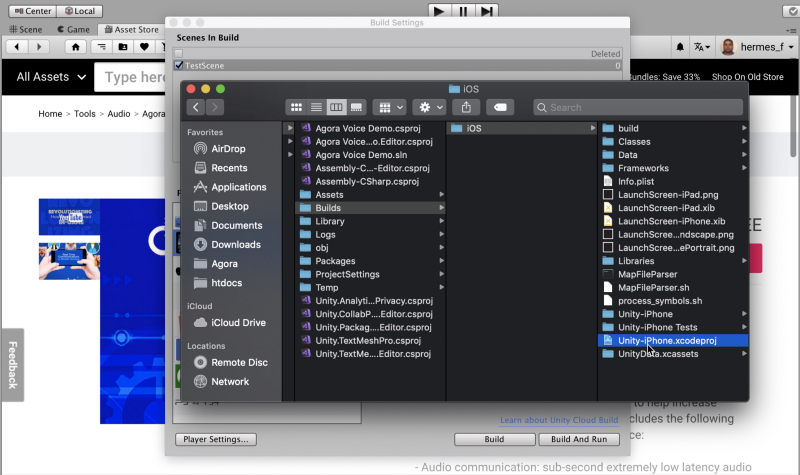
After Unity finishes building the iOS app the Finder window will appear containing the Unity-iPhone.xcodeproj, double click the file to open XCode.
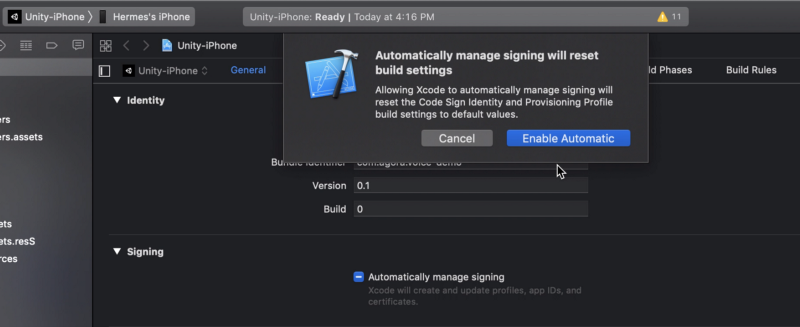
Once XCode is open, select the project (from the file navigator on the left) and enable Automatic Signing and select your team profile.
Lastly, make sure your test device is plugged in and click the Play button.

Building For Android
Now we are ready to build the project for Android, so click back into Unity and open the Build Settings (File > Build Settings).
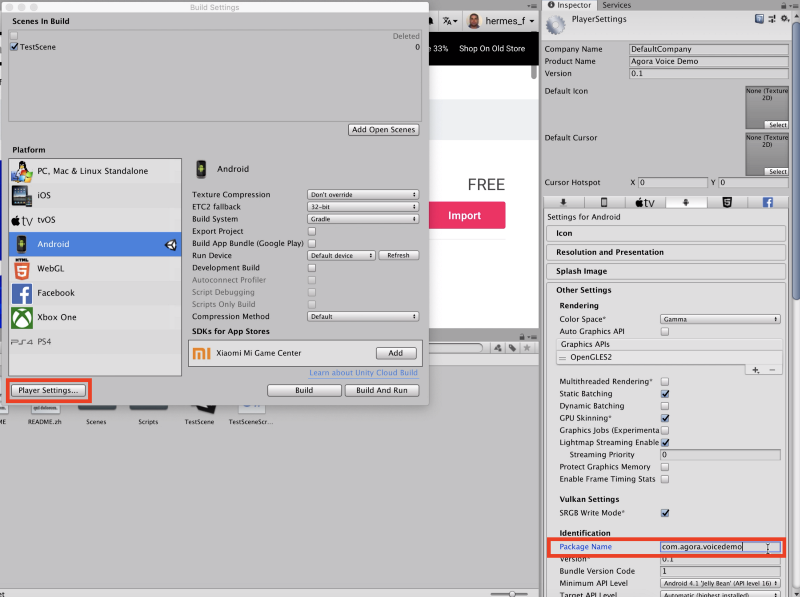
When the Build Settings dialog box appears, select Android from the Platform list and click Switch Platform. Once Unity finishes its setup process, open the Player Settings. We need to make sure our Android app also has a unique bundle id, I chose com.agora.voicedemo.
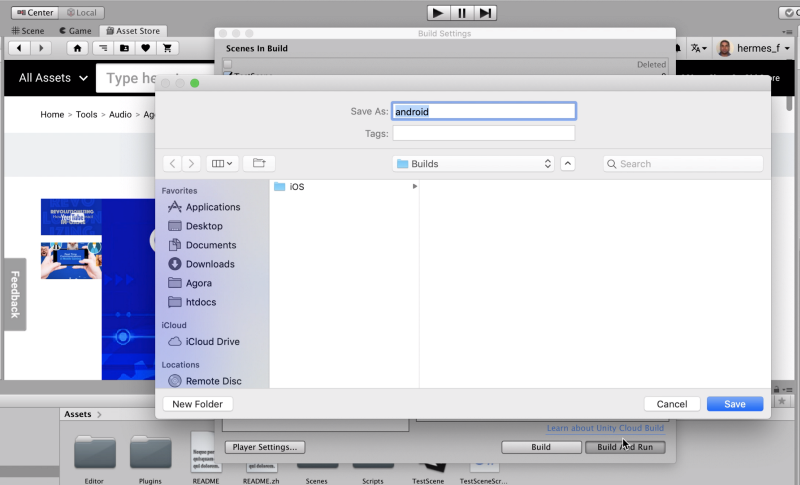
Make sure your Android device is plugged and click Build And Run. Unity will prompt you to save your project, I named my build Android.
Unity will build and deploy your app to your Android device.

Note: Newer versions of Unity will ship with a new version of gradle and this can cause compile errors. You may run into an issue when building for Android, where Unity throws an error “Unable to build gradle”. If this happens open your file explorer and navigate into the project Assets > Plugins > Android and delete the mainTemplate.gradle file.
All Done!
Thanks for following along, feel free to leave a comment below!

Note: to really test the voice chat functionality you’ll have to deploy the app to two devices. When both devices connect to the same channel you will be able to speak and hear the audio on each device.


