
This blog was written by Sai Sandeep Rayanuthala, an Agora Superstar. The Agora Superstar program empowers developers around the world to share their passion and technical expertise, and create innovative real-time communications apps and projects using Agora’s customizable SDKs.
Security for video chat applications is very important. In the Agora platform, one layer of security comes in the form of token authentication. This guide explains how to build a simple microservice using Java and Jersey to generate an Agora RTC token.
Prerequisites
- Apache Tomcat, IntelliJ IDEA IDE, Jersey framework, and Docker.
- Basic understanding about how the REST framework works.
- Basic understanding of classes in Java.
- Agora developer account.
What you’ll do today:
- Build a Jersey project.
- Create a Hello World API.
- Generate Agora token.
- Dockerize application and deploy it on a Ubuntu VM.
Project Setup
Archetype: Archetype is a Maven project templating toolkit.
Artifact: An artifact is a file, usually a JAR file, that gets deployed to a Maven repository. A Maven build produces one or more artifacts, such as a compiled JAR file and a source JAR file.
jersey-quickstart-webapp provides a basic project template to work on. It is very useful for beginners and powerful enough.
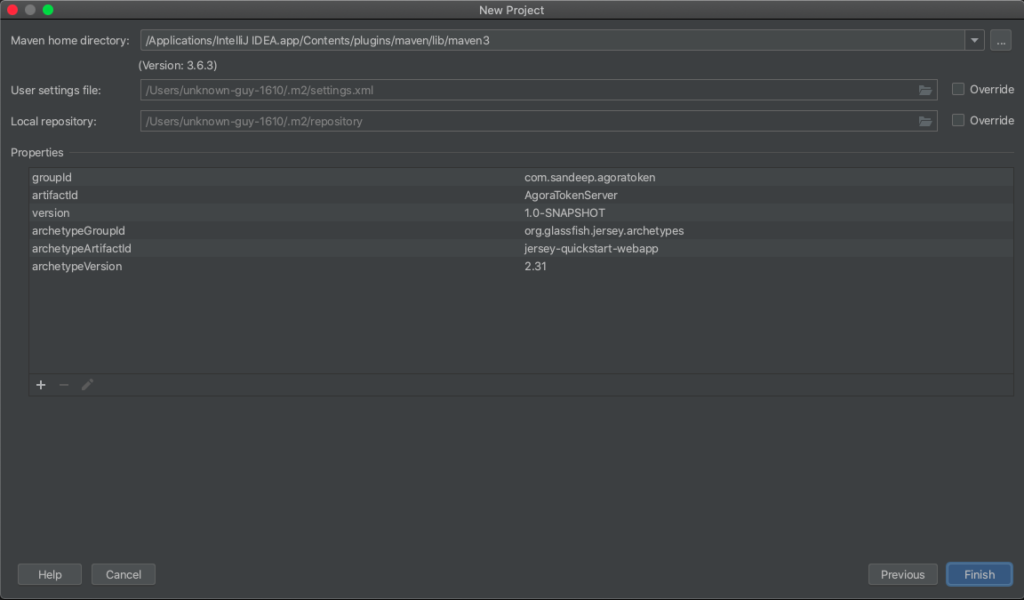
Open your IntelliJ IDE and click start new project. We are gonna build it using Maven. Click Create from Archetype and add an Archetype with the following configuration.
Group Id: org.glassfish.jersey.archetypes
Artifact Id: jersey-quickstart-webapp
Version: 2.31
The final configuration of the project looks like this:
Once your project is built, we will add the Tomcat server. If you don’t have one installed you can get Tomcat from this link. After completing the installation of Tomcat you can click Add Configuration, which is next to the build icon.
From templates choose Local Tomcat Server. The final configuration looks like this:
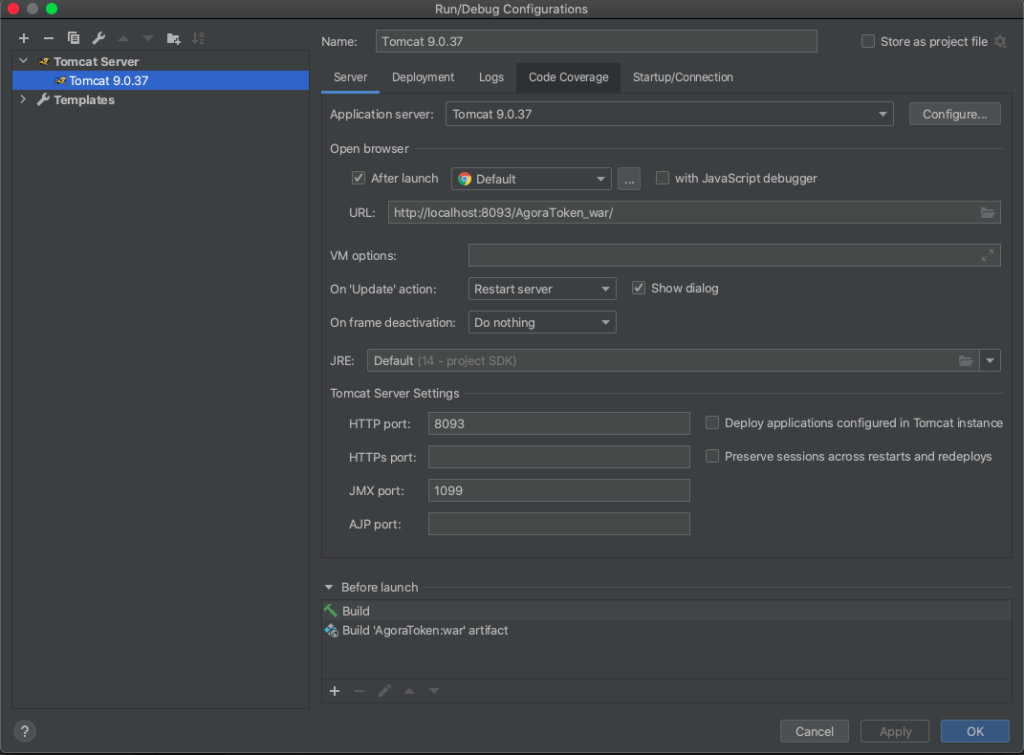

Once you’re done apply the configuration and close the configuration window. You are done setting up your Jersey project and configured Tomcat server.
Hello World API
In this section, you create a Hello World API with JSON and XML input and output.
Navigate to pom.xml (which holds all the Maven dependencies), uncomment the JSON dependency, and add the JAVAX dependency. Your dependencies should look like this:
Edit src/main/webapp/index.JSP and add the following code to the file:
Now build the project. After a successful build, IntelliJ opens the browser for you. By default, the index.JSP file is displayed in the browser. The browser should show something like this:
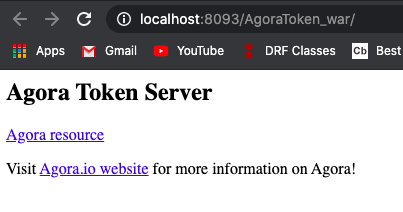
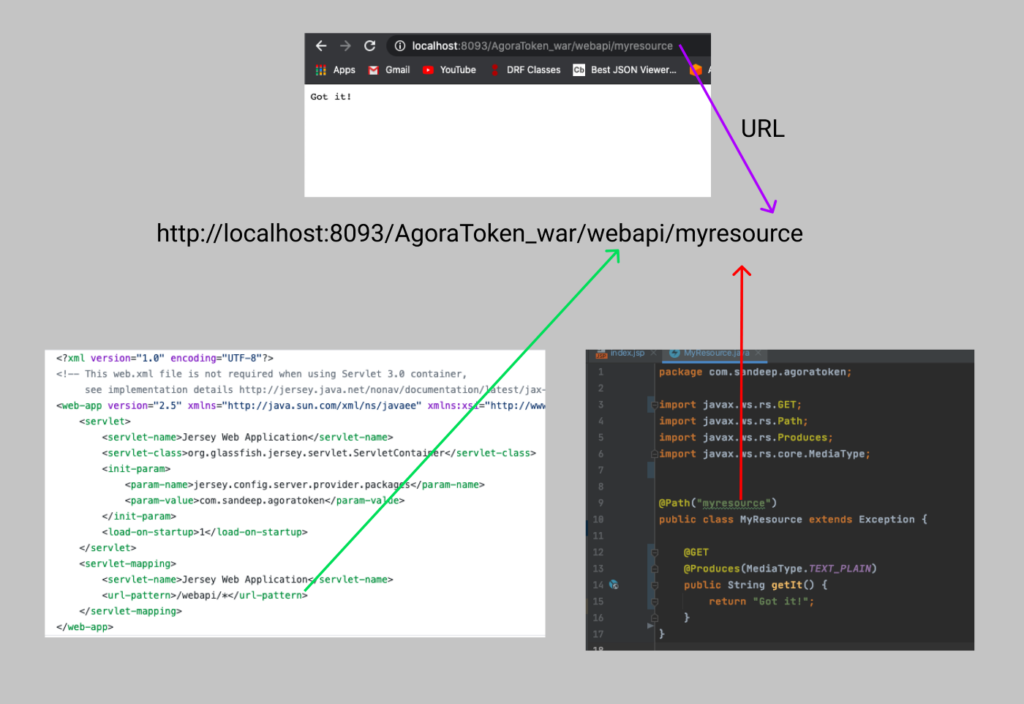
Click jersey resource, which redirects you to a new page:
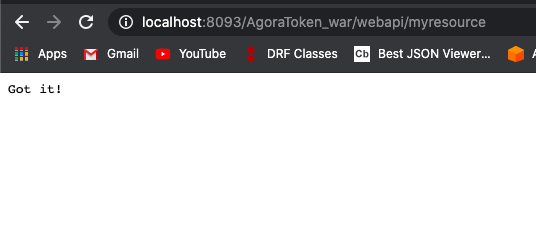
Notice the URL. By default, ServerletMapping maps everything to /webapi/*. You change that to /*.
Restart the server. webapi is removed.
How did “Got it!” appear on the website? Head to the MyResource Java class. It looks something like this:
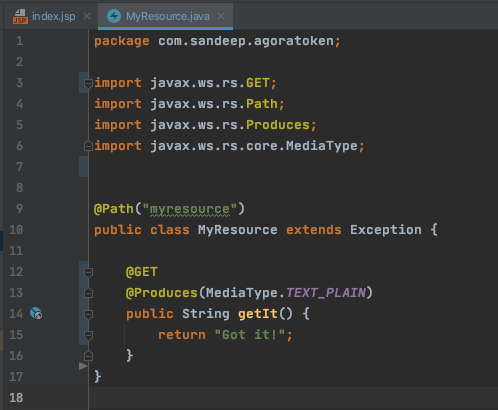
Here we added a Path annotation (@ PATH). which is used to define a URI matching pattern for incoming HTTP requests for the MyResource class.
We got “myresource” in the URL due to this Path annotation ( i.e., @ PATH(“myresource”) ). We defined @ GET (line 12) for the getIt() method, which specifies that this will use the GET HTTP method. @ Produces annotation (line 13) defines the return response format.
Now you add Agora to the project.
Go on to https://bit.ly/AgoraJAVAGithub, clone the whole repository, and copy and paste the Media and RTM folders. The file structure should look like this:
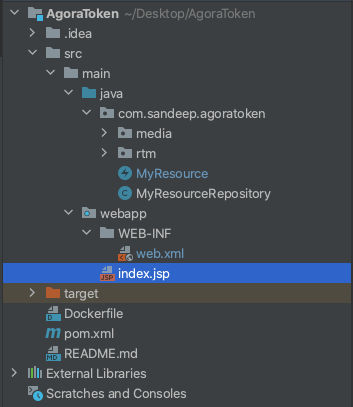
Note: Go to every file and correct the package name to avoid errors. In my case, it should be com.sandeep.agoratoken instead of io.agora. Usually, IntelliJ does this for you.
Once you are done create 3 new java classes by right-clicking the java folder named Agora, AgoraRepository, and AgoraRTMRepository, and delete the MyResource file.
Paste the following code in your AgoraRepository:
Paste the following code in your AgoraRTMRepository:
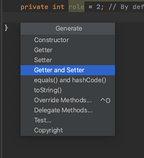
Now you need getters and setters.
Go to AgoraRepository class and enter the command for your operating system:
* Ctrl + N for Linux and Windows users
Your file should look like this:
Repeat this step in AgoraRTMRepository. Your file should now look like this:
You can see something like this. Click Getter and Setter and select everything. We are almost done with Agora Token Server.
Import stuff and define the Token Server RTC POST Request:
Initialize all parameters:
Do some checks before creating the tokens to make sure everything is correct:
Create a timestamp and complete the generation of token:
Hurray! You’re done building the Agora Java RTC token server. Now it’s time to get started with Agora RTM token server.
Add the following code to your Agora class:
Your final code should look like this:
Are we done? No, there’s still deployment.
Deployment
First, you need to create a WAR file. Open Maven from the right toggle bar, and click the Maven Icon to execute a command:

Now run mvn clean package
A WAR File is generated in a minute or two. You can see the location of the WAR file.
Create a Dockerfile in your repository, and push your code to GitHub.
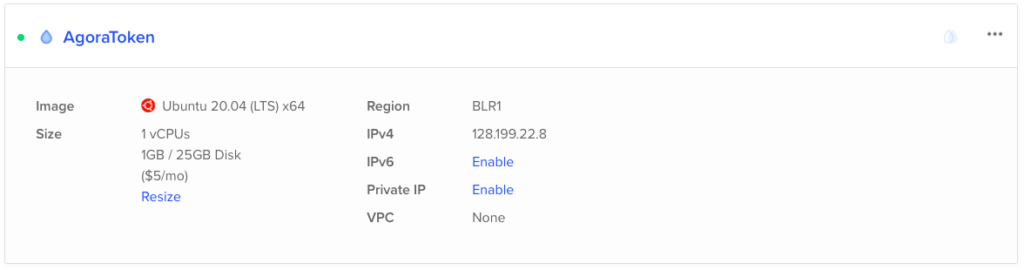
Create a Ubuntu VM.
Run the following commands to install Docker on Linux:
sudo apt-get update

sudo apt-get install \
    apt-transport-https \
    ca-certificates \
    curl \
    gnupg-agent \
    software-properties-common

curl -fsSL https://download.docker.com/linux/ubuntu/gpg | sudo apt-key add -

sudo add-apt-repository \
   "deb [arch=amd64] https://download.docker.com/linux/ubuntu \
   $(lsb_release -cs) \
   stable"

sudo apt-get update

sudo apt-get install docker-ce docker-ce-cli containerd.io
Mac and Windows users can get the executable file from this link.
Run this command to check if Docker is installed -> docker -v
Clone your repository into your VM. And run the following command:
nano src/main/java/com/sandeep/agoratoken/MyResourceRepository.java
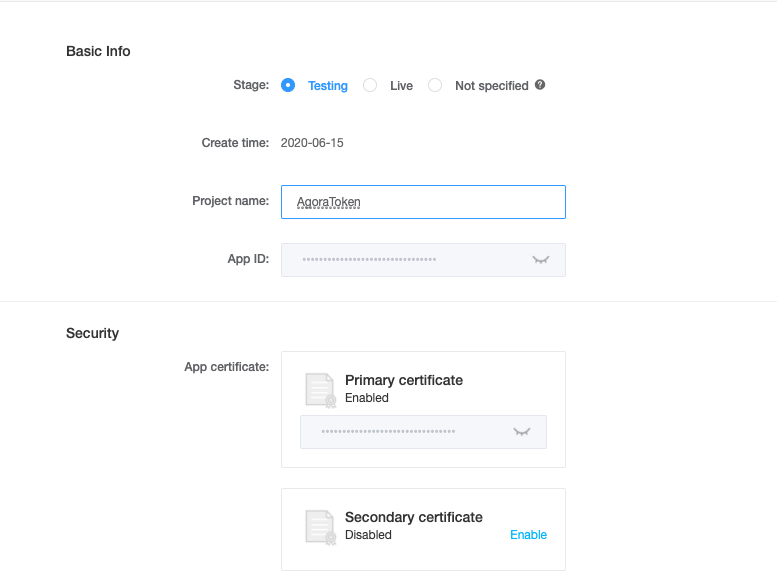
Fill your APP_ID and APP_CERT. You can get APP_ID and APP_CERT from your Agora Console.
To build the Docker image, run the following command:
docker build -t agoratoken ./OK, run it!
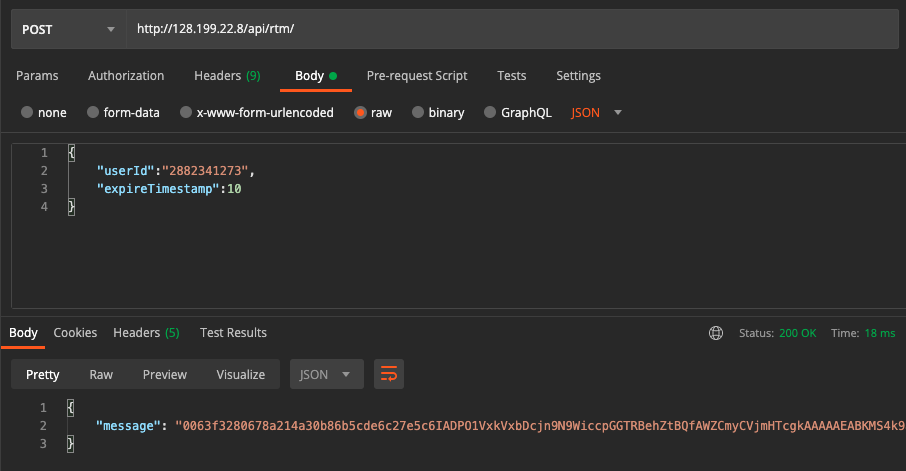
docker run -p 80:8080 agoratokenCheck the API.

Other Resources
For more information about the tokens for Agora applications, please take a look at the Setup Authentication guide and Agora Advanced Guide: How to build a Token(Go).
I also invite you to join the Agora Developer Slack community.
Github repo: https://github.com/raysandeep/AgoraToken


