
Ever built a cross-platform mobile multiplayer game in Unity and wanted to add in some custom group video chat capabilities? If you answered yes, first let me tip my hat to you because that's a big task! If you answered no (or yes but are still interested in Unity voice chat as you play), today is your lucky day! I will spend some time explaining how to easily add cross-platform video communication to your existing Unity project.
For those that don’t have a multiplayer game but are still interested in Unity multiplayer chat? Well, don’t worry because you’ve come to the right place. I chose to use a pre-built Tanks!!! reference project (based on Unity’s popular Tanks tutorial) which has a nice set of video tutorials for those interested in learning more about the game build.
Before we get started on building Unity voice chat for multiplayer platforms, there are a few prerequisites for anyone reading this article.
Prerequisites
- Unity and a Unity Developer account
- Knowledge of how to build your Unity project for iOS and Android apps
- A cross-platform mobile multiplayer Unity game (I chose to use Tanks!!!)
- An understanding of C# and scripting within Unity
- An Agora developer account
- At least two mobile devices (one iOS & one Android is ideal)
Project Setup
If you plan to use your own existing project to build your Unity voice chat, go ahead and open it now and skip down to “Integrating Group Voice Chat”.
For those readers that don’t have an existing project, keep reading (the next few sections are for you).
New Unity Project
Please bear with me as the basic setup has a few steps and I’ll do my best to cover it swiftly with lots of images. Let’s start by opening Unity, creating a blank project.

I named my project Tanks!!! with Agora
If you’ve previously downloaded the Tanks!!! asset package, you can select Tanks!!! using the “Add Asset Package” button.

If you don’t have the asset downloaded, create a new project and download it from the Unity Store.

Download and import the project.
There are a couple more steps to getting the Tanks!!! reference project ready for building on mobile. First, we need to enable Unity Live Mode for the project through the Unity dashboard. (select project → Multiplayer → Unet Config).

Set max players to 6 even though Tanks!!! limits games to 4 players and click save.

Once Unity Live Mode is enabled.
Building for iOS
Now that we have Unity’s multiplayer enabled, we are ready to build the iOS version of the online video chat. Let’s start by opening our Build Settings and switch our platform to iOS and build the project for testing.

After switching platforms to iOS make sure to update the Bundle Identifier.
Please note: You need to have Xcode installed and set up before attempting to build the Unity voice chat project for iOS.

When building for the first time, I create a new folder “Builds” and save the build as iOS.

After the project has successfully been built for iOS, we will see the project in the Builds folder.
Let’s open Unity-iPhone.xcodeproj, sign, and build / run on our test device.

I enabled automatic signing to simplify the system signing process.
Don’t start celebrating just yet. Now that we have a working iOS build, we still need to get the Android build running.
Building for Android
Android is a bit simpler than iOS since Unity can build, sign, and deploy to Android without the need to open Android Studio. For this section I’m going to assume everyone reading this has already linked Unity with their Android SDK folder. Let’s start by opening our Build Settings and switching our platform to Android.
Before we try to “Build and Run” the project on Android we need to make a couple adjustments to the code. Don’t worry, this part is really simple: we only need to comment out a few lines of code, add a simple return statement, and replace one file.
Some background: The Tanks!!! Android build contains the Everyplay plugin for screen recording and sharing your game session. Unfortunately Everyplay shut down in October 2018 and the plugin contains some issues that if not addressed will cause the project to fail to compile and to quit unexpectedly once it compiles.
The first change we need to make is to correct a mistake in the syntax within the Everplay plugin’s build.gradle file. Start by navigating to our project’s Plugins folder and click into the Android folder and then go into the everyplay folder and open the build.gradle file in your favorite code editor.

Now that we have the Gradle file open, select all and replace the default with the code below. The team that built Tanks!!! updated the code on GitHub, but for some reason it didn’t make its way into the Unity Store plugin.

The last change we need to implement is to disable EveryPlay. Why would we want to disable EveryPlay, you may ask. That's because when the plugin tries to initialize itself it causes the Android app to crash. The fastest way I found was to update a couple lines within the EveryPlaySettings.cs, (Assets → Plugins → EveryPlay → Scripts) so that whenever EveryPlay attempts to check if it’s supported or enabled, we return false.

(Assets → Plugins → EveryPlay → Scripts → EveryPlaySettings.cs)
Now that EveryPlay works, we are finally ready to build the project for Android! Within Unity open the Build Settings (File > Build Settings), select Android from the Platform list, and click Switch Platform. Once Unity finishes its setup process, open the Player Settings. We need to make sure our Android app also has a unique bundle id, I chose com.agora.tanks.voicedemo.

Integrating Voice Chat
For this project I chose to use the Agora Voice SDK for Unity, because it makes implementation into our cross-platform mobile project really simple.
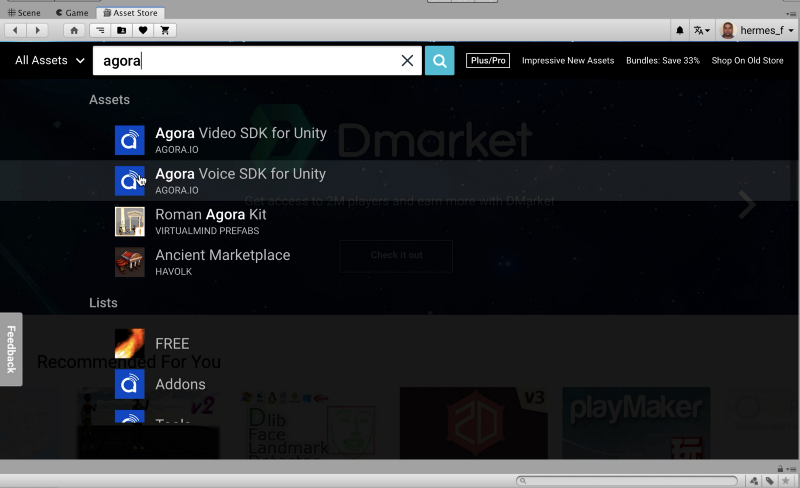
Let’s open up the Unity Store and search for “Agora voice SDK”.
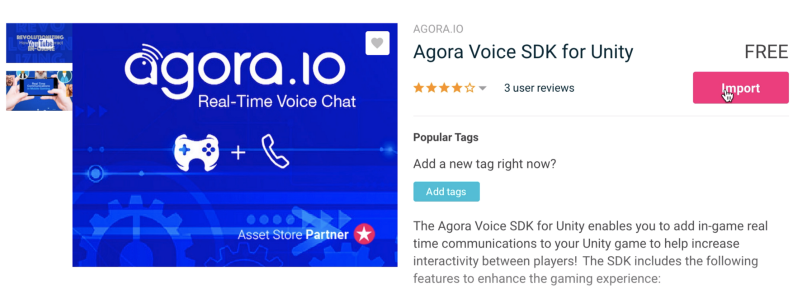
Once the plugin page has loaded, go ahead and click Download. Once the download is complete, click and Import the assets into your project.
We need to create a script to interface between our game and the Agora Voice SDK. Open the LobbyScene, select the PersistantUIAudio Game Object, and add a C# Script component, AgoraInterfaceScript.cs. Next, let’s open the C# file in Visual Studio.

There are two important variables that we need to declare:
static IRtcEngine mRtcEngine;
public static string appId = "Your Agora AppId Here";
Be sure to replace Your Agora AppID Here with an Agora AppID from your Agora developer dashboard. The mRtcEngine needs to be a static so the reference doesn’t get lost when it gets called during OnUpdate. Also the appId should be public and static so that we can reference it from other scripts within the game.
In the interest of time and keeping this article concise, I’ve included the code of the AgoraInterface.cs below. Let's skim through it together quickly.
First we notice that on Start, we include some logic to check/request the Permissions for Android. Next we initialize the Agora RTC Engine using our appId and then we attach some callback functions for the various engine events (pretty straightforward and self explanatory). The main one we care about is mRtcEngine.OnJoinChannelSuccess, as this one will log to the console when we’ve successfully joined the channel.
The final critical function is the Update. While the Agora RTC Engine is active (not null) we want to call the engine’s .Poll() method. This is crucial for the plugin to work!

This code is generic and can be applied to any Unity project that includes the Agora Voice SDK.
You may have noticed that we are missing methods to actually Join/Leave the channel. Let’s start with leaving the channel, create a new C# script, LeaveHandler.cs, and we want theLeaveHandler to get called whenever the user returns to the Main Menu. The simplest way is to tap into the OnEnablemethod for one of the Game Objects that gets enabled when that part of the LobbyScene is activated.

The Game Object we are looking for is LeftSubPanel. It's a child of MainPanel, which is a child of MenuUI.

Within the Tanks!!! game there are two ways to join a multiplayer game, either Create a Game or Find a Game. These are the two areas where we want to add in our command to join the channel.
Let’s start in order, navigate into the UI Scripts folder (Assets → Scripts → UI) and open CreateGame.cs. If we scroll down to line 61 we can see that this is where the game does the matchmaking, and we can add some logic to connect to the channel. Start by including the Agora SDK library.
using agora_gaming_rtc;Within the StartMatchmakingGame() starting on line 78 we’ll add in some logic to get a reference to the Agora RTC Engine (that's currently running), and then use the user input (m_MatchNameInput.text) as the channel name.

StartMatchmakingGame() including call to join channel
Now we need to open the LobbyServerEntry.cs (Assets → Scripts → UI) and add logic for users that Find a Game to also be able to join the same channel.
Let’s open LobbyServerEntry.cs in Visual Studio and scroll down to line 63, where we can see the JoinMatch(). Starting at line 80 let's add some code similar to that above.

So, that's it!
We’ve integrated the Agora SDK, and now we are ready to build and test the multiple user game with Unity chat on both iOS and Android. We can follow the same steps we did above, for building and deploying!
Thanks for following along, feel free to leave a comment or question below!
Other Resources
- The complete API documentation is available in the Document Center.
- For technical support, submit a ticket using the Agora Dashboard.


