
远程操作就一定很无聊吗?!你有没有想象过在 VR 中和朋友聊天?或是通过 VR 中了解另外一个世界?或是从工作无缝转换到 VR App 去逛一个 VR 贸易展?你是否对 Oculus Quest 感兴趣,却无从下手?
本指南能帮你迅速了解如何集成 Oculus Quest 并为声网直播视频推流创建一个拖放方案,此方案由声网低延迟全球网络提供支持。
安装 Fest
你需要:
- Unity 编辑器 (Android 支持)
- Oculus 开发者帐户
- Oculus Quest
开始
首先,打开 Unity,创建一个名为声网 Quest Demo 的空白项目。
切换构建平台
因为我们是为 Oculus Quest 构建应用,所以要将平台更改为 Android,方法是 File > Build Settings,然后在 Platform 选项下选择 Android。
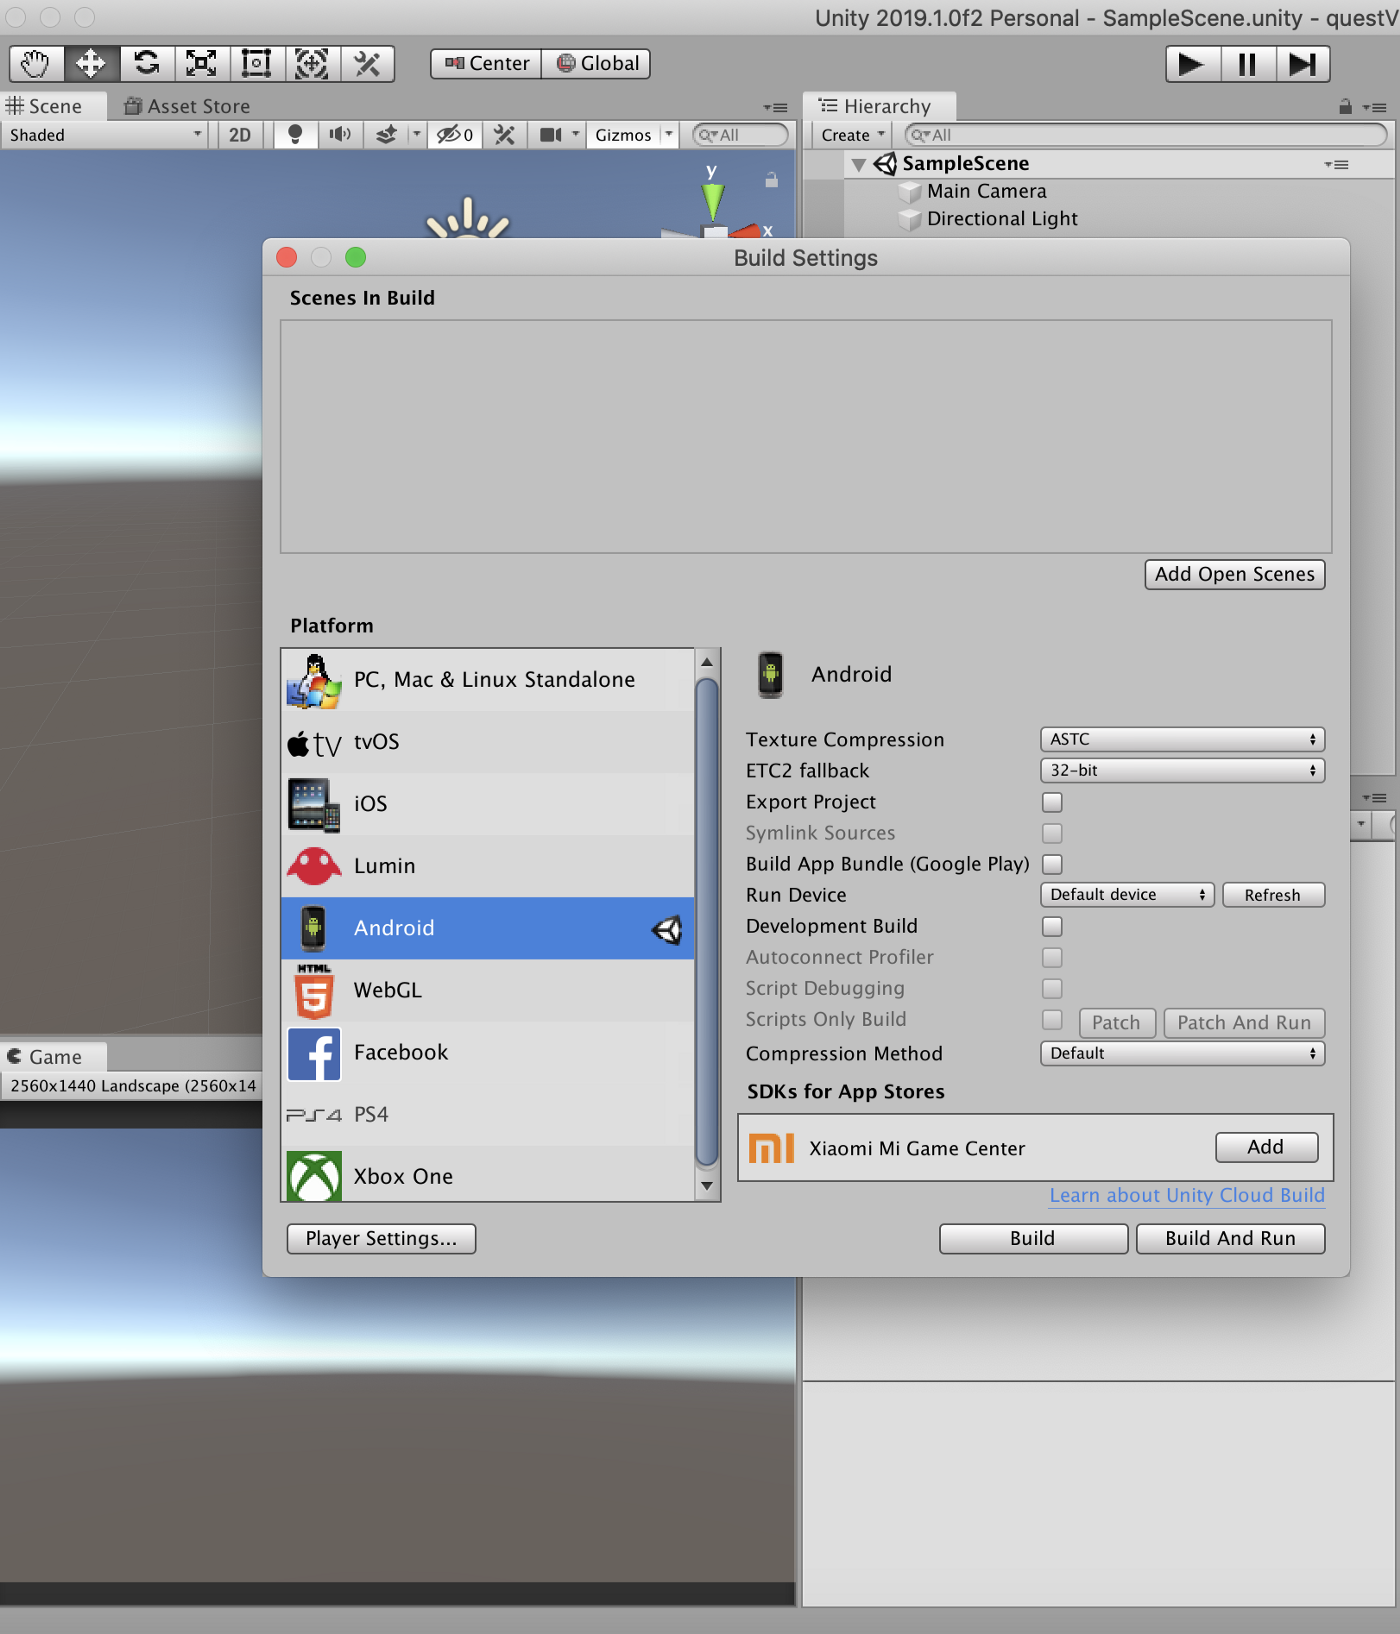
请务必将 Texture Compression (纹理压缩)设置为 ASTC。
安装 Fest
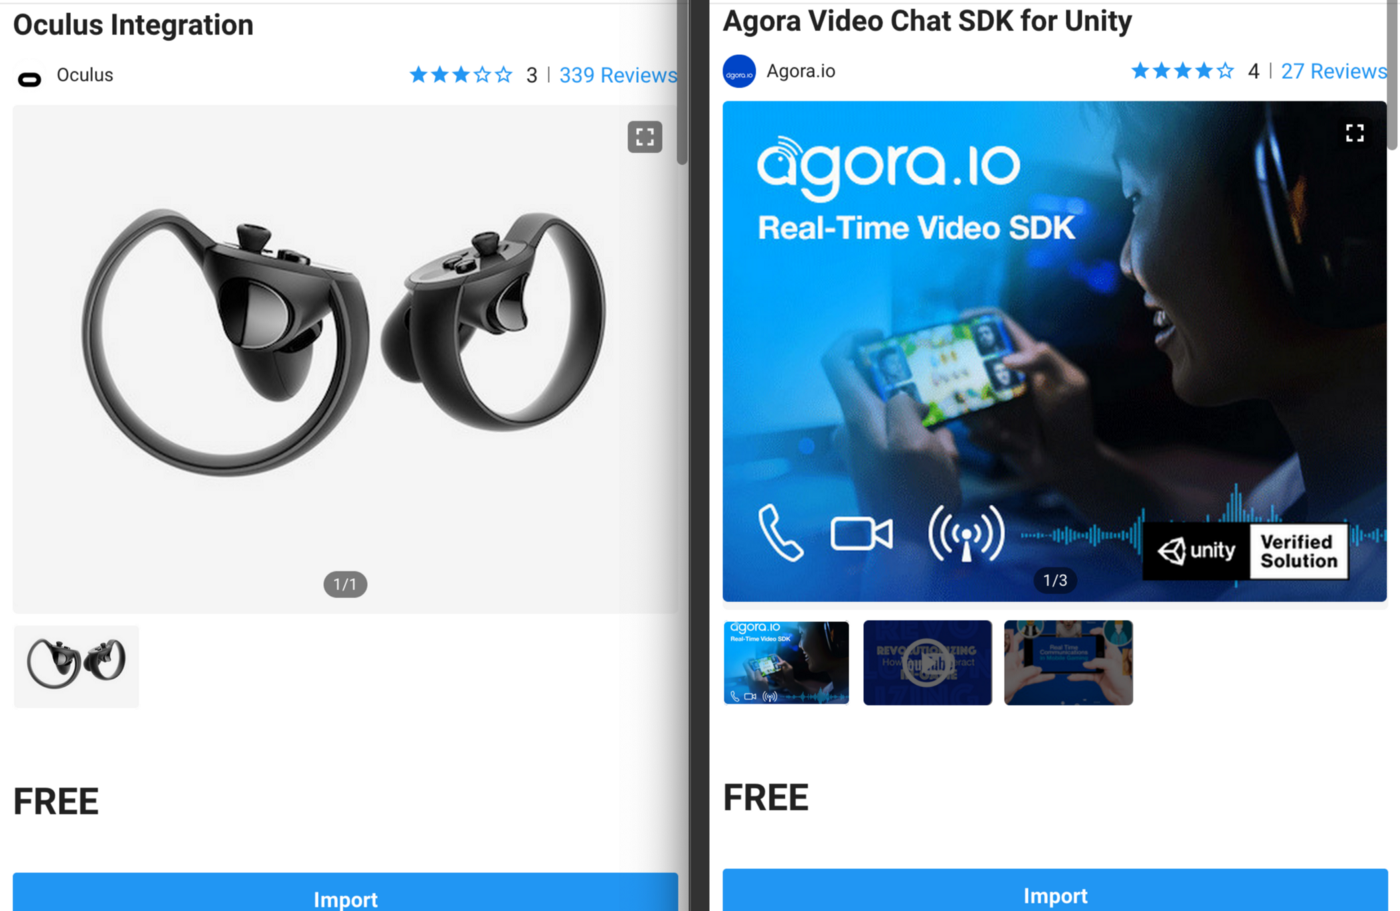
接下来,找到 Unity Asset Store(在场景视图中,单击 Asset Store 选项卡)导入并下载两个 asset:Oculus Integration 和声网 Video Chat SDK。Oculus 负责许多在 VR 领域起步的重要工作,声网则在全球通信方面提供支持。
下载 Oculus Integration 软件包时,系统会提示你更新 Spatializer 插件并重启你的 Unity Editor。请单击 Ok 并进行重启。
修改项目设置
首先,我们需要在播放器设置(Player Settings)中更改一些参数,因此找到 File > Build Settings > Player Settings,在 inspector 顶部,更新 Company Name 和 Product Name。

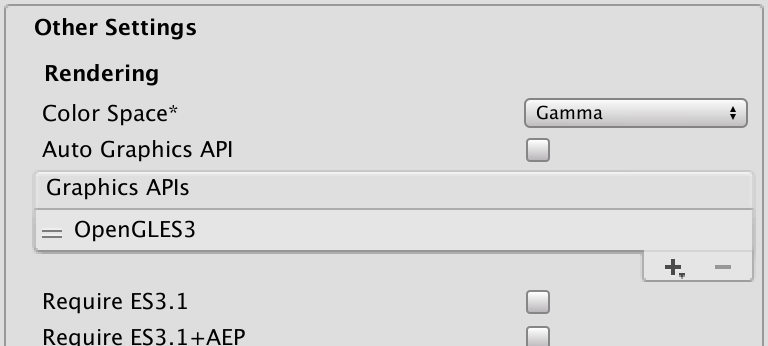
接下来,转到 Other Settings,取消 Auto Graphics API,也取消 Vulkan。
现在更改 Package Name 来匹配 Company 和 Project (你之前设置的),并将 Minimum API Level (最低 API 等级)更改为 API level 21。

最后,滑动鼠标到底部的 XR Settings。选中 Virtual Reality Supported,然后在 Virtual Reality SDKs 下选择 Oculus。

制作场景
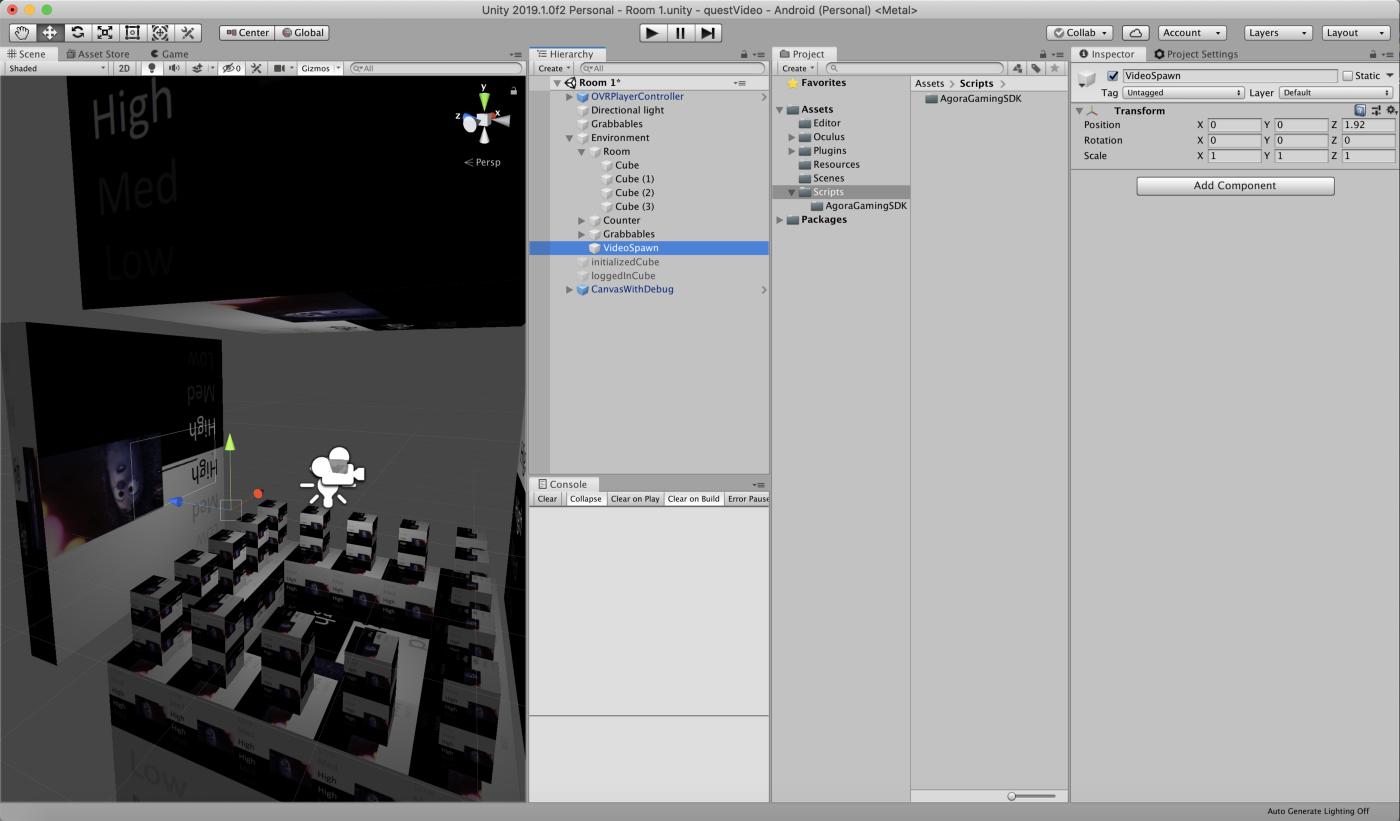
这次我们不制作场景,而是使用在 Assets>Oculus>VR>Scenes>Room 中找到的 Oculus 预制场景,我们对预制场景进行修改,使其符合我们的需求。打开房间场景,这是一个装饰明亮的空房间,并配有一些简单的掌形。对于主要用于通信的场景来说,这是一个完美的起始场景。我会去掉几堵墙来打造我自己的场景,然后创建一个 Empty GameObject,作为我的视频屏幕的位置占位符。我将此对象命名为 VideoSpawn,然后将位置放置到摄像机的正前方,Z 位置为 1.92。
创建新素材
我们将在平面对象上显示传入的实时视频推流。我们将在平面上定义自己的素材。在 Resources folder 中,创建一个新素材 (Material) 并将其命名为 PlaneMaterial。选择 Mobile/Unlit 作为其着色器。
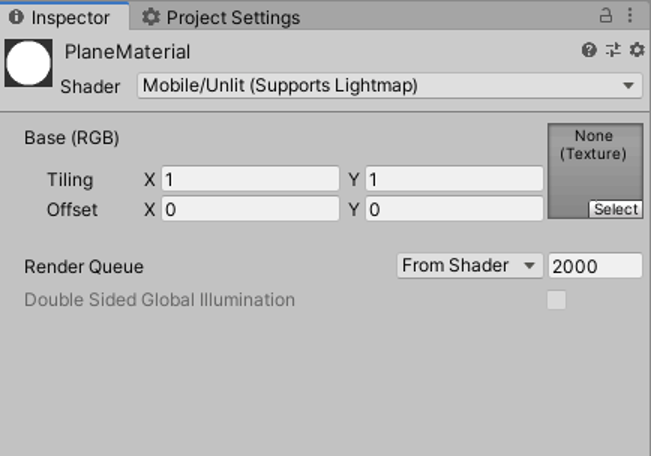
注意:如果跳过此步骤,那么在远程用户的实时视频推流启动时,你的 Plane 对象上会显示一个粉红色的 Texture。
创建一个声网拖放预制实例
我们需要一种让 App 与声网进行网络对话的方法,最快捷的方法是创建一个声网预制件,就是通过在场景中创建一个 Empty GameObject 并将其命名为 AgoraInstance。然后使用下面的代码片段并将其添加到新的 AgoraInstance 中。
using System.Collections;
using UnityEngine;
using UnityEngine.UI;
#if (UNITY_2018_3_OR_NEWER)
using UnityEngine.Android;
#endif
using agora_gaming_rtc;

public class QuestInterface : MonoBehaviour
{
    // PLEASE KEEP THIS App ID IN SAFE PLACE
    // Get your own App ID at https://dashboard.agora.io/
    [SerializeField]
    private string appId = "AGORA-APP-ID-HERE";
    [SerializeField]
    private string roomName = "room1";

    private int numUsers = 0;
    private bool connected;


    private static QuestInterface _AgoraInstance;

    public static QuestInterface Instance { get { return _AgoraInstance; } }


    private void Awake()
    {
        if (_AgoraInstance != null && _AgoraInstance != this)
        {
            Destroy(this.gameObject);
        }
        else
        {
            _AgoraInstance = this;
        }
        InitUI();
    }

    // Use this for initialization
    private ArrayList permissionList = new ArrayList();

    // Start is called before the first frame update
    void Start()
    {
#if (UNITY_2018_3_OR_NEWER)
        permissionList.Add(Permission.Microphone);
#endif
    }

    void InitUI()
    {
        GameObject.Find("QuitButton").GetComponent<Button>().onClick.AddListener(OnQuit);
    }
    private void CheckPermission()
    {
#if (UNITY_2018_3_OR_NEWER)
        foreach (string permission in permissionList)
        {
            if (Permission.HasUserAuthorizedPermission(permission))
            {
                if (!connected)
                    onJoinRoomClicked();
            }
            else
            {
                Permission.RequestUserPermission(permission);
            }
        }
# endif
    }

    // Update is called once per frame
    void Update()
    {
#if (UNITY_2018_3_OR_NEWER)
        CheckPermission();
#endif
    }

    private void onJoinRoomClicked()
    {
        if (!connected)
        {
            connected = true;
            loadEngine();
        }
        join(roomName);
        onSceneHelloVideoLoaded();
    }


    public void onLeaveButtonClicked()
    {

        if (connected)
        {
            leave();
            unloadEngine();
            connected = false;
        }
    }

    void OnApplicationPause(bool paused)
    {
        if (paused)
        {
            if (IRtcEngine.QueryEngine() != null)
            {
                IRtcEngine.QueryEngine().DisableVideo();
            }
        }
        else
        {
            if (IRtcEngine.QueryEngine() != null)
            {
                IRtcEngine.QueryEngine().EnableVideo();
            }
        }
    }

    void OnApplicationQuit()
    {
        IRtcEngine.Destroy();
    }


    // load agora engine
    public void loadEngine()
    {
        // start sdk
        Debug.Log("initializeEngine");
        if (mRtcEngine != null)
        {
            Debug.Log("Engine exists. Please unload it first!");
            return;
        }

        // init engine
        mRtcEngine = IRtcEngine.getEngine(appId);

        // enable log
        mRtcEngine.SetLogFilter(LOG_FILTER.DEBUG | LOG_FILTER.INFO | LOG_FILTER.WARNING | LOG_FILTER.ERROR | LOG_FILTER.CRITICAL);
    }

    // unload agora engine
    public void unloadEngine()
    {
        Debug.Log("calling unloadEngine");

        // delete
        if (mRtcEngine != null)
        {
            IRtcEngine.Destroy();
            mRtcEngine = null;
        }
    }

    public void join(string channel)
    {
        Debug.Log("calling join (channel = " + channel + ")");
        if (mRtcEngine == null)
            return;

        // set callbacks (optional)
        mRtcEngine.OnJoinChannelSuccess = onJoinChannelSuccess;
        mRtcEngine.OnUserJoined = onUserJoined;
        mRtcEngine.OnUserOffline = onUserOffline;

        // enable video
        mRtcEngine.EnableVideo();

        // allow camera output callback
        mRtcEngine.EnableVideoObserver();

        // join channel
        mRtcEngine.JoinChannel(channel, null, 0);


        Debug.Log("initializeEngine done");
    }

    public void leave()
    {
        Debug.Log("calling leave");

        if (mRtcEngine == null)
            return;

        // leave channel
        mRtcEngine.LeaveChannel();
        // deregister video frame observers in native-c code
        mRtcEngine.DisableVideoObserver();

    }

    public string getSdkVersion()
    {
        return IRtcEngine.GetSdkVersion();
    }

    // accessing GameObject in Scnene1
    // set video transform delegate for statically created GameObject
    public void onSceneHelloVideoLoaded()
    {
        GameObject go = GameObject.Find("VideoSpawn");
        if (ReferenceEquals(go, null))
        {
            Debug.Log("BBBB: failed to find VideoQuad");
            return;
        }
    }

    // instance of agora engine
    public IRtcEngine mRtcEngine;

    // implement engine callbacks
    private void onJoinChannelSuccess(string channelName, uint uid, int elapsed)
    {
        Debug.Log("JoinChannelSuccessHandler: uid = " + uid);
    }

    // When a remote user joined, this delegate will be called. Typically
    // create a GameObject to render video on it
    private void onUserJoined(uint uid, int elapsed)
    {
        Debug.Log("onUserJoined: uid = " + uid);
        // this is called in main thread

        // find a game object to render video stream from 'uid'
        GameObject go = GameObject.Find(uid.ToString());
        if (!ReferenceEquals(go, null))
        {
            return; // reuse
        }

        numUsers++;
        PutUser(uid);
    }

    void PutUser(uint uid)
    {
        // create a GameObject and assigne to this new user
        GameObject   go = GameObject.CreatePrimitive(PrimitiveType.Plane);
        if (!ReferenceEquals(go, null))
        {
            go.name = uid.ToString();

            // configure videoSurface
            VideoSurface o = go.AddComponent<VideoSurface>();
            o.SetForUser(uid);
            o.SetEnable(true);

            // Adjust view transform
            var videoQuadPos = GameObject.Find("VideoSpawn").transform.position;
            go.transform.position = videoQuadPos + new Vector3(numUsers * 0.95f, 0, 0);
            go.transform.localScale = new Vector3(0.1f, 0.5f, 0.1f);
            go.transform.Rotate(-90.0f, 1.0f, 0.0f);

            AssignShader(go);
        }
    }

    void AssignShader(GameObject go)
    {
        Material material = Resources.Load<Material>("PlaneMaterial");
        MeshRenderer mesh = go.GetComponent<MeshRenderer>();
        if (mesh != null)
        {
            mesh.material = material;
        }
    }
    // When remote user is offline, this delegate will be called. Typically
    // delete the GameObject for this user
    private void onUserOffline(uint uid, USER_OFFLINE_REASON reason)
    {
        // remove video stream
        Debug.Log("onUserOffline: uid = " + uid);
        // this is called in main thread
        GameObject go = GameObject.Find(uid.ToString());
        if (!ReferenceEquals(go, null))
        {
            Destroy(go);
        }
        numUsers--;
    }

    void OnQuit()
    {
#if UNITY_EDITOR
        UnityEditor.EditorApplication.isPlaying = false;
#else
      Application.Quit();
#endif
    }


}
现在,你可以将其拖动到层级结构中,另存为预制件。每当你将其放入场景中时,它都会在激活预制件时自动创建一个声网实例并加入一个场景。

你可以在 Inspector 中添加声网 App ID 和要测试的房间名称。
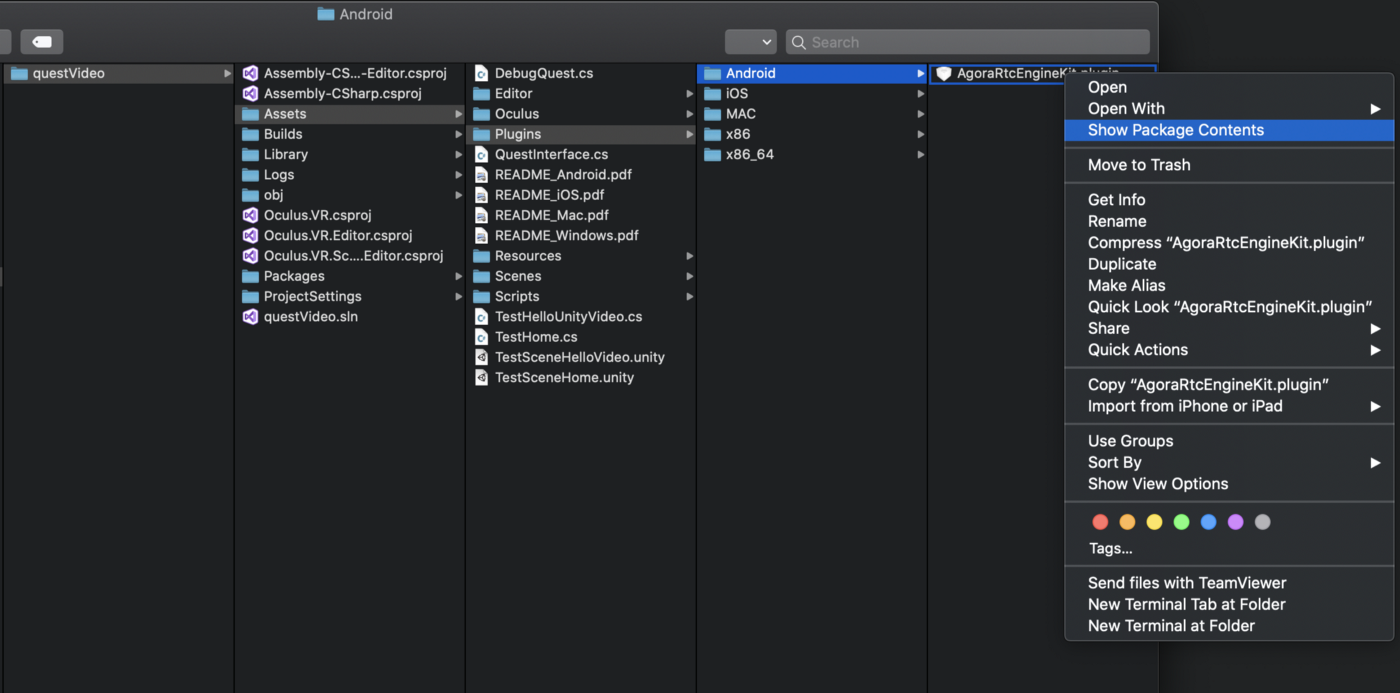
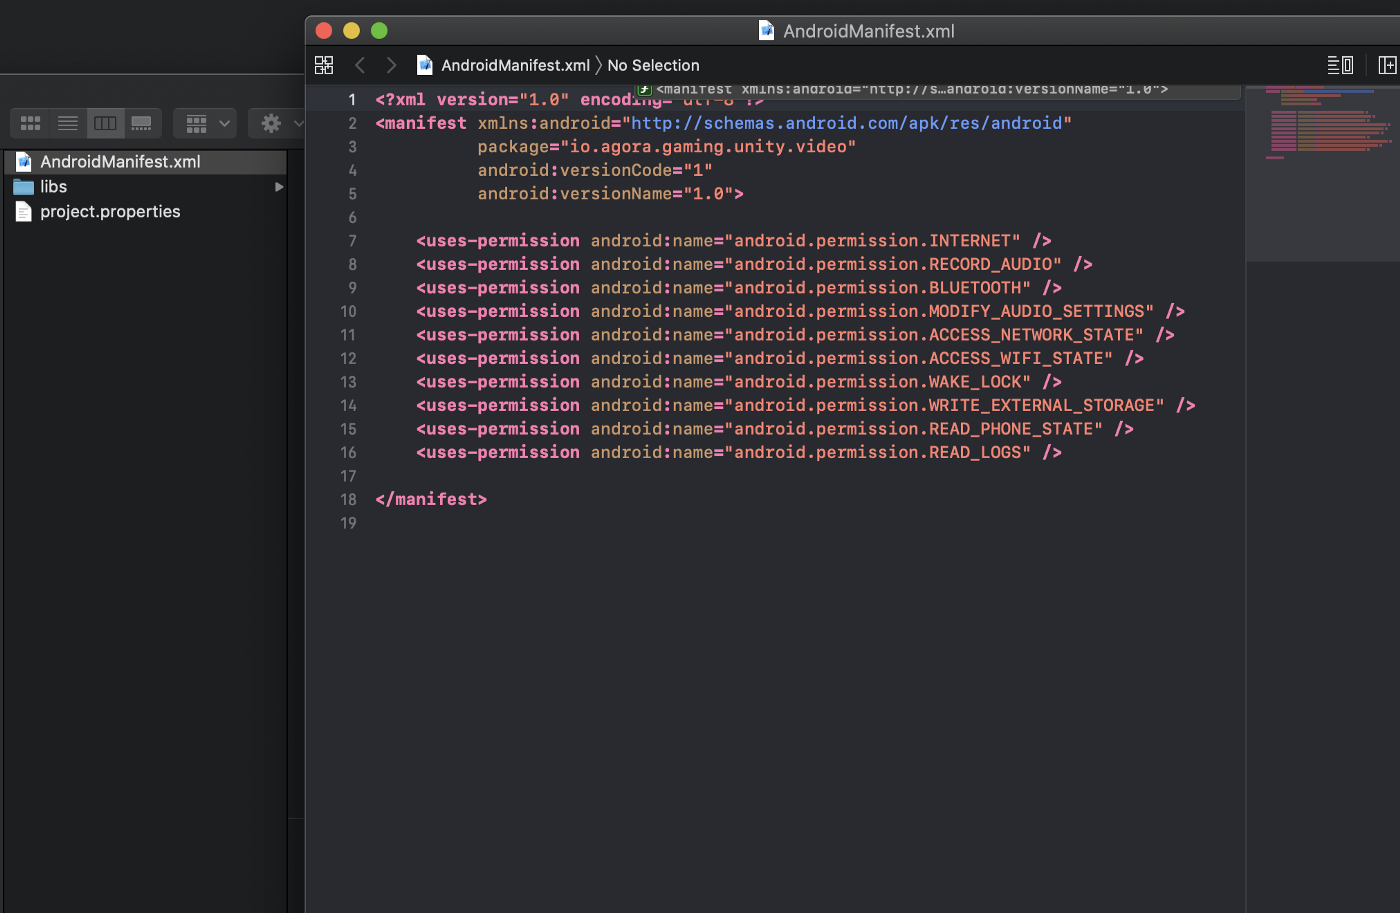
修改 Android 清单
你需要修改 manifest 文件。由于 Oculus Quest 没有摄像头(没有此 Demo 可用的摄像头),因此我们将删除文件夹 Assets> Plugins> Android> AgoraRtcEngineKit.plugin 的第9行中的摄像头的使用请求(android:name=”android.permission.CAMERA”/>)。
设备测试
现在要进行测试。因为声网不只适用于 Unity,所以你有很多选择,也可以只创建一个样本声网视频场景。
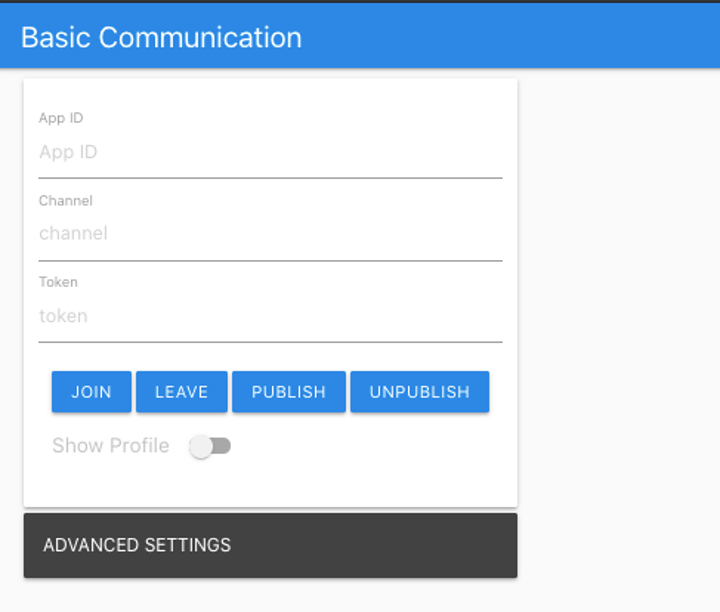
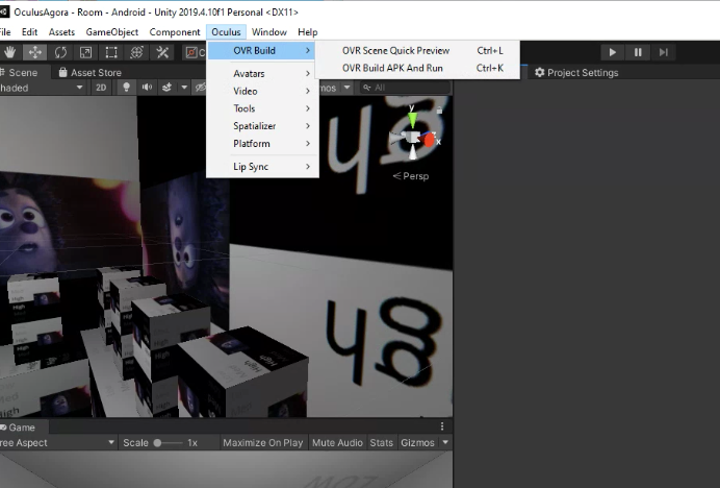
现在你已经有了一些实时视频,返回 Unity Editor 并选择 File> Build Settings。将修改后的房间场景拖放到 Scenes to Build 一栏。注意,新的 Oculus 有自己的构建脚本,因此你不能只要在 Unity Editor Build 窗口上单击 Build And Run,而是要转到 Oculus 菜单,然后选择 Build And Run。屏幕截图如下:
短暂的加载序列后,你的 app 就会部署到 Oculus Quest 头显设备中。
恭喜你!如果你想在 Oculus Quest 头显设备中运行 App 而且无须重建,请在头显设备内部进入 Library>UnkownSources 以查看你的 App。
其他资源
- 适用于 Unity 的 声网 Video SDK 可在 Unity 资产商店中找到。
- 在多人通话 Demo 获取 Web app 的源代码 。
- 完整的 API 文档可在声网文档中心中找到
- 完整的 Oculus 文档可在 Oculus 文档获得。
原文作者:Rick Cheng
原文链接:https://www.agora.io/en/blog/how-to-embed-drag-drop-video-streaming-vr-oculus-quest/